Adding a new web opt-in path
Note: Work with your IT team to create a web page using the HTML code generated with your web opt-in path.
When new subscriptions are created using a web sign-up form, you can opt new users in to the specified campaign one time and one time only through the API.
If a user is already a member of that campaign or was previously a member of that campaign, they will not receive a welcome message and no new subscription will be generated:
-
If the user was already an active subscriber, they will remain an active subscriber.
-
If they were a subscriber and opted-out, they will remain opted-out.
When using the API to add a new profile to a campaign through a specific opt-in path, all opt-in path options apply.
For web opt-in paths:
Creating a web opt-in path
To create a new web opt-in path:
-
Select
 Text Messaging in the left pane, and then select Campaigns.
Tip: The default short code is listed in the title bar.

If you have questions about the short code to use, contact your customer success manager.
-
Locate an existing campaign in the Campaigns table, and then select the campaign name link.
The Campaign Details page opens.
-
To review existing opt-in path messages, select the Opt-in path tab at the bottom of the page.

The Opt-in path table displays the opt-in paths available for the selected campaign. You can identify web opt-in paths in the Type column.
-
Select Actions at the top of the page, and then select New opt-in path.
The New Opt-In Path form opens to Step 1, Details.

-
Enter a descriptive name for the web opt-in path.
Note: This name is available to internal users only and should be meaningful to your organization.
-
Under People will opt-in by, select Any other method such as a web form or CRM sync.
-
Select CREATE & CONTINUE.
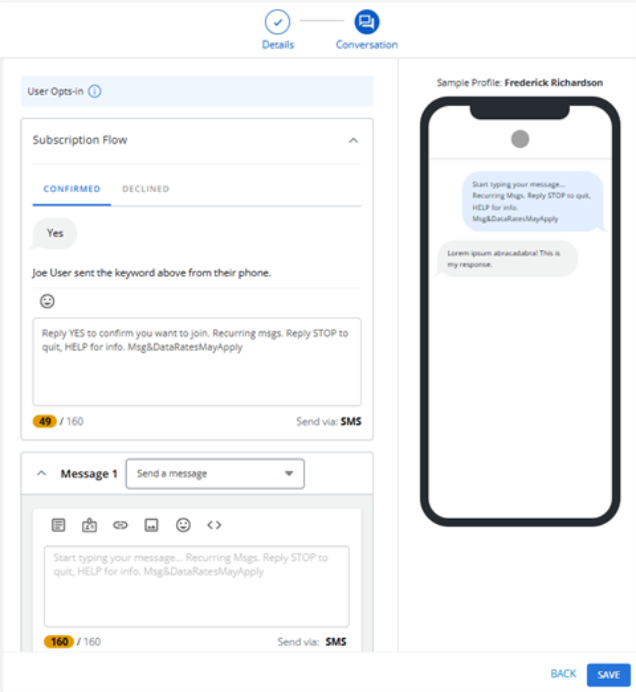
The New Opt-In Path form opens to Step 2, Conversation. The opt-in path status is
 .
.
-
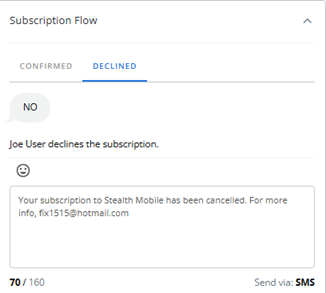
Select the Subscription Flow tab to review the default messages that will be sent when the user confirms or declines their subscription.
- (Optional) Edit the Confirm and Decline messages.
Tip: Limit your edits to adding your company or organization name to the messages. For the Decline message, include your company's general contact email address.
Select Confirm Message and add your company or organization name to the message that is sent when the user signs up to receive text messages from the selected campaign.
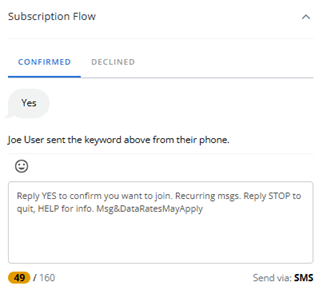
If the user texts YES to confirm, you can add a follow-up message in the conversation text box.
Select Decline Message and add your company or organization name and your general contact email address to the message that is sent when the user does not subscribe to the selected campaign.
-
Enter the required details on the Conversation page. When you are done, select SAVE.
Editing opt-in path settings
After you add an opt-in path, you can review the opt-in path settings.
-
Select
Text Messaging in the left pane, and then select Campaigns. -
Locate an existing campaign in the Campaigns table, and then select the campaign name link.
The Campaign Details page opens.
-
Locate the Web opt-in path in the Opt-In Paths table, and then select the opt-in path name link.
The Opt-in path page opens.
-
In the Opt-In Paths Actions panel on the right, select Edit Opt-in Path.
-
Opt-in immediately. Use this option when a user is added through a method, such as a CRM sync or web form opt-in, where an extra confirmation message is not needed.
-
Send a confirmation message.
-
Send an age confirmation > 13.
-
Send an age confirmation > 18.
-
Send an age confirmation > 21.
-
Send a zip code confirmation.
-
Do not send a message.
-
Resend the conversation.
-
Send the campaign's Already Subscribed message. For more information, see Editing a campaign.
-
Do not send a message. Do not opt back in again.
-
Resend the conversation.
-
Send a confirmation message.
-
When you are done, select SAVE &CONTINUE.
| Setting | Options |
|---|---|
| When a user opts in |
The opt-in options determine standard opt-in results, plus age gate (13, 18, and 21) and zip code options. |
| When a current campaign subscriber opts in again |
|
| When a subscriber opts out, then opts in again |
|
Setting up a web opt-in form
After you create a web opt-in path, use the HTML code to set up an opt-in form on your website to allow users to join your campaign. You can use this form as is, or you can customize it to match your site's design. The form will always include all standard and custom fields, many of which you will likely remove before adding to your site.
Note: All your web form codes for all of your campaigns are identical, except for the key, which is unique to the opt-in path for the selected campaign. This ensures that the user receives the correct messages when they opt-in to your campaign.
To set up a web form:
-
Select
Text Messaging in the left pane, and then select Campaigns. -
Locate an existing campaign in the Campaigns table, and then select the campaign name link.
The Campaign Details page opens.
-
Locate the Web opt-in path in the Opt-In Paths table, and then select the opt-in path name link.
The Opt-in path page opens. When you open the Web Form Snippet tab, the following options are available: COPY TO CLIPBOARD and PREVIEW WEB FORM.
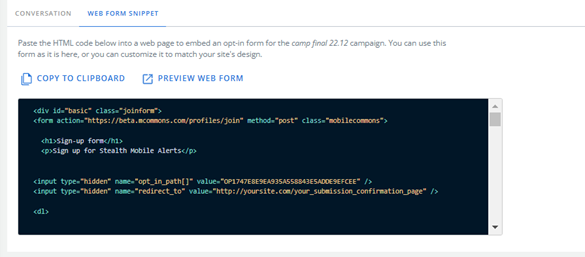
The HTML code contains a unique key that is specific to the selected campaign. When you add it to your website, users can opt-in to the campaign by filling out and submitting the web form.
-
To preview how the sign-up form will look on your website, select PREVIEW WEB FORM.
The web form, which includes all standard and custom profiles fields, opens in a new window.
-
Select x Close in the browser tab to return to the Web opt-in form page.
-
To make a copy of the HTML code that you can add to your web page, select Copy contents to clipboard.
-
Work with your Development team to set up the web form, including the following compliance message next to or below the phone number field:
By providing your mobile phone number, you consent to receive automated recurring text messages from [Company Name]. Message & Data Rates May Apply. Text HELP for Info or text STOP to opt out to [Short Code]. No purchase necessary.
Note: Do not auto-check any box that subscribes users to receive text messages from your company.
For more information, select Learn more about customizing web forms, log in to the Community, and search for "Advanced Web Forms."
Cloning a web opt-in path
You can also create a web opt-in path by making a copy of an existing web opt-in path.
To clone a web opt-in path:
-
Select
Text Messaging in the left pane, and then select Opt-In Paths. -
Locate the Web opt-in path to copy in the Opt-In Paths table, and then select the web opt-in path name link.
The Conversation page opens.
-
In the Opt-In Path Actions panel on the right, select Clone.
Mobile Commons creates a copy of the web opt-in path conversation.
The message is now active.
Editing a web opt-in path
To make changes to a web opt-in path:
-
Select
Text Messaging in the left pane, and then select Campaigns. -
Locate an existing campaign in the Campaigns table, and then select the campaign name link.
The Campaign Details page opens.
-
Locate the Web opt-in path in the Opt-In Paths table, and then select the opt-in path name link.
The Conversation page opens.
-
In the Opt-In Paths Actions panel on the right, select Edit Opt-in Path.
-
Make your changes to the Details and Conversation steps.
-
When you are done, select SAVE.
Deactivating a web opt-in path
To deactivate a web opt-in path:
-
Select
Text Messaging in the left pane, and then select Campaigns. -
Locate an existing campaign in the Campaigns table, and then select the campaign name link.
The Campaign Details page opens.
-
Locate the Web opt-in path in the Campaigns table, and then select the web-opt-in path name link.
The Conversation page opens.
-
In the Opt-In Paths Actions panel on the right, select Deactivate Web Opt-in Path.
-
Select OK to confirm.