Setting up a new campaign
-
A nonprofit may have separate campaigns for general supporters, volunteers, donors, and staff.
-
A company that sends messages in more than one language may have a separate campaign for each language.
For more information, see Planning your text-messaging campaign.
To set up a campaign:
Creating a new campaign
To create a new campaign:
-
Select
 Text Messaging in the left pane, and then select Campaigns.
The Campaigns page opens.
-
Above the Campaigns table, on the right, select
 NEW CAMPAIGN.
 The Create New Campaign form opens.

-
In the Name field, enter a descriptive campaign name.
Note: Even though this name is available to internal users only, take the opportunity to assign a descriptive name that is meaningful to your organization.
-
In the Description field, add a brief description of the new campaign.
-
If more than one short code is available to your company, select the short code from the drop-down list.
-
When you are done, select CREATE.
The Campaign Details page opens.

 About the Campaign Details page
The following information is available at the top of the Campaign Details page :
-
Campaign name
-
Description
-
Number of current subscribers, plus a link to the full campaign report
The tabbed sections display additional sections in the campaign:
-
Opt-in paths: A campaign begins with an opt-in path message, requesting that users subscribe to messages from your company. For full instructions, see Adding an opt-in path message.
You can also add subscribers via web sign-up forms and integration of records from your CRM (customer relationship management) platform. For more information, see Adding a web opt-in path and Integrating data from CRM platforms.
-
Recently updated broadcasts: After a user responds to the opt-in message with consent to receive text messages from your company, you can send broadcast messages promoting your company or organization. For full instructions, see Adding a broadcast message.
-
Recent CMS rows: You can set up a schedule to send a group of messages at an exact time and date or relative to a set date stored in the subscriber's profile. For more information, see Setting up scheduled messaging and Working with scheduled messages.
The campaign status is
 .
. -
-
To organize your campaigns, in the Tag field, on the right, enter a descriptive tag name and then press ENTER. Select OK to confirm.
Each item is automatically tagged with the email of the user who created the item. Additional tags are added below the Tag field. For more information, see Organizing campaigns using tags.
Cloning a campaign
You can also create a campaign by making a copy of an existing campaign.
To clone a campaign:
-
Select
Text Messaging in the left pane, and then select Campaigns. -
Locate the campaign to copy in the Campaigns table, and then select the campaign name link.
The Campaign Details page opens.
-
Select Actions at the top of the page, and then select Clone.
-
To confirm, select OK.
Mobile Commons creates a copy of the entire campaign, including all opt-in paths and message schedules, but not any keywords.
The Campaign Details page for the copied campaign opens with an
 campaign status.
 -
Select Actions at the top of the page, and then select Edit Campaign.
-
In the Name field, change the campaign name.
Note: Even though this name is available to internal users only, take the opportunity to assign a descriptive name that is meaningful to your organization.
-
In the Description field, add a brief description of the new campaign.
-
Review the settings for the campaign, making changes as needed.
Field Action Expiration Automatically unsubscribe profiles from the campaign after a given number of hours.
Tip: This is a great feature for events or destinations where it may make sense to have subscribers opted-in to a daily events campaign for just the length of a visit or the event.
Custom message for duplicate opt-ins Edit the custom message to send when a user opts in to this campaign twice. (You can decide on a per opt-in path basis, in Opt-in Path Settings, if someone gets this message or the opt-in conversation again when they opt-in twice.)
Customize the STOP message Add a custom response to send when a user opts out after receiving a message from this campaign.
Tip: Be respectful of the mobile user’s wishes and act promptly on opt-out requests.
-
When you are done, select Update.
Note: If the campaign includes opt-in paths, you will need to select new a keyword for each opt-in path. For more information, see Editing an opt-in path message.
Editing a campaign
To edit an existing campaign:
-
Select
Text Messaging in the left pane, and then select Campaigns. -
Locate the campaign to edit in the Campaigns table, and then select the campaign name link.
The Campaign Details page opens.
-
Select Actions at the top of the page, and then select Edit Campaign.
The Editing campaign form opens.
-
Review the settings for the campaign, making changes as needed.
Field Action Name Change the name of the campaign. Description Add a description of the campaign. Expiration Automatically unsubscribe profiles from the campaign after a given number of hours.
Tip: This is a great feature for events or destinations where it may make sense to have subscribers opted-in to a daily events campaign for just the length of a visit or the event.
Custom message for duplicate opt-ins Edit the custom message to send when a user opts in to this campaign twice. (You can decide on a per opt-in path basis, in Opt-in Path Settings, if someone gets this message or the opt-in conversation again when they opt-in twice.)
Customize the STOP message Add a custom response to send when a user opts out after receiving a message from this campaign.
Tip: Be respectful of the mobile user’s wishes and act promptly on opt-out requests.
-
When you are done, select Update.
You return to the Campaign Details page.
Add tags to a campaign
Tags are keywords or terms that can be attached to campaigns in Mobile Commons to inform users on what the campaign is about. They help users easily organize and search through campaigns. Multiple tags can be added to campaigns in order to organize them into groups such as campaign type, department, team members, or target audience.
Example: Allie instructs her campaign managers to add a tag named "Community Initiatives" to their campaigns that relate to community outreach. This way, she can navigate to the "Tags" page and select the "Community Initiatives" tag to view a list of every community outreach campaign: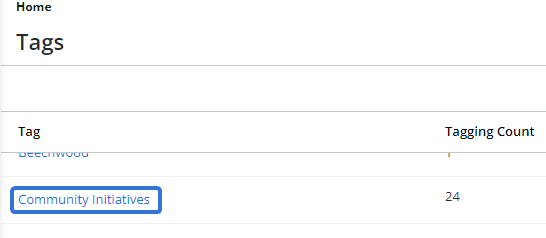
Tip: Team members should create a system of tags to improve the organization and searchability of their campaigns.
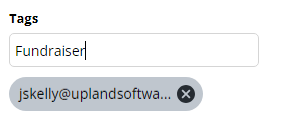
Note: When a new campaign is created, the email address of the user who created the campaign will automatically be added as a tag: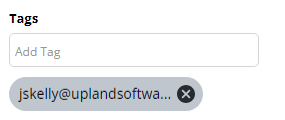
To add tags to a campaign:
-
Select
Text Messaging → Campaigns from the left pane menu:
-
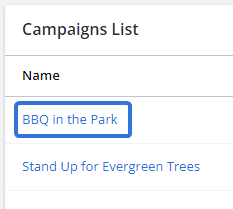
Select a campaign from the Campaigns List:
-
Type the name of a tag into the "Tags" textbox:
-
Select the Enter key on your keyboard.
Note: If the tag entered has not been used before, it will be added to the "Tags" page as a new tag.
-
Select the OK button from the confirmation window:

-
(Optional) Repeat Steps 3-5 until all of your tags have been added.
-
(Optional) Select
 of any displayed tags to remove them from the campaign:
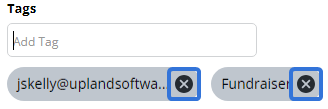
Each added tag will be displayed under the "Tags" textbox. To view hidden tags, scroll your cursor over + more:
Click thumbnail to play.
Deactivating a campaign
Use caution when deactivating a campaign:
-
All subscriptions and opt-in paths to that campaign will end, pending broadcasts are removed, and message schedules are deactivated.
-
If there are Smart Campaigns based on subscription to a campaign you are ending, those subscribers will no longer be filtering into the group as their subscription will end.
To deactivate a campaign:
-
Select
Text Messaging in the left pane, and then select Campaigns. -
Locate the campaign to deactivate in the Campaigns table, and then select the campaign name link.
The Campaign Details page opens.
-
Select Actions at the top of the page, and then select Edit Campaign.
The Editing campaign form opens.
-
In the Campaign Actions panel on the right, select
 Deactivate Campaign.
Caution: Deactivating a campaign is permanent. You cannot reverse it.
-
To confirm, select OK.
The campaign status is
 . For more information, see Reviewing ended campaigns.