Adding polling locators
Polling locators are customized location-based mData searches. During election season, use polling locators to help individuals locate their designated voting or ballot drop-off stations based on their full voting address.
To add a polling locator:
For more information, see Working with polling locators.
Creating a voting locator
-
Select
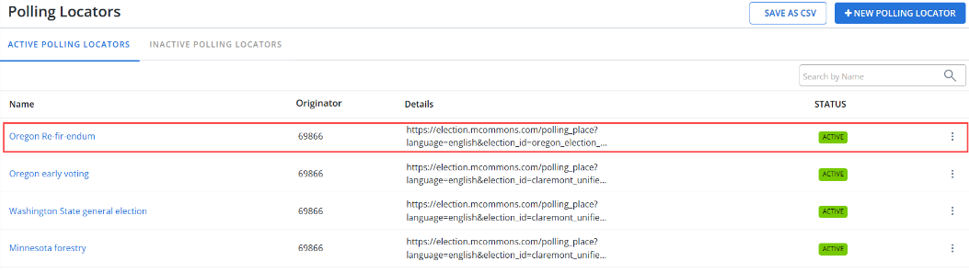
 Text Messaging in the left pane, and then select Polling Locators.
 -
In the upper-right corner, select
 .
.The New Polling Locator page opens.

-
Enter a descriptive name for the polling locator.
-
Select the language from the drop-down list: English (default) or Spanish.
-
If more than one short code is available for your company, select a short code from the drop-down list.
-
From the Election Key drop-down list, select the name of the active election in which your users are voting.
Note: All displayed election keys and polling types are pulled from the Google Civic API.
-
In the Polling Type section, select Regular Voting, Early Voting, or Drop Box:
-
For Early Voting, select one or more of the following options for the response: Include dates, Include hours, and Include city.
-
For Drop Box, select one or more of the following options for the response: Include hours, and Include city.
-
-
(Optional) To provide a contact option, make sure that the Include the additional contact details checkbox is selected, and then select one of the following from the Type drop-down list:
-
Email: Enter an email address for your company or organization in the Value field.
-
Phone: The default phone number (866-OUR-VOTE) is national hotline run by Election Protection that is staffed with legal experts to answer questions. Optionally, you can replace the default phone number with a contact phone number for your company or organization in the Value field.
-
Website: Enter the URL for your company's or organization's website in the Value field.
-
-
In the Default responses section, enter the messages to display when a search query is unsuccessful.

Note: If the character count exceeds 160 characters, the message is sent as a multi-part SMS message.
-
In the Default/Error Response text box, inform the user that their query was incorrect and invite them to try again.
-
In the No Results Response text box, inform the user that the query did not match the data set.
-
-
When you are done, select Save.
Tip: To make changes to the new polling locator, at the top of the page, select Actions and then select Edit Details.
-
To add a keyword, at the top of the page, select Actions and then select Keywords. For more information see, Adding keywords to a polling locator.
The Polling Locator Details page is updated.

-
To ensure that the polling locator works, in the Test this polling locator section, enter the keyword and full address in the Query field and, optionally, add a mobile number to the Phone field for a text response.
-
Select Test.
-
When you are satisfied with the result, select
 Back at the top of the page to return to the Polling Locators page.
The new polling locator is added to the Active Polling Locators table.
Adding keywords to a polling locator
You can add one or more keywords to the short code that you will use for your polling locator.
To add keywords:
-
Select
Text Messaging in the left pane, and then select Polling Locators.The Active Polling Locators table opens.
Note: To add a keyword to a deactivated polling locator, select the Inactive Polling Locators tab.
-
Locate the polling locator in the table, and then select the name link.
The polling locator page opens.
-
At the top of the page, select Actions, and then select Keywords.
The Keywords table for the polling locator opens.

 About the Keywords table
The Keywords table contains the following information:
Column Description Keyword The name of a keyword that is available for the short code. Created System-generated date when the keyword was added. Updated System-generated date when the keyword was last updated. Actions Available action for a keyword:
-
 Remove
-
-
Type a unique keyword or keyword phrase (between 2 and 20 characters) in the Keyword field above the table.
Tip: Do not use special characters in your keywords. If you enter a keyword phrase, use a space between each word, not a period (.) or an underscore (_).
Mobile Commons validates the keyword to determine that it is available. If the keyword is not valid or available, you cannot add it. Try to add another keyword.
-
If the keyword is valid and available for your short code, select Add.
-
When you are finished, select Done.
Testing a polling locator
When you create or update a polling locator, be sure to test that it works.
-
Select
Text Messaging in the left pane, and then select Polling Locators.The Active Polling Locators table opens.
Note: To test a deactivated polling locator, select the Inactive Polling Locators tab.
-
Locate the polling locator in the table, and then select the name link.
The polling locator page opens. The Details section is at the top of the page.
-
Scroll down to the Test section.

-
In the Query field, enter the keyword for the polling locator (if available) followed by a full address (number, street, city or town, state, and zip code).
-
Optionally, in the Phone field, enter a mobile phone number where you can receive a text message response.

-
Select Test.
Downloading a CSV file
To download the records in the Polling Locators table in a CSV (comma separated values) file:
-
Select
Text Messaging in the left pane, and then select Polling Locators.The Polling Locators page opens to the Active Polling Locators table.
Note: To save inactive polling locators, select the Inactive Polling Locators tab.
-
Above the table, select Save as CSV.
The records for all of the polling locators in the table are saved in a .CSV file.
-
To download the CSV file, select
 Home in the left pane, and then select Reports.
 -
Locate the CSV file in the Exports table, select the link in the Name column, and then open the downloaded file.