Work with Projects
This is the third topic of the Use Projects guide.
When the Projects feature is enabled, a Project History tab appears in the right sidebar. The history view provides version control for your project files, showing which files have changed since the last commit. From this view, you can review changes, revert to a previous commit, or stage files for the next commit.
The Project History tab has two sections: Local Changes and Commit History.
Local Changes
Whenever a file is modified, for example, the flow file after deploying changes or the package.json after adding project dependencies, it appears in the Local files list. If you add a file to the folder, it also appears here.
-
For text-based files, you can click the file name to view a diff showing what has changed.
-
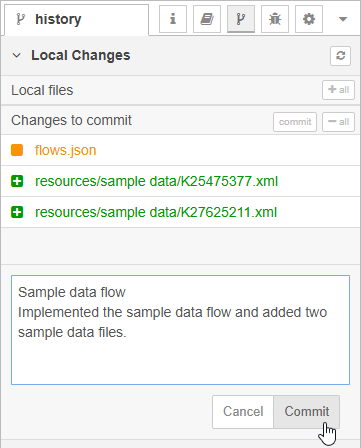
Hovering over a file displays a + button; clicking it stages the file, moving it to the Changes to commit list.
-
Hovering over a file also displays a back button; clicking it reverts the modifications to the file, after this action is confirmed. Reverting is not available for files added to the folder.
-
Click the + button to the right of Local files to stage all files.
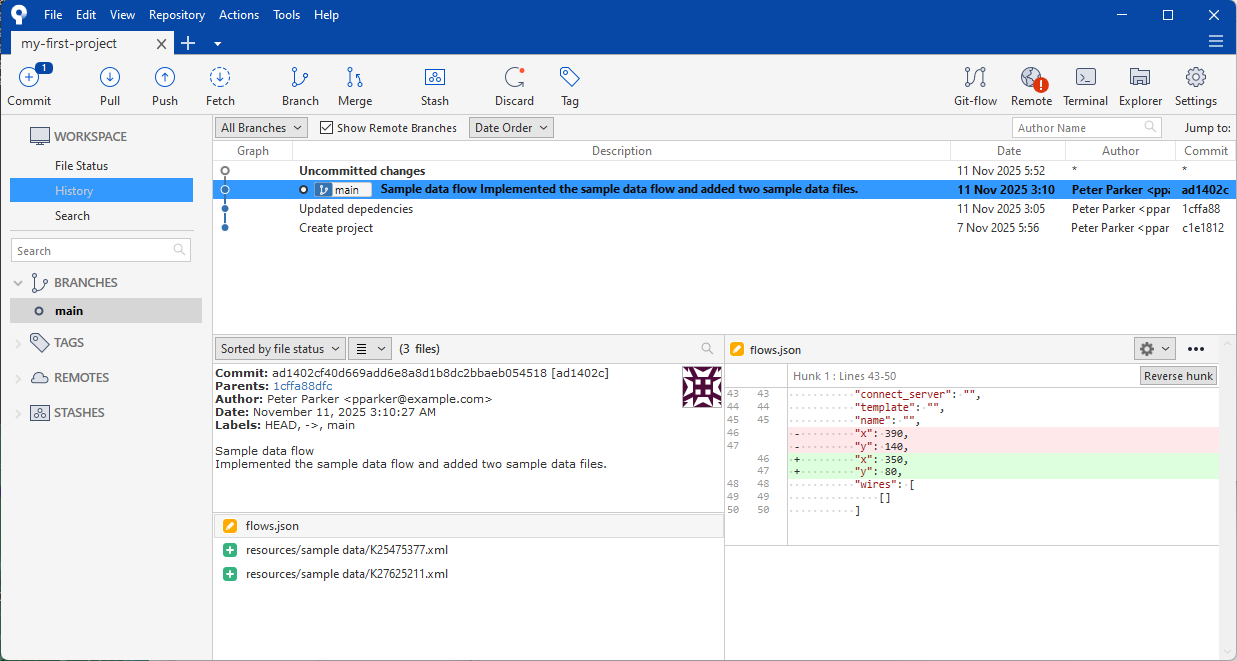
In the following image, the files flows.json is highlighted in orange, indicating that the contents have been modified. Two new files, shown in gray with a question mark icon, were added to the project's folder: these are sample data files within a subfolder called resources.
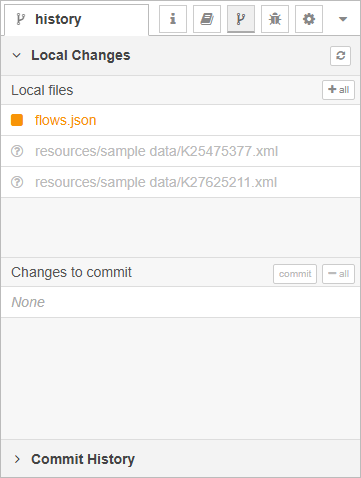
This example illustrates that a project is not limited to OL Connect Automate specific files. You can include any files relevant to the project, such as OL Connect templates, data mapping configuration files, presets, and sample data, making it easier to organize and version all project-related resources in one place.
Once the desired files have been staged, click commit. You must enter a commit message to continue.
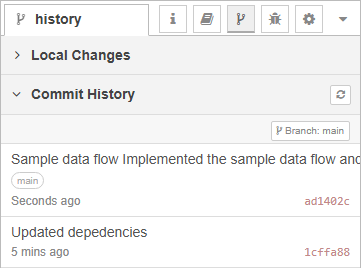
Once the commit is complete, a new entry appears in the Commit History section, showing your latest changes.
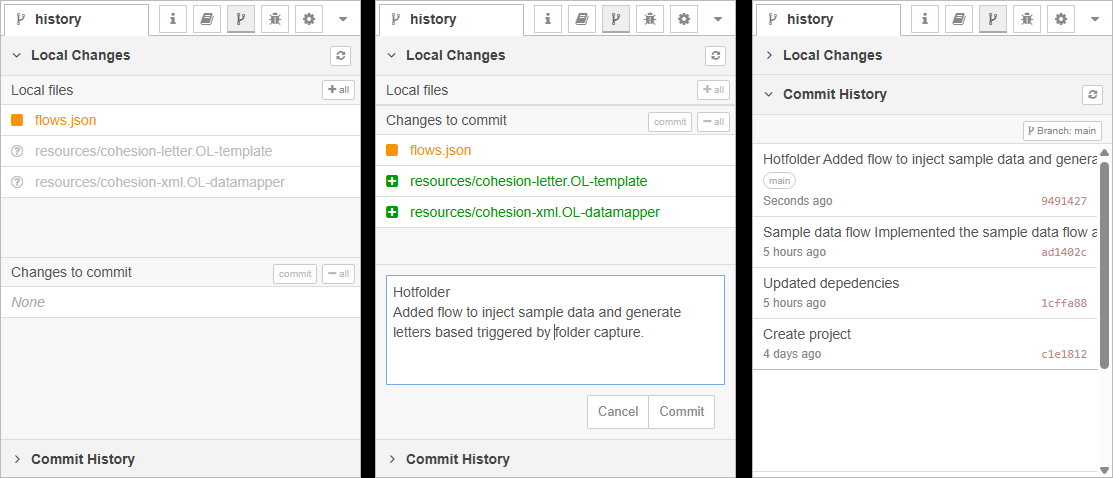
This summary image shows the Local Changes panel after modifying the flow and subflow, and adding a new template and data mapping configuration. After staging and committing these changes, a new entry appears in Commit History to record the update.
Commit History
The Commit History section lists all of the commits in the current branch of the repository. When you create a project, the application automatically commits the initial set of default files for the project.
At the top of the list is the Branch button. That allows you to checkout or create branches within the repository.
Git features
The Node-RED editor simplifies the Git experience by exposing only the most commonly used features. Advanced Git operations, such as merging, stashing changes, checking out older commits, setting tags or force-pushing changes, are not available from within the editor.
OL Connect Automate/Node-RED projects are stored as standard Git repositories, which means they can be opened and managed with any external Git client. If you need to perform the mentioned more advanced Git opererations, you can use the Git command line or a third-party Git client such as Sourcetree, TortoiseGit, or GitKraken.
The following image shows this project opened in the Sourcetree client.
External Git clients provide access to the full range of Git features and can also be used for everyday tasks such as staging and committing changes.
Tip: You can open the same project folder in OL Connect Designer using its Project feature.
This allows you to view and edit OL Connect resources, such as templates and data mapping configurations, directly from within Designer, while keeping them under Git version control.
Branching strategies
So far, we’ve been working on the main branch of the repository. Even with a single branch, Git provides useful capabilities such as reverting to previous versions and reviewing commit history with descriptive revision comments.
For larger projects, or when collaborating with a team, it’s worth considering a branching strategy to better organize your work. A branching strategy defines how and when new branches are created, merged, or released.
Two common strategies are widely used in Git-based workflows. Choosing the right strategy depends on your project’s size, release process, and team collaboration style.
Gitflow
A structured branching model suited for projects with multiple environments (e.g., development, test, production). It introduces dedicated branches for features, releases, and hotfixes to support controlled version management.
See Gitflow Workflow for more information.
GitHub Flow
A simpler, lightweight workflow designed for continuous integration and frequent deployment. Developers create short-lived branches from main, review them through pull requests, and merge changes back into main when ready.
Remote repositories
So far, we’ve been working with a local repository, but you can also link your project to a remote Git repository (for example, on GitHub, GitLab, or Bitbucket).
When a remote repository is configured, the History tab displays how many commits your local repository is ahead or behind the remote branch. It allows you to select which remote and branch to track, push your local commits to the remote repository or pull updates from the remote to synchronize your project.