Explore the Workspace
Once OL Connect Automate is installed, you should explore the workspace. If you are already familiar with Node-RED, the workspace is similar, but has enhancements.
A typical workspace screen consists of a sidebar palette of nodes on the left, the workflow space or canvas, and a sidebar of options on the right.
The canvas can scroll horizontally and vertically. You can have more than one canvas, and tabs at the top identify the canvas. To add a canvas, click the plus sign, +, at the upper right of the canvas. By default, the canvases are labeled Flow 1, Flow 2, etc., but you can rename a canvas, and provide information about it, by double-clicking the tab and editing the Properties.
You can widen or narrow the sidebars by clicking and dragging on the inner edge. You can collapse or open sidebars using arrows that appear if you place the mouse over the thick line
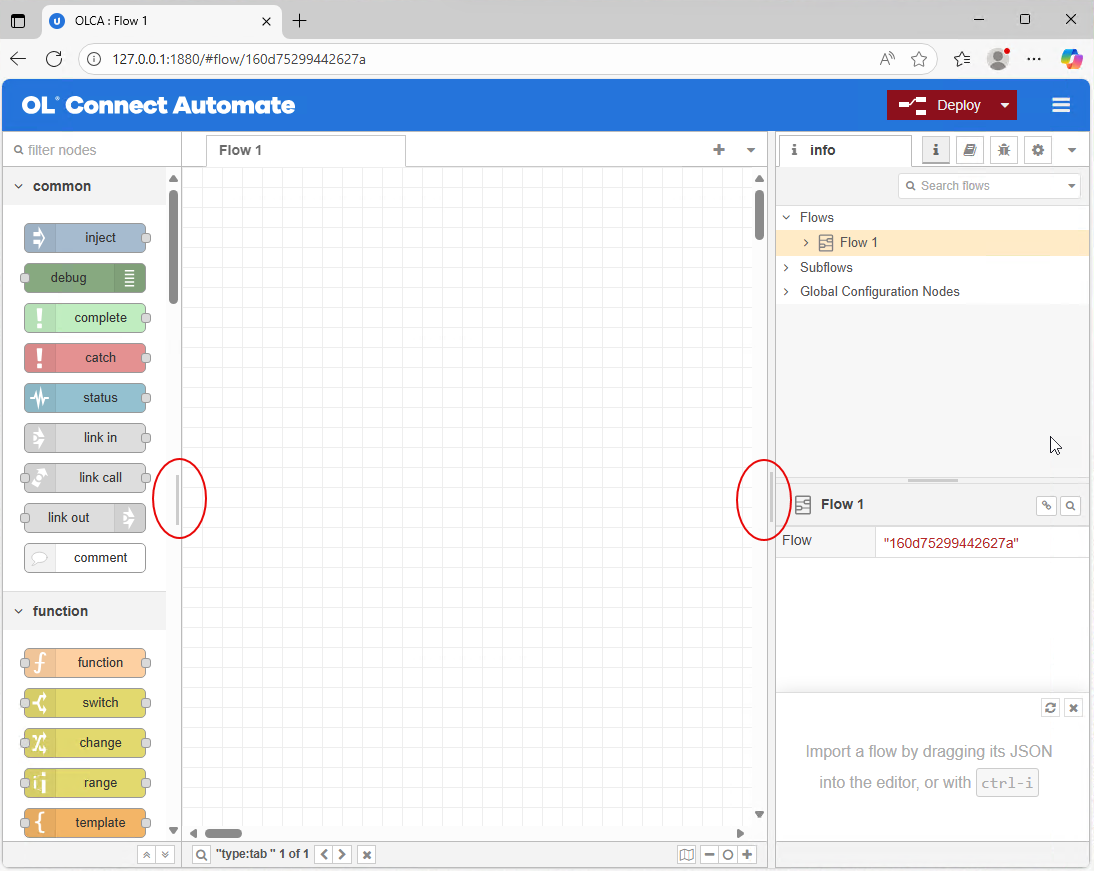
The palette of nodes, on the left, shows all installed nodes, grouped by type. By default, all types are expanded to show all nodes, but each type can be collapsed by clicking the type name. To search nodes, enter a search term at the top of the list, in the filter nodes field. For example, entering file shows nodes specific to file operations.
The sidebar, on the right, has several tabs, identified by icons. If not all the tabs are showing, click the drop-down at the right end of the row of tab icons to see all options for the sidebar. More information about using each of these tabs is provided in the tutorials, but they are summarized below:
-
Information: This tab provides information about the Flows and details of selected flows.
-
Help: This tab provides extensive information about using each node.
-
Debug messages: This tab displays debug messages.
-
Project History: This tab displays Local Changes, including local files and changes to commit, and Commit History. This tab is only available when Projects is enabled.
-
Configuration Nodes: This tab is for configuring nodes.
-
Context Data: This tab is for configuring nodes.
The Deploy button, in the upper right, sends the workflow from this editor to the server. There is a drop-down to select the type of deployment. The different types of deployment can be useful when testing workflows:
-
Full: Deploys everything in the workspace.
-
Modified Flows: Only deploys flows that contain changed nodes.
-
Modified Nodes: Only deploys nodes that have changed.
-
Restart Flows: Restarts the currently deployed flows.
The menu icon in the upper right corner (three horizontal lines) contains options and submenus for working with nodes and flows, importing nodes and exporting nodes and flows, and for managing the workspace view and options. There is also a link to the Node-RED website, and the installed Node-RED version is shown. More information about menu options and nodes is provided in the tutorials.
Work with nodes
Add nodes
There are two ways to add a node in the workspace:
-
Locate the node in the Palette, then drag and drop it onto the flow canvas.
-
Right click on the canvas, and select Insert, or use Ctrl + Click, to open the Insert Node popup. Search for the node you want to add. The Insert Node node is part of the Files and Folders package developed by Upland Objectif Lune (
@objectif-lune/node-red-contrib-files-and-folders).
To delete a node, right click on it, and select Delete selection.
Configure Nodes
To configure a node, double click it to open the properties window for the node. Available properties depend on the node. Example of configuring nodes are provided in the tutorials and documentation for the samples. To close the node properties window, click Done.
The names of nodes shown on the canvas may change as the properties are updated.
Connect nodes
Flows are built horizontally, from left to right. To connect nodes, click and drag from the connector port on the output (right side) of the first node, to the connector port on the input (left side) of the second connector.

Once nodes are connected, either one can be dragged to reposition it. The nodes will remain connected, and the connection line will update as required.
To delete a connection, click on the connection and select Delete selection.
Tip: To quickly add and connect another node to a flow, click and drag from the connector port on the output of the last node to an empty space on the canvas. The use Insert Node to select the next node. Once selected, it is already connected to the previous node.
If you are deleting a node in a flow, you can select Delete and reconnect to delete the node and add a connection between the nodes before and after the deleted node.
Additional Options
For additional options when working with nodes and connectors, including Group, Copy and Export, right click on the node or connector. You can also right click on an empty area of the canvas, but the options vary depending on whether any nodes or connectors are active (have been clicked on). An active node or connector has a red outline. You can make multiple elements active by using Ctrl + Click. This would be useful if, for example, you wanted to group several nodes.
Next Step
Once you are familiar with the workspace and adding nodes, you are ready to review Design a flow.