Design a flow
If you are a novice Node-RED user, especially if you are used to using OL Workflow, this topic prepares you design your first Node-RED application for OL Connect. Once you have reviewed this material, you can build workflows to Serve a PDF preview and Personalize a print job.
About flows and subflows
Flows are built horizontally, from left to right. Multiple flows can fit on a single tab. Want to quickly jump to a flow that’s out of view on the same tab? The Info panel shows a Flows list, providing quick access to flows that are out of view and shows the description of the flow in the lower half. You can organize or group flows by placing them on multiple tabs.
link in and link out nodes connect the end of one flow to the start of another flow, either on the same tab or a different tab in the editor.
In simple use cases these nodes just help you prevent your flow tabs from looking like a bowl of spaghetti, but they can be used in a more functional way, too. Each link node can be connected to multiple link nodes, so that one flow can send out messages to multiple other flows, or receive messages from multiple other flows.
In addition, link call nodes make it possible to call a separate flow and receive its response before continuing the flow. This is comparable to using subprocesses in Workflow.
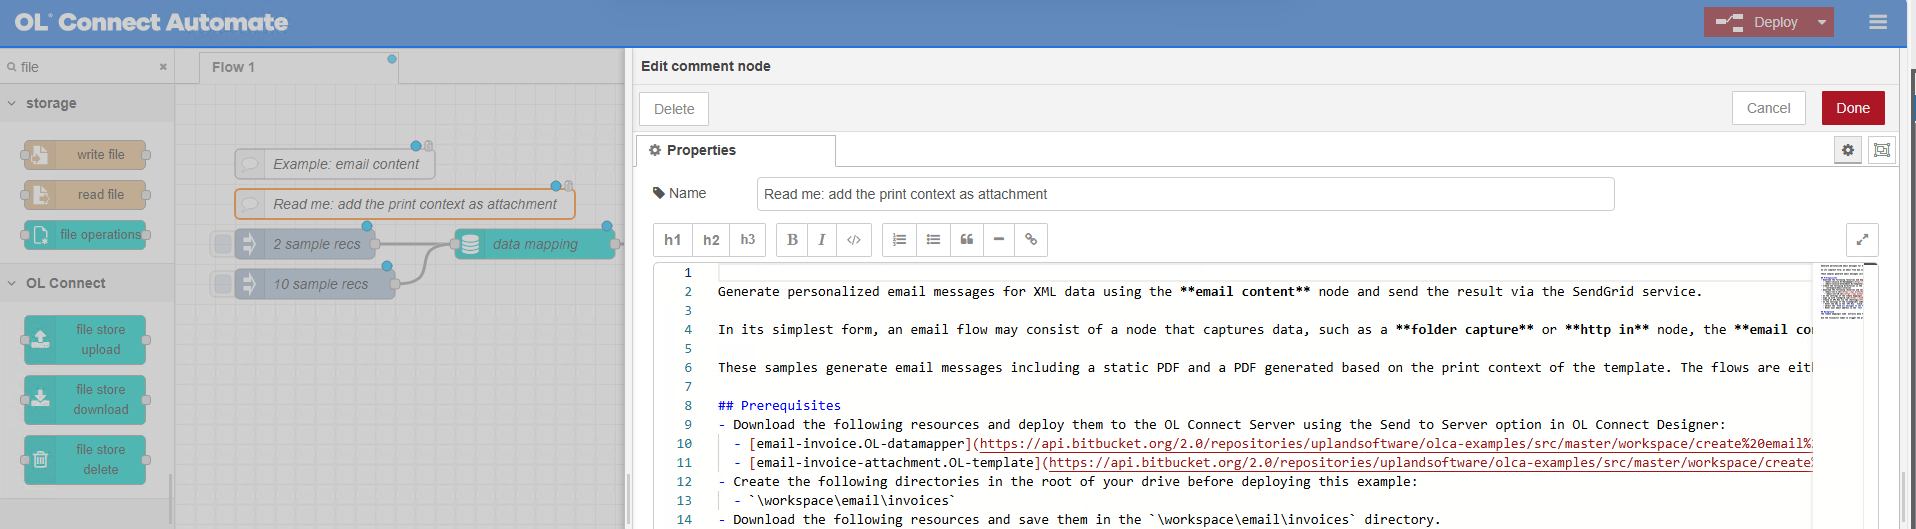
comment nodes are useful for identifying and describing flows. Imported nodes usually have a Read me comment node which contains details about using the flow. Double click the node to view its properties. The image below shows an imported sample flow with two comment nodes. The Read me comment node is selected, and the Properties panel shows information about using the flow.
Standard nodes used in OL Connect flows
In addition to the nodes in OL Connect Automate packages, these standard nodes are often used in OL Connect applications:
-
The inject node triggers the flow.
It can be set up to trigger the flow whenever it is deployed or when Node-RED is started (see Startup flow).
It can also be used to inject the full path to a (sample) data file into a flow. Simply click the check box attached to the node to trigger the flow.
Tip: Adding multiple inject nodes to your flow is a great way to test the flow with data files of different sizes.
-
The HTTP in node creates an HTTP end-point for creating web services.
-
Any flow that starts with an HTTP in node must have a path to an HTTP response node otherwise requests will eventually timeout.
-
The read file node loads a file. If the file is a JSON file, the result is a JSON string.
-
The write file node writes the content of
msg.payloadto a file. -
The JSON node parses a JSON string and adds the keys with their values as properties to
msg.payload. -
The change node can initialize variables and change their value.
-
The function node executes JavaScript code. See https://nodered.org/docs/user-guide/writing-functions.
-
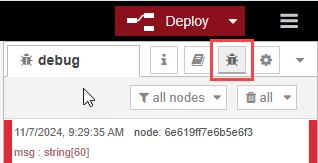
The debug node displays the content of the
msgobject, which is passed between nodes in a flow, in the debug message console.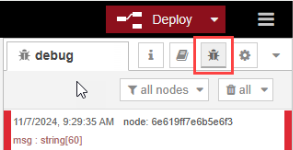
Tip: Add a debug node - one for each property of the
msgobject - after another node to verify that the properties are changed as expected. -
The split node turns a single
msg.payloadconsisting of an array into a series of messages, each of which has a payload containing one of the array's elements.Note that the split node only works on
msg.payloadand not on its child objects.Tip: The join node can be used to continue a flow after iterations made with the split node are done.
-
The switch node can have multiple output channels, and these channels can be linked back to a node on the primary/main branch downstream. The switch node allows messages to be routed to different branches of a flow by evaluating a set of rules for each message.
-
Node-RED natively works with JSON. It has standard nodes to convert data in other formats into json: xml to json, csv to json and more.