Versioned projects in the cloud
If a versioned project is stored on the cloud, you, and other members of your team if you so decide, can work on the project from anywhere and download the very latest version of the files at all times.
OL Connect Designer and Datamapper let you clone a Git repository that exists in the cloud to a local repository, and keep the online and local projects in sync. This topic explains how to do that.
For instructions on how to create and maintain a versioned project that is only stored locally, see Versioned projects.
Note: Options to upload a local project to a new or existing online repository, and to branch (fork) and merge cloud-based versioned projects in OL Connect will be added in a later release.
Before you start
Before you can start working with versioned projects in the cloud, there are a couple of things you need to do. These steps are only needed once.
Create an account
OL Connect integrates with Git to maintain the history of a versioned project. Git is a Version Control System (VCS) that enables developers to save snapshots of projects over time. Web-based platforms like GitHub, BitBucket and Azure DevOps offer a Git repository hosting service that allows projects to be worked on collaboratively.
The first thing you need is an account with a Git repository hosting service. GitHub, BitBucket and Azure DevOps have been tested with OL Connect. Others haven’t been tested, but if they are Git-based, they should work the same way.
Obtain a token
Secondly, you have to log on to your Git repository hosting service and go into your profile settings to obtain a token. This is called an api token in BitBucket, or a personal access token in GitHub and Azure DevOps. OL Connect will use it as the password to your account when it needs to read or write information in the online repository. The token can control which operations are allowed. Allow all operations, so that OL Connect will be able to perform all tasks as needed.
For information on creating a Bitbucket api token and setting its scopes (permissions), see Create an API token at Bitbucket support.
When the token has been generated, it is displayed only once.
Example: go3_bGyW5GlIQx4RWsttlkmxPJZBcFY2UH36B8VP
Make sure to copy the token somewhere, because you won’t be able to see it again!
Set up OL Connect
The user name of your account with a Git repository platform, and the token obtained from that same platform, must be entered in OL Connect, so that the software can access your versioned projects in the cloud.
In the Designer, select Window > Preferences in the menu, go to Versioning and provide the required information under Remote repository.
Creating a cloud-based versioned project
Once you have created a Git repository in the cloud, you can clone that project in OL Connect and keep it in sync with the online project.
Here are the steps to create and clone a cloud-based versioned project:
-
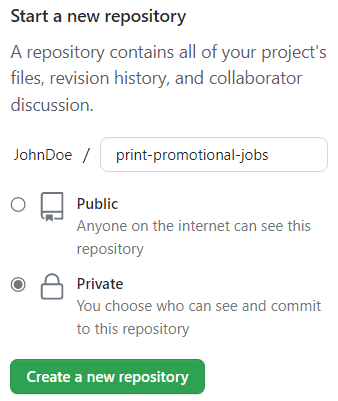
Log on to your Git repository hosting service and create a new project that will host the files for a new project. In BitBucket, for example, it looks like this:
-
Once the new repository has been created, you are presented with the URL of the new project. Copy the URL; you will need it in a following step.
-
Open OL Connect Designer and select the Clone option in the Project menu.
The first time you create a project you may be prompted to enter in your name and email address. This is required by Git. Your name is used to identify changes in the project history.
This setting is also accessible via the menu: Window > Preferences > Versioning. -
Enter in the URL of the remote repository.
-
In the Destination field, enter the name of the folder where the local copy of the versioned project should be stored.
The software suggests to store all versioned projects in the OL Connect folder that is located in the user's Documents folder, with each project having its own folder under Documents/OL Connect.
The folder name will actually become the name of the project. By default, the local repository is created with the same name as the online repository. For example, if the URL to the online repository is 'https://github.com/jdoe/promotional-print-project' then the destination folder will be 'C:\Users\<username>\Documents\OL Connect\promotional-print-project '. You can adjust the local project name if you want to. -
Click the Refresh icon next to the Branch field, to update the list of branches that are available in the remote repository, and select the branch that you want to clone from the drop-down list.
-
Click OK to clone the project. The project will be stored in the destination folder.
Now you can create a new template, data mapping configuration or print preset (File > New) or open an existing one (File > Open) .
As soon as you save a file in the project folder, it becomes part of the project.
Note: Versioned projects have a hidden .git folder. Do not remove this folder. It contains the version history and, in the case of an online versioned project, information about the remote repository.
Tip: Sample Projects are locally stored versioned projects. To turn a Sample Project into an online versioned project, you could create a new project in your online repository and add all of the Sample Project files to the online project before cloning it in OL Connect. Include the local .gitignore file, but don’t upload the existing (hidden) .git folder.
Keeping the local and online projects in sync
Before synching your local repository with the online repository, select Project > Commit. This records the project files as a new version in the local repository. Remember to save any changes before you commit.
Publishing changes
Publishing the local changes to your online repository is done via the Publish Commits… option in the Project menu. A confirmation dialog is displayed, stating that the changes have been published, or, if there are new changes in the remote repository, that you have to download the changed files first.
Note: The .gitignore file in the project folder tells Git which subfolders and files should not be committed.
Tags that you add to versions have to be published to the remote repository via the Project > Publish tags… option.
See also: Using tags.
Downloading remote changes
When you select Project > Check and apply changes OL Connect retrieves changed files from the remote repository and downloads them to your local project. This updates your local project with the most recent version of files in the remote repository.
You can also check for remote changes without immediately downloading the changed files: select Project > Check remote changes from the menu bar.
Conflicts
A 'conflict' arises when both the remote version and the local version of a file have been changed. If there are conflicting files when you download remote changes, you will be asked whether you want to overwrite the local files ("Keep Remote") or discard the remote changes ("Keep Local"). Before a local file is overwritten, a backup of the local file is made.
Preventing conflicts
If multiple people have access to the files in a remote project, check for remote changes on a regular basis, to make sure that you work with the latest files. It is important to prevent conflicts in files, since there is no way or tool yet to resolve conflicts in OL Connect files like templates and data mapping cofigurations.
OL Connect automatically checks for remote changes and displays a message when one or more files in the remote repository have changed. The setting Minutes between remote checks determines how often OL Connect will check the remote repository for changes if a cloud-based versioned project is open. You can find this setting in the preferences; from the menu at the top, select: Window > Preferences > Versioning.
Synchronization information in the project history
Whenever you publish commits to, or pull changes from the online repository, the versioning history panel (Project > Versioning history) is updated to reflect whether the local and remote versions are in sync.
A full circle before the message means the local and remote versions of that commit are in sync.
Half a circle on the left hand side of the axis indicates the commit was made locally but has yet to be published to the online repository.
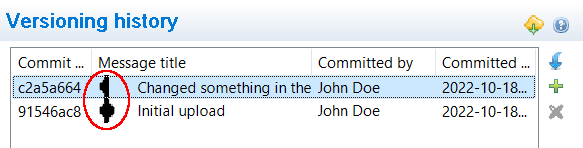
If someone were to make changes to the online version that the local version doesn’t have yet, then that half circle would be on the right hand side of the axis.
See also: Viewing project history.