Versioned projects
A versioned project is essentially a folder that contains a collection of related files whose changes are tracked. When you create a versioned project, all changes to the project are recorded and stored in the project history. You can use the project history to review changes made to the project, and even revert to a previous version if something goes wrong.
As you work on your project files, you can commit files in the project at any time. When you commit files in the project, a snapshot of the project is saved as a version, along with your name, your commit message, and the date. The status of each file - whether it was added, modified, etc. - is recorded as well.
OL Connect uses Git integration to maintain the history of a versioned project in a local repository. Projects can be created and committed from within OL Connect Designer and DataMapper.
Creating versioned projects
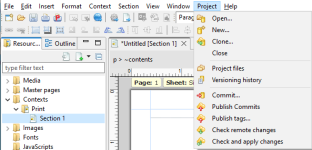
Versioned projects are created from the Project menu at the top of the screen in OL Connect Designer and Datamapper.
You have two options:
-
Create a new versioned project that is only stored locally.
-
Clone a project that exists on a cloud-based platform into a local repository.
How to clone a project is explained in Versioned projects in the cloud.
This is how you create a new local project:
-
Select Project > New from the menu at the top of the screen.
The first time you create a project you may be prompted to enter in your name and email address. This information is required by Git, and your name is used to identify changes in the project history.
Via the menu: Window > Preferences > Versioning, you can change this information at any time. -
Each versioned project needs to be stored in its own folder. Select the folder in which to store the project. The folder name will actually become the name of the project.
The software suggests to store all versioned projects in the OL Connect folder that is located in the Documents folder, with each project having its own folder under Documents/OL Connect.
Tip: If the folder doesn't exist yet, right-click in the right part of the dialog, where the existing folders are listed, and select New. Type the name of the folder that you wish to create and click OK.
Note: If you select an existing folder, be aware that any file that is present in that folder will automatically become part of the project.
-
Now you can create a new template, data mapping configuration or print preset (File > New) or open an existing one (File > Open) .
As soon as you save a file in the project folder, it becomes part of the project.
Tip: You can add a Workflow configuration to a versioned project, simply by saving it in the project folder and then committing the project.
-
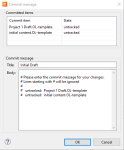
To record this version in the repository, select Project > Commit. This records the project files as a new version in the repository. Remember to save any changes before you commit.
To commit a single changed file, right-click the file in the Project files panel and select Commit.
Note: The .gitignore file in the project folder tells Git which subfolders and files should not be committed.
-
Enter information to describe the changes, then select OK. Describing the changes is important as it will allow you, later, to readily identify each version as you browse through the project history.

Once created or opened, a versioned project remains open until it is closed via the menu: Project > Close, or until (a file from) another project is opened. As long as a project is open, the software will open the project folder every time you want to open or save a file.
Note: Versioned projects have a hidden .git folder. Do not remove this folder. It contains the version history and, in the case of an online versioned project, information about the remote repository.
Viewing project history
The project history contains the records for all of the changes made to each resource in the project. When you commit a project, a snapshot of the project resources is stored as a version. You can review the versions to see what changes were made, who made them, and when they were made.
To see the history of the project:
-
With the project open in Designer, select Project > Versioning history from the menu bar.
-
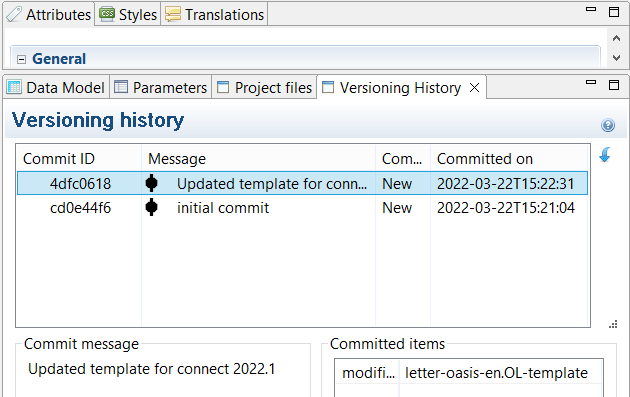
The history displays in the Versioning History tab.
You can select a version from the list to display more information about the changes made in that version.
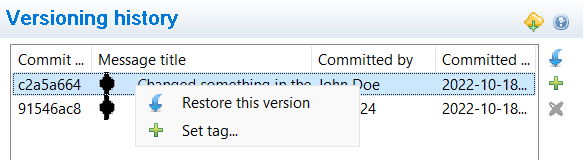
Restoring a version
To restore a previous version, select the version, then select the Restore icon. The project is reset to the state it was in when that version was committed.
Reverting individual files
Instead of restoring an entire version you may revert individual files to a previously committed version. This is done in the Project files panel. Right-click the file and select Revert. Remember to commit the project so that the reverted files become part of the current version.
Viewing project content
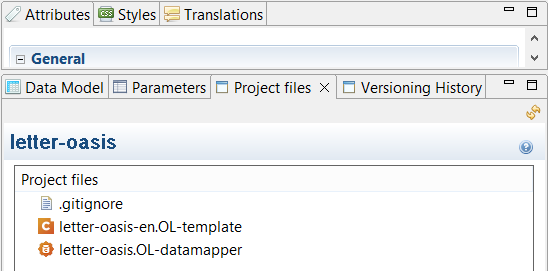
Select the Project files option from the Project menu to display the list of resources in the project.

|
The files comprising a project display in the Project files panel.
Double-click a file to open it.
Right-click a file to open the contextual menu. From there you can not only open, commit or revert it, but also select to view its properties or to open the folder in which the file is located in Windows' File Explorer.
Using tags
The Tag functionality allows any commit to be identified with a user-defined label. Think of it as setting a flag on your versioning history whenever you want to highlight that, at that specific stage, something is more remarkable than on other commits. For instance, you can mark the latest commit with a tag named Version_1, thereby indicating that this is the first version of the entire project that goes into production.
To do that, simply right-click on one of the commits in the Version History and select Set Tag, then enter a tag name.
Note: Tag names must be unique. A different capitalization does not make a name unique. Spaces are not allowed.
The Versioning history panel displays any tags immediately before the message title:
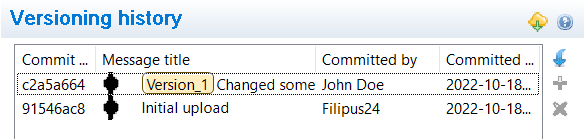
You can add as many tags as you like, and you can delete them (right-click the tag, then click Delete) and re-use them on a different commit (which is the equivalent of moving a tag).