Designing an invoice
This step by step walkthrough will teach you how to create a new basic invoice from scratch. It will explain common techniques that are applicable to other document types too.
Connect Designer lets you create and design print documents, web pages and emails in one tool. Every aspect of a document can be easily personalized thanks to its feature-rich and user-friendly interface.
The file format of the templates is HTML, the main markup language for web pages and e-mail messages. When exploring the user interface you will see several items that reveal this underlying technology. You will be able to work with the application without knowing HTML, but for users who are advanced in HTML and related technologies and standards like JavaScript and Cascading Style Sheets, the user interface does include the appropriate features.
This tutorial will teach you to create a new basic invoice from scratch. It will explain common techniques that are applicable to other document types too. But there is more to learn. To discover new ways and enhance your skills, please visit https://olresourcecenter.uplandsoftware.com and the Help (PReS Connect or PlanetPress Connect).
This walkthrough is meant to be used with OL Connect Designer 2022.2 and later versions.
Note: A PDF version of this walkthrough is available for offline use. Designer_Invoice_WT.pdf.
Note: The resources needed for this walkthrough can be downloaded: Designer-Invoice-resources.zip
Template requirements
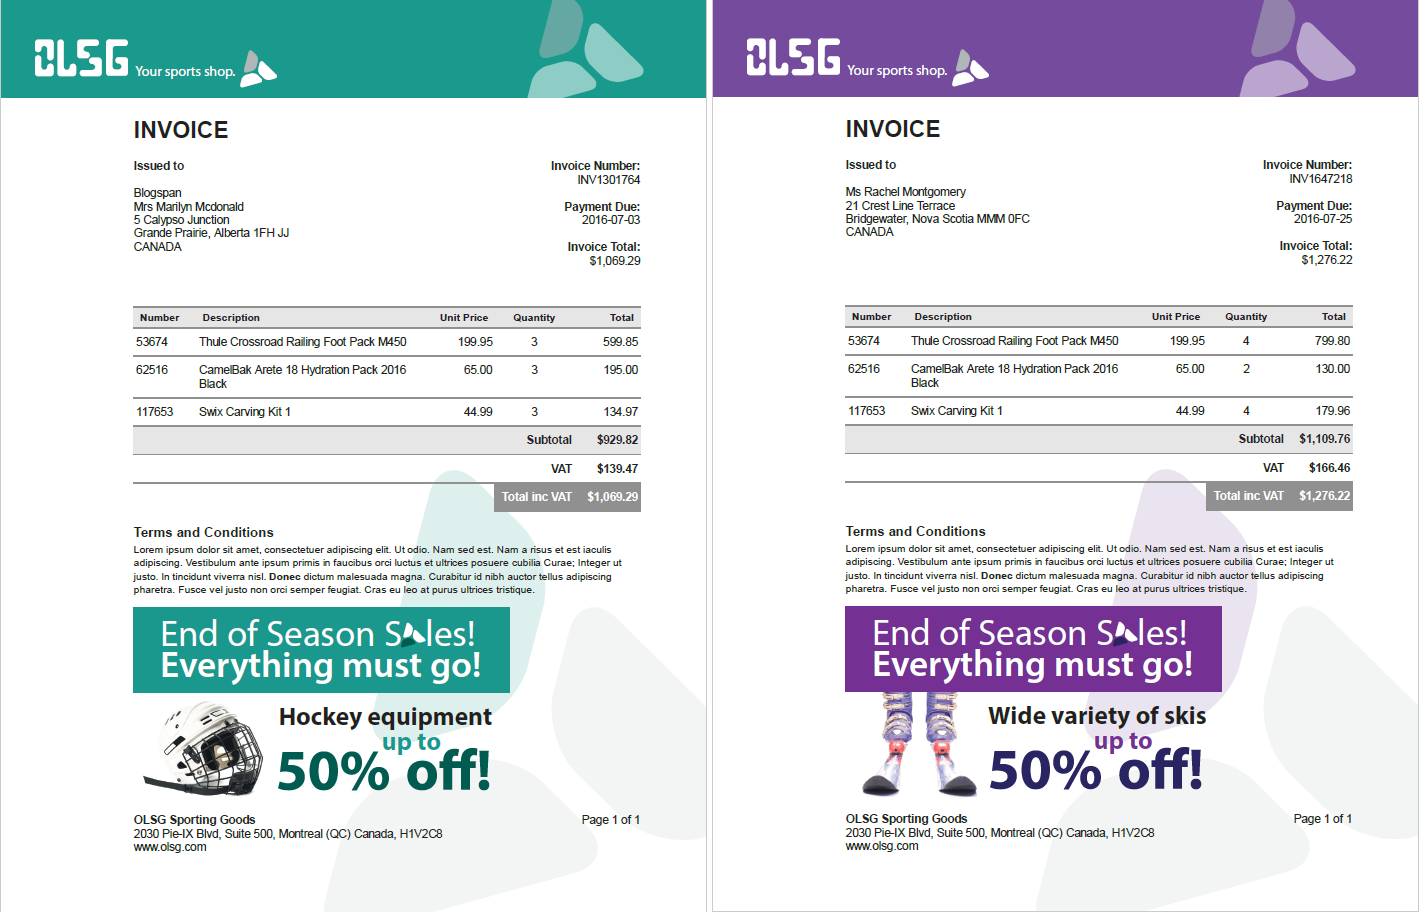
Here are the requirements for the invoice template that needs to be created:
-
The template contains a letterhead. Which color it has, depends on the hobby of the receiver: green for skating, purple for skiing.
-
The general invoice information, like the invoice number and the due date, should be printed at the top, under the letterhead.
-
The invoice data has to be printed in a table. The table should contain a transport line if it runs over two or more pages. The pages should be numbered.
-
The company has several offices. The sender’s address should be the office that is nearest to the receiver of the invoice.
-
To fill any remaining white space a picture should be printed. Which picture is printed depends on the hobby of the receiver. If no white space remains, the picture should not be printed.
The generated invoice will look similar to this picture: