Enter Time
Timesheets allow users to enter and submit their time spent on specific work items during the week. They also allow project labor costs to be automatically calculated and recorded on a work item's Actual Costs page.
Once a Timesheet is submitted, it can be addressed by a supervising user on the Manage Time page.
To enter time into a Timesheet:
-
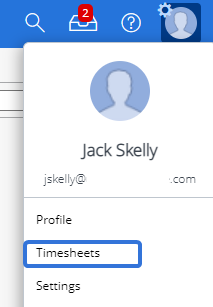
Select Timesheets from your Profile Menu:
-
Use the date fields / navigation arrows or the calendar icon to select which week you would like to enter time for:

-
Select one of the empty work item drop-down menus:
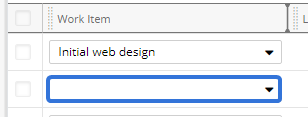
Note: Work items become part of a predefined list and are automatically added to a Timesheet week (similar to the "Initial web design" example above) if they meet the following conditions:
- The work item's Object Type must have its "On timesheet" setting set to "Automatic" (contact a PowerSteering administrator to do this for you).
- The work item must have an "Active" status (administrators can check the Work Status Names page to see which statuses are considered "Active").
- The user is assigned a non-"Owner" Role on the work item ("Owner" can be configured as an acceptable Role for auto-population. Please reach out to a PowerSteering representative if you are interested).
- At least one of the following: 1) The user has submitted a Timesheet for the previous week that has time entries for the work item OR 2) The work item's schedule intersects with the Timesheet week.
Additionally, the auto-populate feature can be set to check the statuses of all the work item's parent work as well. When this is enabled, the work item will not auto-populate the Timesheet if any of its parent work items have an "Inactive" status. Please contact a PowerSteering representative if you are interested in enabling this. -
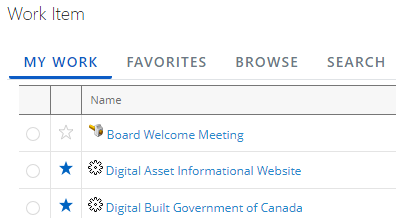
Use one of the tabs from the "Work Item" window to find and select a work item that you would like to enter time for:
Note: Certain work items can be restricted from entering time based on their status. If you cannot find your desired work item, it might not currently be in an acceptable status for entering time. Speak to the Project Manager / Owner for clarification.
Tip: Users can add work items as favorites to easily access them from the "Favorites" tab.
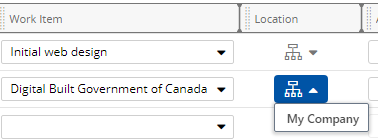
Tip: After you select a work item, you can click on the
 icon in the "Location" column to see the work item's Work Tree location:
-
(Optional) Choose an Activity from the "Activity" drop-down menu:
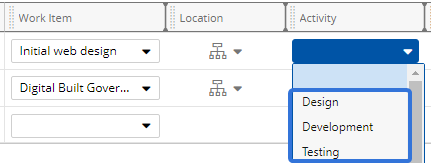
Note: The available Activities are values that have been added to the "Activities" Tag and configured to be selectable in Timesheets. See Add or Update Tag Values for more information.
Note: The same work item can be selected on multiple line in the same Timesheet if a different Activity is selected for each one.
-
(Optional) Select a role from the "Role" drop-down menu:
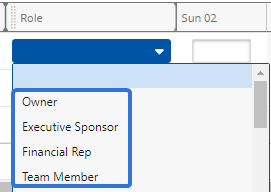
Note: Users can attribute time to separate roles on the same work item by selecting the Work Item again in another empty row (same as Step 3). However, there can only be one row per combination of work item and role.
Note: If the user is already assigned to a role on the work item, it will auto-populate the "Role" field. If the user is assigned to multiple roles, only one will be automatically selected. To enter time against another role on the same work item, a new row will need to be added that contains the same work item with the different role.
Note: PowerSteering administrators can add new PowerSteering Roles.
-
Enter the hours you worked on the Work Item into the weekday cells:

-
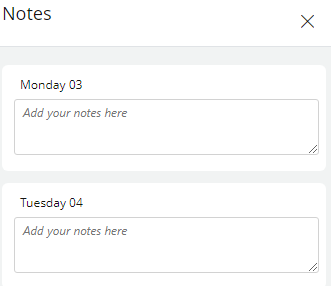
(Optional) Select the notepad icon on the right-hand side of the line item to enter any notes for the week:

Note: You can enter notes for particular date that has time entered into it. You cannot enter a note for any dates without values (or "0" values).
-
Repeat Steps 3-9 to enter time for other any other work items.
Note: If you navigate to a different time period (Step 2) before saving, your hours will be lost. Be sure to save before changing the time period.
Tip: You can select Copy Last to automatically enter the same saved work items and Activities from the previous week.
-
Select the Save button to save your entries without submitting the Timesheet

OR
Select the Submit button to save your entries and submit the Timesheet to the Timesheet approver.

After saving, your hours will be saved to your Timesheet. Please remember that the time approver will not receive your Timesheet unless you submit it.