Metric Lock
Metrics can be either completely or partially locked in order to prevent additional editing. Any locked data cannot be modified; this ensures that data will be accurate once the Metric is final and ready to be included in rollup reports. Metric data can be locked and unlocked at any time by PowerSteering users with the "Lock Metrics" Project Task permission.
Note: Locking any part of a Metric View will result in the entire view being uneditable in both Legacy Mode and the Financial Review. For example, if only one line item is locked, the entire grid will be locked once the See The Old View button is clicked.
Also, the Report Wizard will display the earliest locked date when multiple line items have different locked dates.
Note: Users will require the "Lock Metrics" Project Task permission to place locks on PowerSteering Metrics.
Tip: If you would like to lock or unlock the same Metric on multiple work items at once, consider using Metric Bulk Actions.
The lock feature allows you to lock both types of Metric data:
To lock or unlock numeric data:
Before You Start: Users will require the "Lock Metrics" Project permission to lock or unlock Metric data.
-
Select a Metric from the "Metrics" section of a Work Item's "Project" menu:
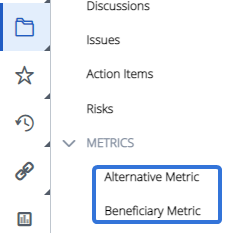
Note: Clicking the Project button on the Icon Bar will take you directly to the summary page of the last work you visited.
-
Click on the Lock icon.
Tip: Hover your cursor over the Lock icon to see when the Metric data was last locked:
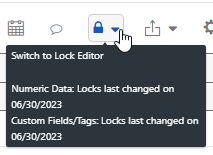
-
Select Lock Numeric Data to enter "Lock Mode":
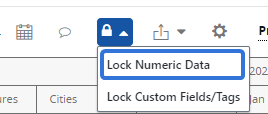
Note: If you navigate to a different Metric View while in "Lock Mode," you will no longer be in "Lock Mode" and any unsaved locks will be lost.
-
Click on a column header to completely lock the column as well as every column to its left:
Click thumbnail to play.
OR
Click on a line item (row) header to completely lock the line item:
Click thumbnail to play.
OR
Click on a Metric cell to lock that cell as well as every other cell to its left within the line item (row):
Click thumbnail to play.
Note: Metric Beneficiary line items can be locked as well. However, this differs based on the type of Metric Beneficiaries used on the Metric:
Manual Metric Beneficiaries: The "Parent" line item simply displays the sum of the Metric Beneficiaries below it. The Beneficiary lines can have data entered into them, but the "Parent" cannot. So, only the Beneficiary lines can be locked:
Percent Allocation Metric Beneficiaries: The "Parent" line item has Metric data entered into it. The Beneficiary lines under it split the total of the "Parent" line item based on the percentage that has been allocated to them. So, only the "Parent" line item can be locked: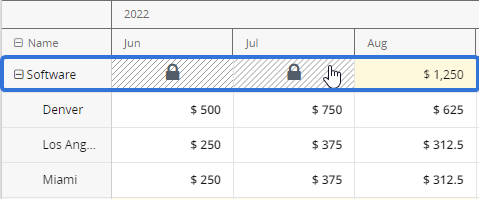
If you are unsure about the type of Beneficiaries on your Metric, speak to a PowerSteering administrator.OR
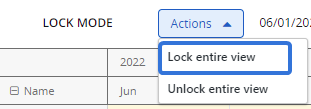
Select Lock entire view from the "Actions" drop-down menu:
-
(Optional) Click on the column header of any completely locked column to unlock all Metric cells in the column and all cells in the columns to its right:
Click thumbnail to play.
OR
Click on any line item (row) with locked cells to unlock all the line item's cells:
Click thumbnail to play.
OR
Click on any Metric cell to unlock the cell as well as every other cell to its right within the line item (row):
Click thumbnail to play.
-
Click the Save Changes button.
Any locked cells within the Metric View will no longer be editable, which is indicated by a white background and a lock icon in the top-right corner:

Note: Metric numeric data can also be locked from the Edit Properties window:
From here, PowerSteering users can lock a Metric view up to a certain date: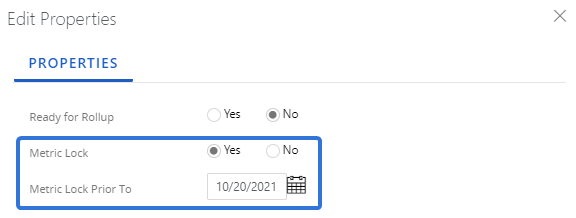
If the date is left empty, the entire Metric view will be locked.
To lock or unlock Custom Fields and Tags:
Before You Start: Users will require the "Lock Metrics" Project permission to lock or unlock Metric data.
-
Select a Metric from the "Metrics" section of a Work Item's "Project" menu:

-
Click on the Lock icon.
Tip: Hover your cursor over the Lock icon to see when the Metric data was last locked:

-
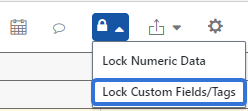
Select Lock Custom Fields/Tags to enter "Lock Mode."
Note: If you navigate to a different Metric View while in "Lock Mode," you will no longer be in "Lock Mode" and any unsaved locks will be lost.
-
Click on any unlocked Tag or Custom Field cells to lock them for editing:

-
(Optional) Click on any locked cells to unlock them for editing:

-
Click the Save Changes button.
Any locked Custom Field of Tag cells will no longer be editable, which is indicated by a white background and a lock icon in the top-right corner:


