Report Wizard Definition Tab
The Definition tab of the Report Wizard is used to identify the source of the data you want to include in your report. Data for a report can come from a portfolio, a specific section of the work tree, or from one or more work types. You can also determine how you want the report to handle archived data and add additional filters that will impact what information is included in your report. This article describes the options available on the Definition tab.
Note: Making a selection on the Definition tab is optional for some report types and required for others, such as Metrics. It is important to remember that if you do not make any selections on the Definitions tab, the report you create will allow users to potentially run the report against whatever they have access to within the PowerSteering database.
1. Click Definition Tab
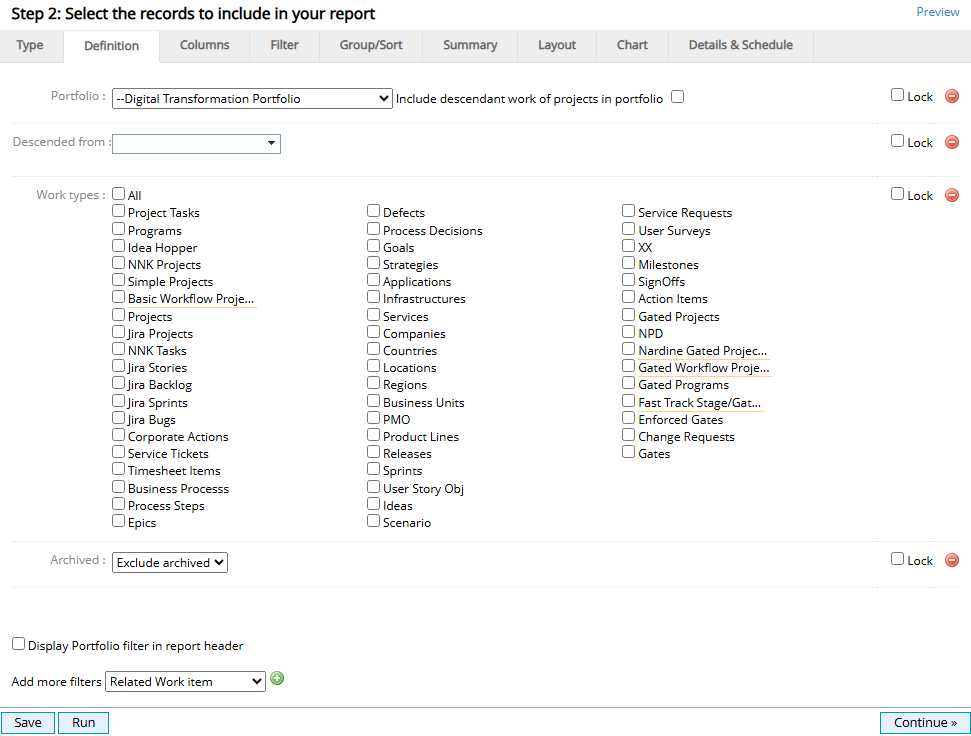
- Click the Definition tab.
Below are descriptions for the options on the Definition tab of the Report Wizard. These options are important for two reasons. First, they allow you to define the source of your data for your report. Second, if you are creating this report for others to use, it can control the options those users have for running the report. This is important if you have a large organization with lots of data and want to limit how much information a person can include on a single report.
Period: Allows you to select the date range from which to report data.
Portfolio: Allows you to select a pre-defined portfolio to use as a source for your report. This can be a personal portfolio or one that is shared between users. Select the Include descendant work of projects in portfolio check box if you want this additional information in your report.
Descended from: Allows you to select areas from the work tree as the source for your report. With this feature you can browse and select one ore more sections of the work tree or search for a specific area of the work tree such as a project name.
Work types: Allows you to select one ore more work types for your report.
Note: Inactive object types will be options here only if there are instances of that object defined in the system.
Archived: Allows you to select if you want to include archived work, exclude archived work or only see archived work in your report.
Display Portfolio filter in report header: When this checkbox is selected, the name of the selected Portfolio will be displayed at the top of the report whenever it runs. Selecting the Portfolio name will automatically navigate the user to the Portfolio's details page. Users who do not have permission to view the Portfolio's details page will be navigated to the main Portfolios page instead.
Add more filters: Allows you to further define your report by selecting additional criteria for your report. The options that are displayed in the Add more filters list are based on the category and type of report you selected on the Type tab.
Lock: Allows you to prevent anyone using this report to change the selection you have made on the Definition tab. For example if you created this report to be used exclusively with a specific portfolio, you could select Lock and anyone running this report in the Public Report section will not be able to select a different portfolio for this report. Likewise if you do not lock the portfolio, the person running this report can opt to select a personal or shared portfolio for this report on the Edit Filters page.
Delete: Allows you to remove a definition field from being selected. For example, if you do not want anyone to be able to select a work type when they are running this report, you can click the red circle to remove this option from the Definition tab and the Edit Filters page.
Note: The Definition tab will differ based on the report category and type you select on the Type tab.
Note: These definitions act as an "and", not an "or" statement. If you select a portfolio that was built using Gated Project work types, and then select the check box for a different kind of work type in the Work type section, you will not have any results for your report because those two selections conflict.
2. Click Period
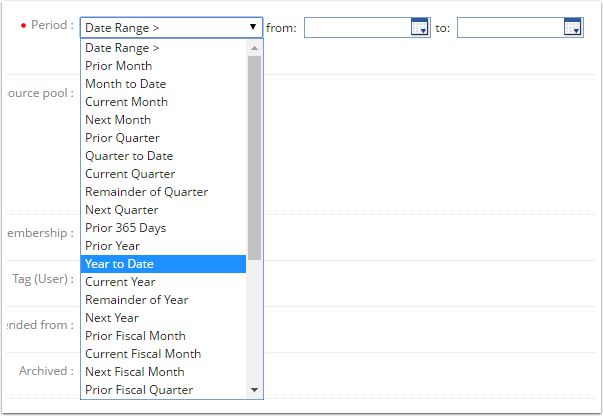
- If required for the selected report type, click Period, select a reporting period from the list. See Report Wizard Period Options for track period definitions.
3. Click Portfolio (optional)
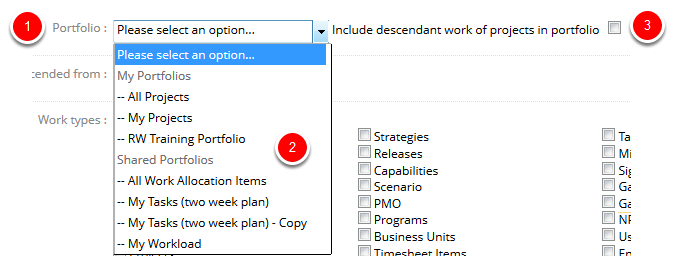
- Click Portfolio, select a personal or shared portfolio from the list.
- Select Include descendant work of projects in portfolio check box if needed.
4. Click Descended From (Optional)
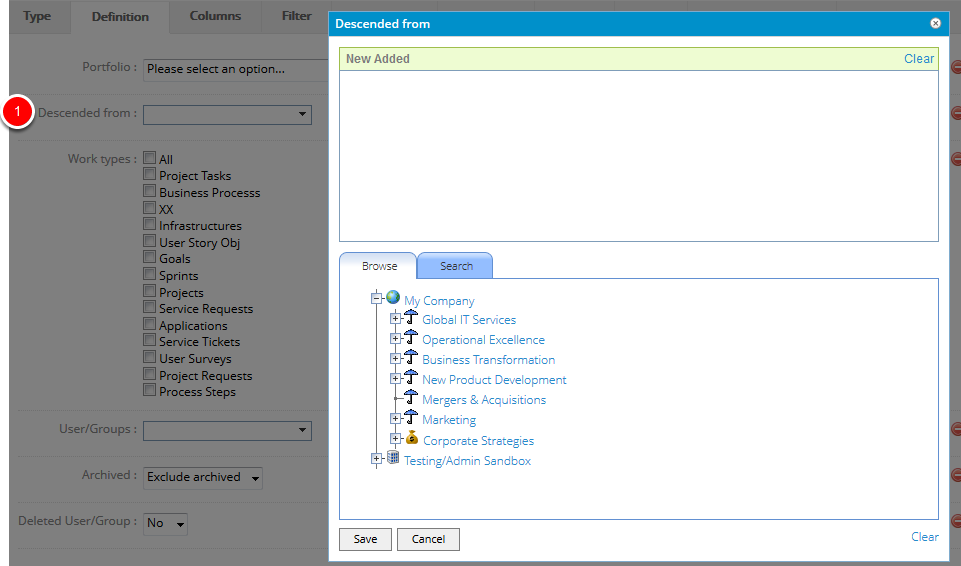
- Click Descended from to display the Descended from dialog box.
4.1. Browse Work Tree
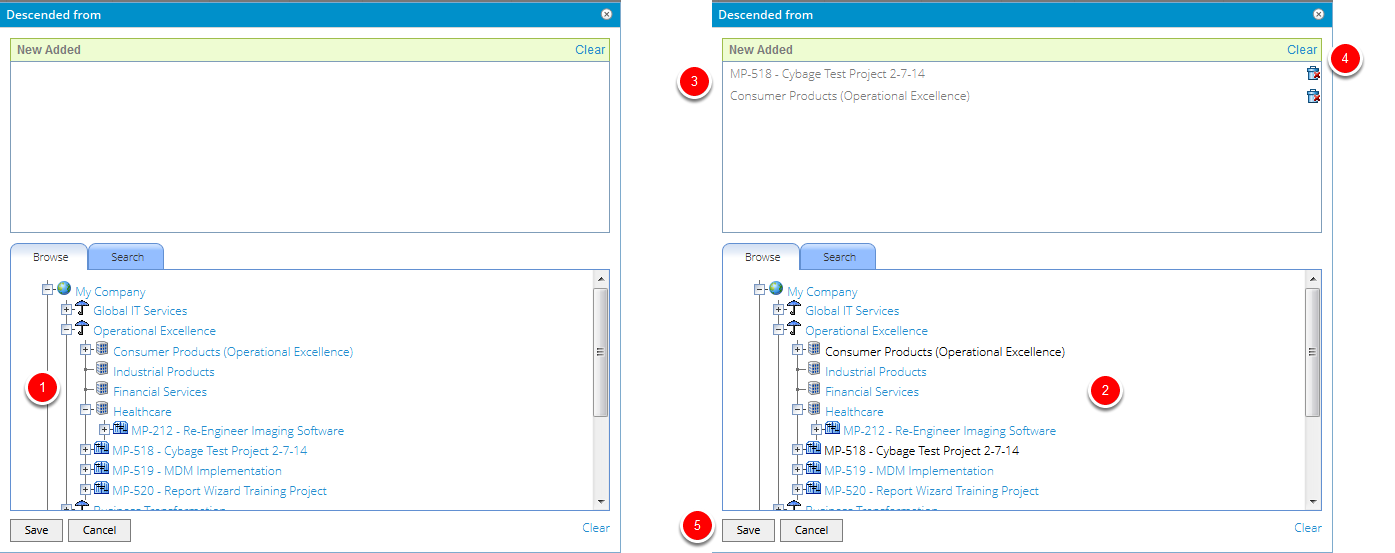
- Click the plus and minus signs to expand or collapse the work tree to locate what you want to select as your source work.
- Click to select the work you want to include.
- View added work in the New Added section of the dialog box.
- Click the trashcan button or Clear to remove any of your selections.
- Click Save.
4.2. Click Search
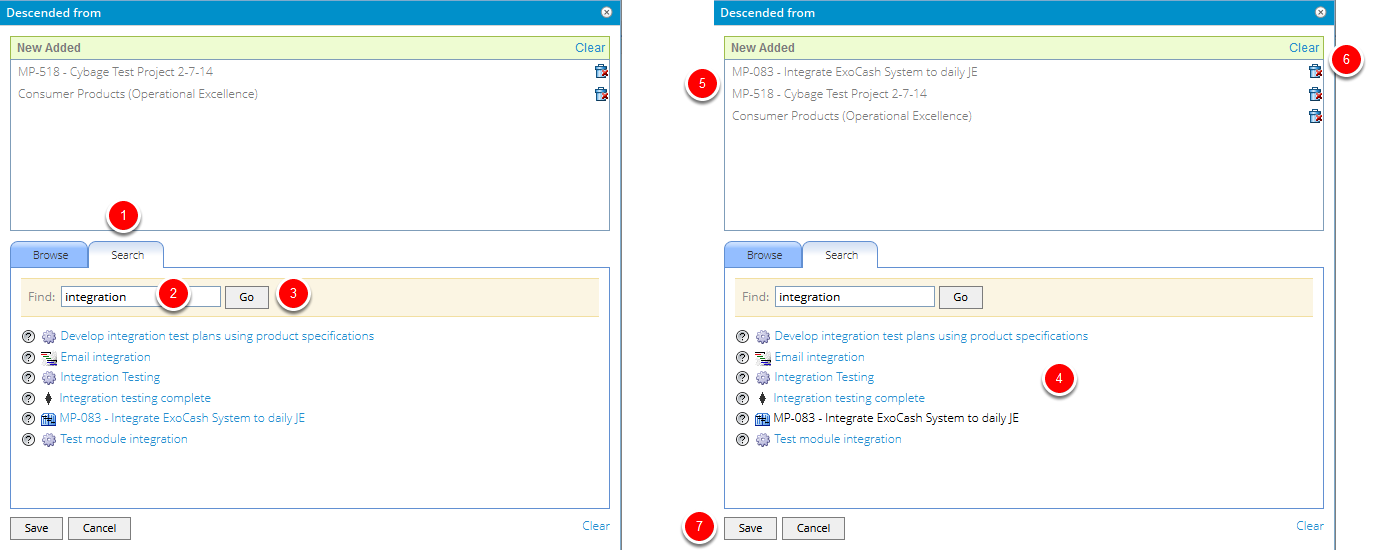
- Click the Search tab.
- Click Find, type search criteria.
- Click Go.
- Click to select the work you want to include.
- View added work in the New Added section of the dialog box.
- Click the trashcan button or Clear to remove any of your selections.
- Click Save.
5. Select Work Types (Optional)
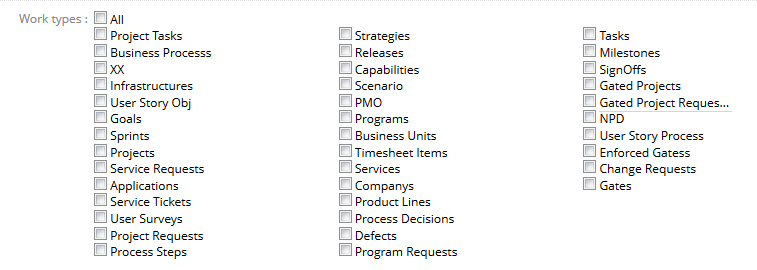
- Click to select one or more work types for your report.
6. Click Archived (Optional)
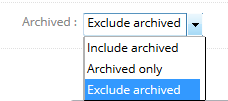
- Click Archived, select if you want to include, exclude or only show archived work in your report. Exclude archived is the default selection for this field.
7. Click Add More Filters (Optional)
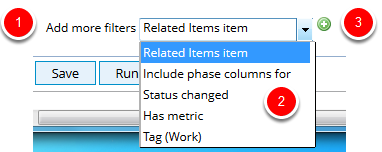
- Click Add more filters, select an option from the list.
- Click the green plus symbol.
- Make additional selections as needed.
Note: The options in this list will change based on the category and type of report you select.
8. Click Preview (Optional)

- Click Preview.
Note: The Preview feature allows you to view your report as you build it. It will show the first 20 results of any report you are creating.
9. View Preview Report
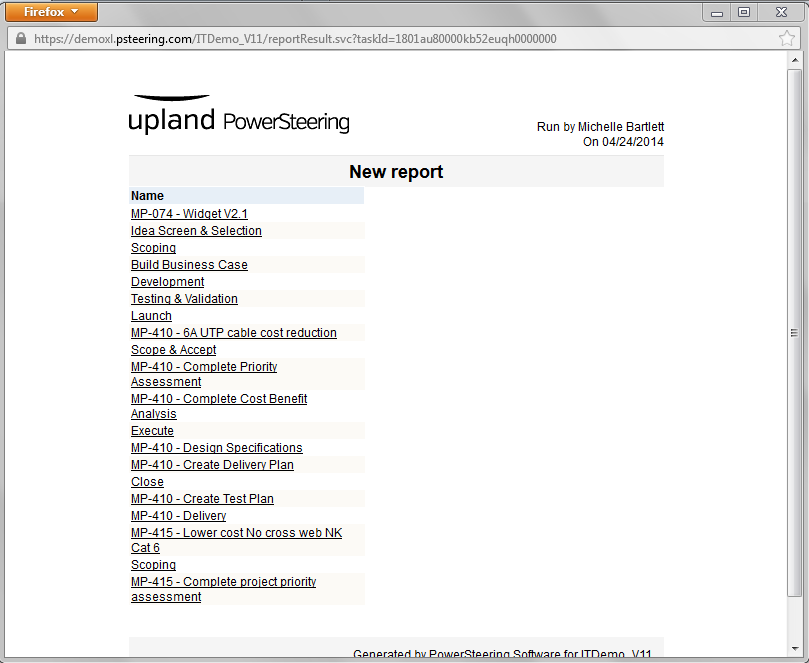
- View the preview of your report.
Note: The preview report will open in a separate window. You may need to disable your pop-up blocker if you do not see the preview window.
10. Click Continue or Tab
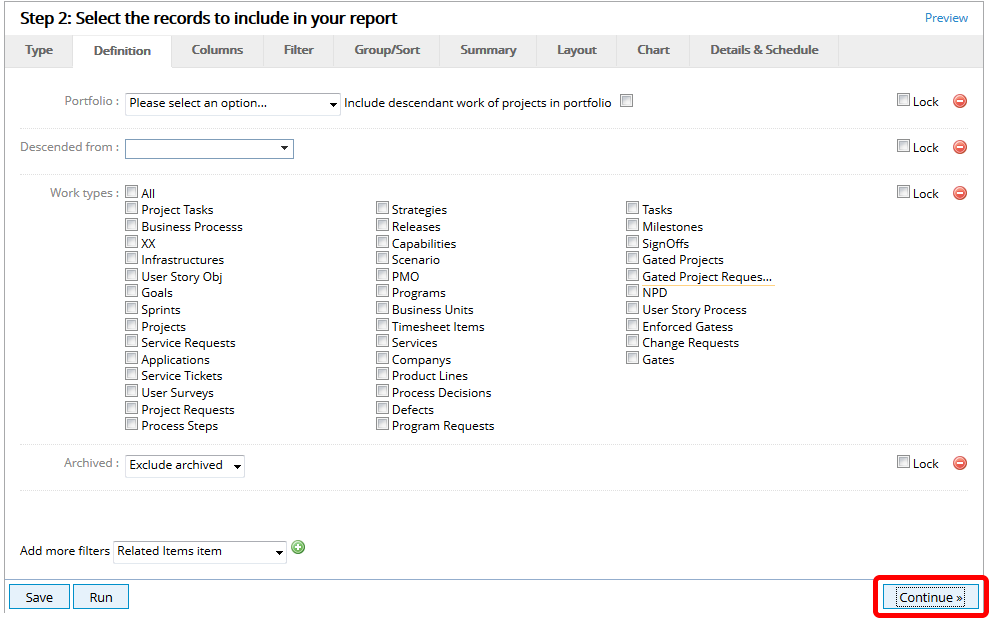
- Click Continue to go to the Columns tab, or click another tab within the Report Wizard.
Note: There are some type and category report combinations, such as Metrics, that will require you to make selections before you can click Continue or another tab of the Report Wizard.