Timesheet Reminder Agent
Users that are assigned to any work item in PowerSteering with an "On Track" status are eligible to receive email reminders when the agent runs. Administrators can also limit email reminders to specific users, as well as configure additional agent settings.
Tip: This page covers how to edit the Timesheet Reminder agent's settings. For information on enabling or disabling the agent (or any other agent), see Activate / Deactivate an Agent. For information on manually running an agent, see Manually Run an Agent.
To edit the Timesheet Reminder agent's details:
Before You Start: Only PowerSteeringadministrators can work with agents. If you are not an administrator, reach out to one if you are interested in this agent.
-
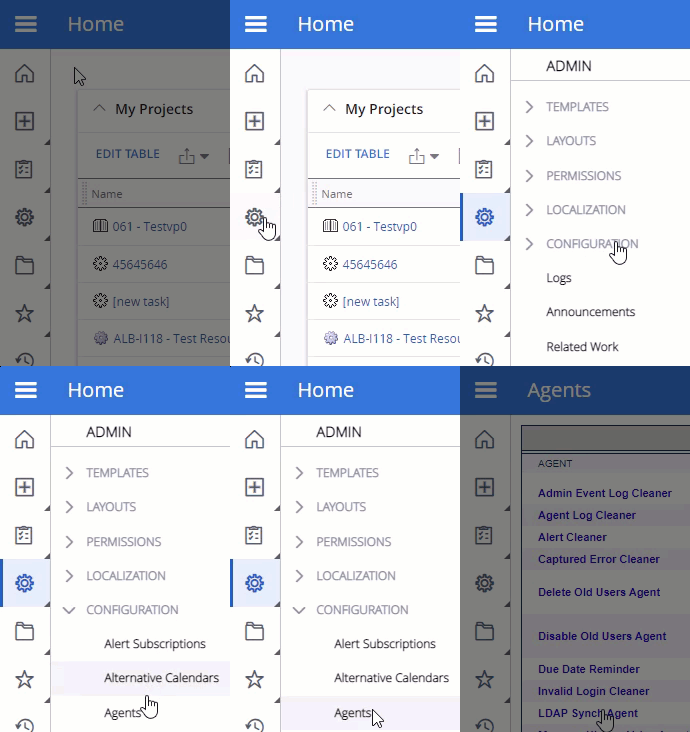
Select Admin → Configuration → Agents from the Navigation menu.
-
Select Timesheet Reminder Agent from the list of agents:
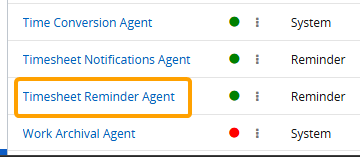
Note: This opens up the "Timesheet Reminder Agent" page. From here, administrators can run the agent manually by selecting the Run Agent button next to the title.

-
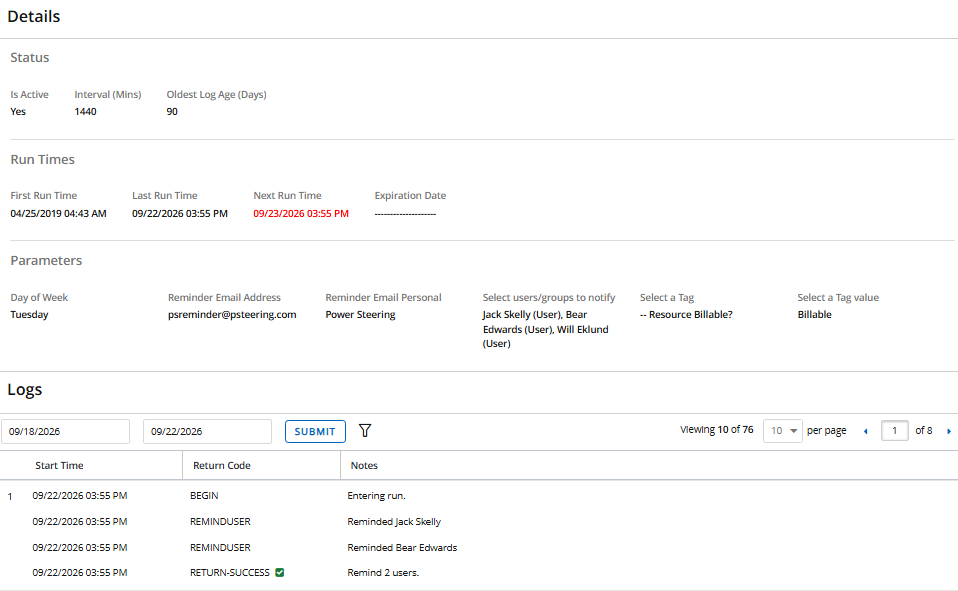
(Optional) Review any of the agent's details, email parameters, and / or run logs.

Click thumbnail to enlarge. -
Select the Edit button in the top right-hand corner of the page:
-
(Optional) Change the title of the agent task.

-
Configure the agent's "Status" details.

-
Is Active: Select "Yes" to activate the task or "No" to deactivate the task.
-
Interval: Specify how often the task will run in minutes. For example, an interval of 60 minutes will cause the task to run every 60 minutes.
Note: This interval represents how often the task runs. When this task runs, it checks whether it is time to send reminder emails. It is not to be confused with the "Reminder Interval in days" parameter (more info below).
-
Oldest Log Age: Enter a time limit (in days) that logs (Step 3) will expire after. For example, an oldest log age of 90 days will erase any task logs that are older than 90 days.
-
-
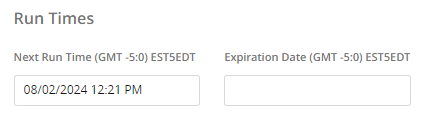
Edit either of the "Run Times":
-
Next Run Time: Select the field to determine a custom time for the task to run next. Once it runs during this custom time, it will run again after the specified interval time ("Interval" above).
Note: The currently-scheduled next run time will be displayed in the field by default.
Tip: Remember that you can always run the task manually.
-
Expiration Date: Select the field to determine a time for the task will stop running. If you want the task to continue to run without an end date, simply leave the box empty.
-
-
Configure any of the agent's parameters.

-
Day of Week: The day email reminders are sent out for users who have not submitted a Timesheet for the current week.
-
Reminder Email Address: This parameter is currently not in use. Please leave as is.
-
Reminder Email Personal: This parameter is currently not in use. Please leave as is.
-
Select users/groups to notify: Directly select the checkbox of any user or User Group to send them reminders. Leaving the field empty will send the reminders to all applicable users (unless a Tag has been selected from the "Select a Tag" field below).
Note: Selecting a User Group will send reminders to all member of the group.
-
Select a Tag: Choose a Tag that will be used to determine which users receive reminders. This field works in conjunction with the "Select a Tag value" field below. Leaving the field empty will send the reminders to all users (unless any users or User Groups have been selected from the "Select users/groups to notify" field above).
-
Select a Tag value: Select which Tag value users must have associated with them in order to receive reminders. Users will only receive a reminder email if they have the Tag value on their profile.
-
-
Select the Save button in the top right-hand corner of the page.
After selecting Save, your changes will be saved to the agent.