Reject Time
Once a Timesheet has been submitted, a Timesheet approver can reject the time from the Manage Time page if the Timesheet contains incomplete information or inaccurate entries. Once a Timesheet is rejected, the user who submitted it will receive a "Rejected Timesheet" notification. The user will be able to correct the Timesheet and submit it again.
Note: There is no way to rescind a rejection. If a Timesheet is rejected, the user will have to resubmit the Timesheet.
Tip: See Configure the Manage Time Page for information on customizing the Manage Time page to your liking.
To reject time:
Before You Start: Users will require the "Accept/Reject Time" Project permission on the specific work items they would like to reject time for (in other words, when a user submits time toward a project, the time approver will need this permission on that project to reject the Timesheet). Alternatively, users with the "Approve/Reject Timesheets" Manage Time permission can reject all Timesheets in PowerSteering regardless of the work item they are submitted for.
-
Select Review → User Management → Manage Time from the Navigation Menu:
Click thumbnail to play.
Tip: Upon arriving to the Manage Time page, users should ensure that "Awaiting Action" is the only status selected from the "Timesheet Status" drop-down menu:
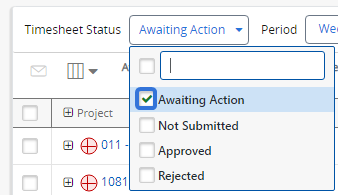
This will cause the Approve and Reject buttons to appear on the Manage Time page. Also, it will filter out all Timesheets that are not pending approval. This will make it much easier and quicker to review Timesheets that are waiting to be approved.
If additional statuses are selected, you will need to use the Timesheet's "Actions" drop-down menu to approve time: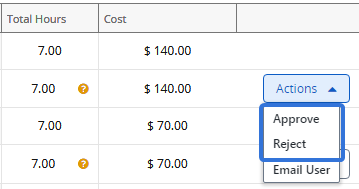
See Configure the Manage Time Page for more information. -
Use the period selectors to navigate to the time period that contains the Timesheet(s) you would like to reject:

Note: You can use the arrows to navigate between consecutive periods or you can directly select one of the dates to navigate to a period that is further away.
-
Select the checkboxes of the Timesheets you would like to reject:
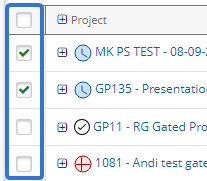
Note: Notice that the values in the left-hand column (either "Project" or "Submitted By" based on the "Display" setting you chose while configuring the page), contain expand icons
 . When selected, they will reveal the individual Timesheets that make up their totals:
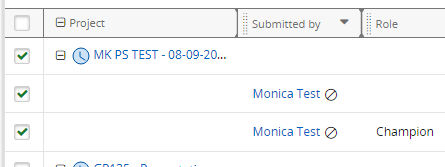
Selecting the checkbox of an unexpanded row will automatically select the checkboxes of all the Timesheets within it. To make sure you are not overlooking any Timesheets, expand the rows before selecting. -
Select the Reject button in the top right-hand corner of the table:

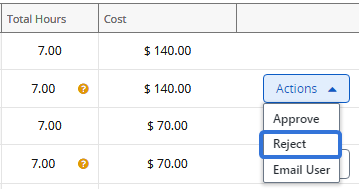
Note: If more that one option has been selected from the "Timesheet Status" drop-down menu, the Reject button will not be available. You will need to approve the Timesheets one-by-one using the "Actions" drop-down menu:
-
Enter a comment that explains why you are rejecting the Timesheet(s) and select the Reject button:
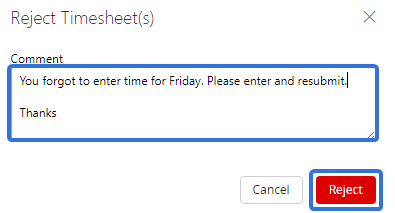
Tip: This message will be the same for all selected Timesheets. If you would like to provide different reason codes for each Timesheets, you will need to reject the Timesheets one by one.
After selecting the Reject button, the selected Timesheets will be rejected. The users who submitted them will need to resubmit them based on your comments.
