2018 R1.3 (v18.3) - New Features
Below is a summary of the features included in the PowerSteering 2018 R1.3 (v18.3) service pack.
1. Changing Project Name on Project Summary

Description: Users can change the project name on the Project Summary window by clicking on the pencil next to the item.
Benefit: From the Project Summary page, users can hover over the current project name. Clicking the pencil icon allows the user to enter the new name directly on the Project Summary.
See Edit Work Details for detailed information.
2. Changing Project Owner on Project Summary
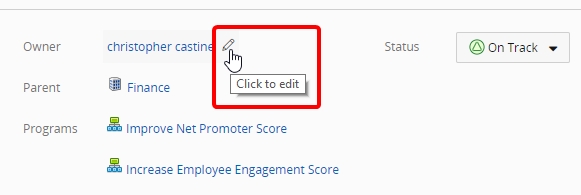
Description: Users can change the project owner on the Project Summary window by clicking on the pencil next to the item.
Benefit: From the Project Summary page, users can hover over the current owner. Clicking the pencil icon opens the Edit Owner window, where users can change the owner by entering the name.
See Edit Work Details for detailed information.
3. Associating Program(s) on Project Summary

Description: Users can associate additional program(s) to the listed program(s) on the Project Summary window by clicking on the pencil next to the item.
Benefit: From the Project Summary, users hover over the Program where they want to associate a program(s). Clicking the pencil icon opens the Edit Program Associations window where the user select the program(s) to add or remove from the program.
See Edit Work Details for detailed information.
4. Editing Standard and Custom Details in Project Summary
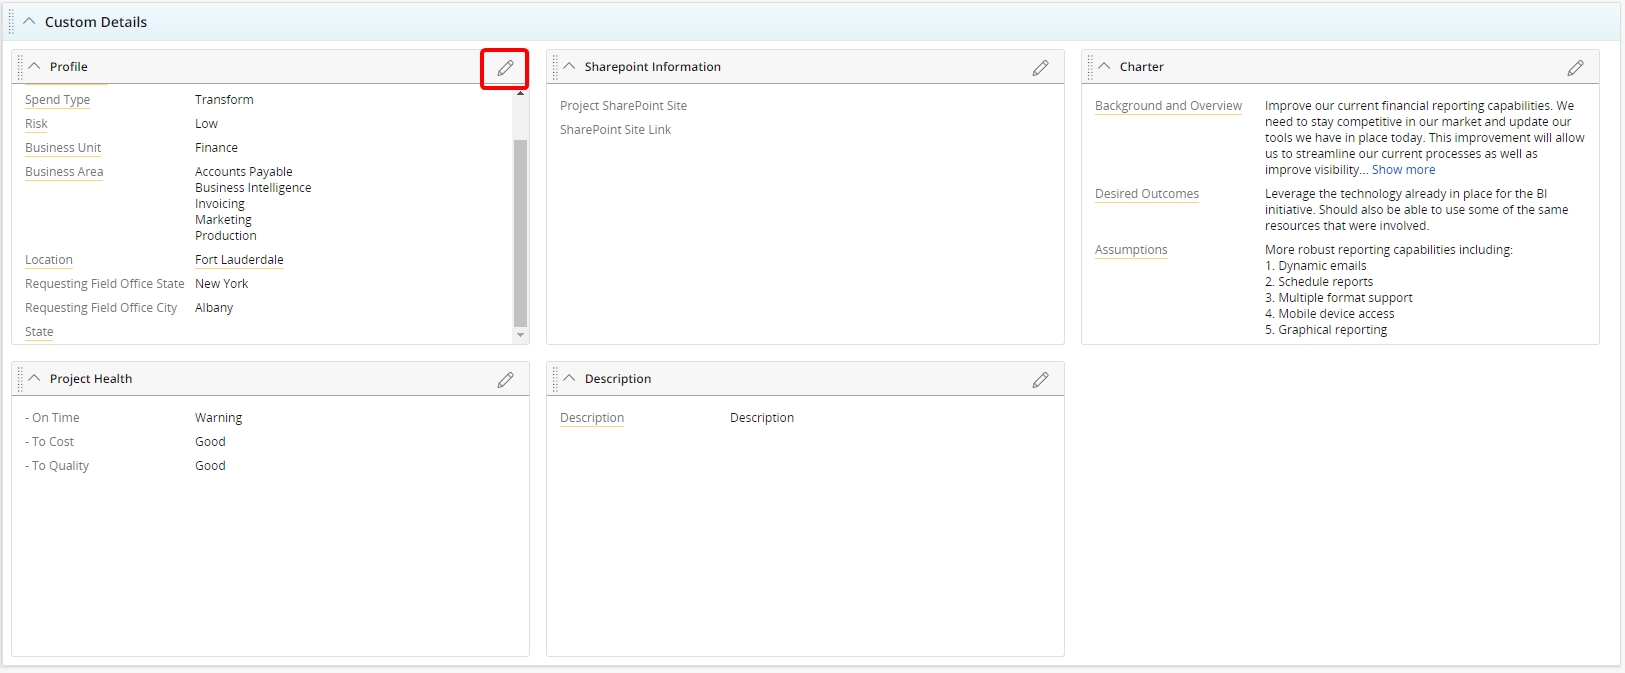
Description: Users can edit Standard and Custom Details by clicking on the pencil next to the item.
Benefit: From the Project Summary page, users can make changes to any of the widgets in the Standard and Custom Detail sections by clicking the pencil icon. The edit window will appear without needing to leave the Project Summary page.
See Edit Work Details for detailed information.
5. Displaying Full-size Images in Project Summary
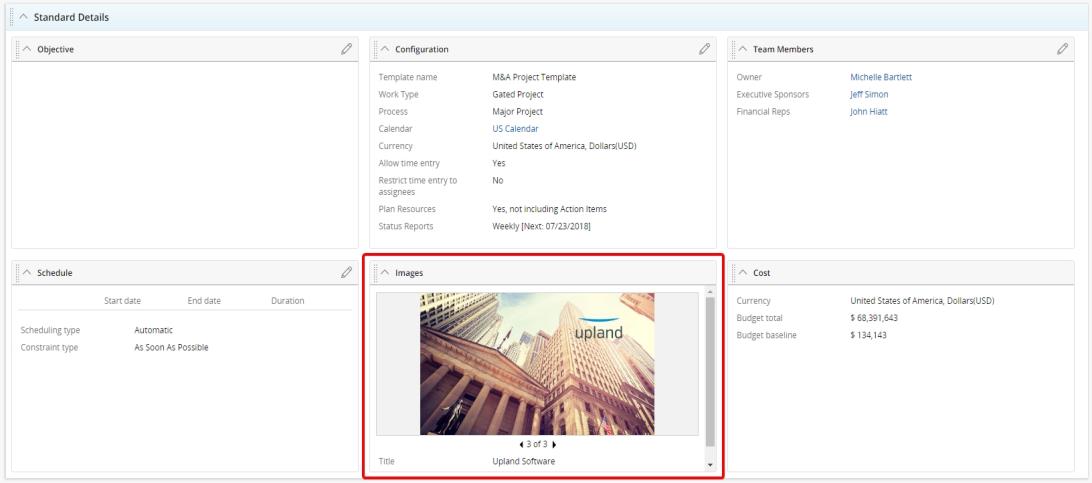
Description: Full-size images are displayed after clicking the thumbnail.
Benefit: After users attach images to the project, they appear as large thumbnails in the Standard Details section. Users clicking on the thumbnail will open a full-size version of the image. Carousel arrows are available if more than one image has been attached.
See Edit Work Details for detailed information.
6. Moving Widgets in Project Summary
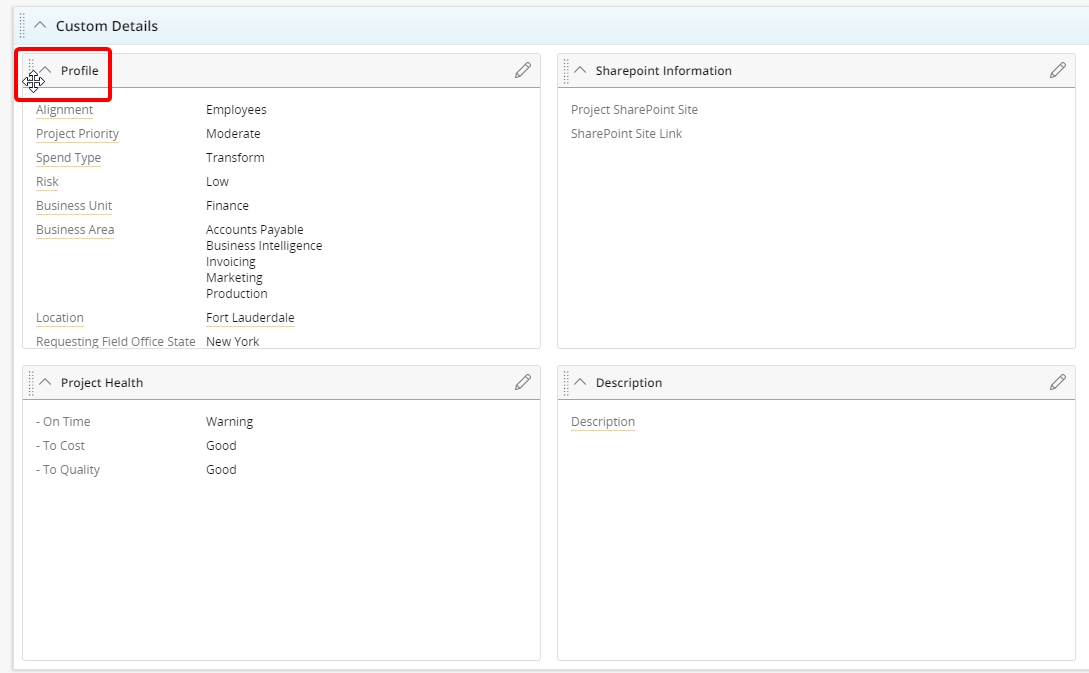
Description: Users can move any widget on the Project Summary page.
Benefit: Users can move any widget within a section by hovering the mouse over the dotted gripper bar until the cursor changes to the four-headed arrow and dragging it to the new location.
See Rearrange Modules on the Summary Page for detailed information.
7. Resizing Widgets in Project Summary
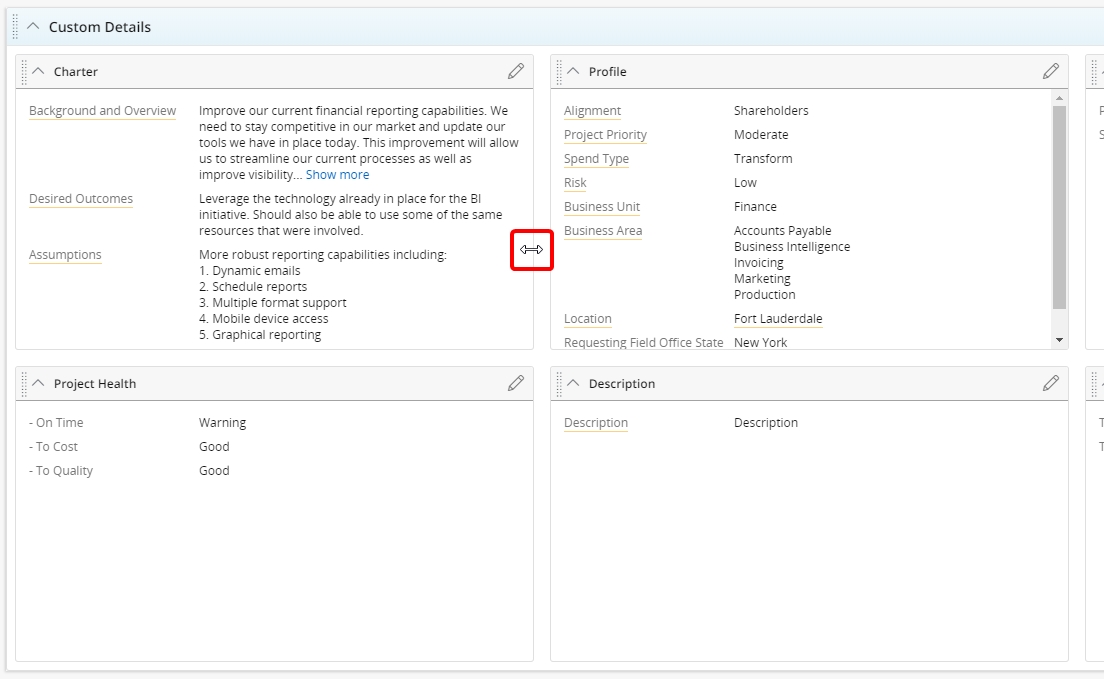
Description: Users can resize any widget on the Project Summary page.
Benefit: Users can resize the widgets by hovering the mouse over the right or bottom edge of the window until the cursor changes to the two-headed arrow and dragging it to change the size. This can be used on any widget window, but will not work with tables.
See Rearrange Modules on the Summary Page for detailed information.
8. Editing and Configuring Project Summary for Administrators
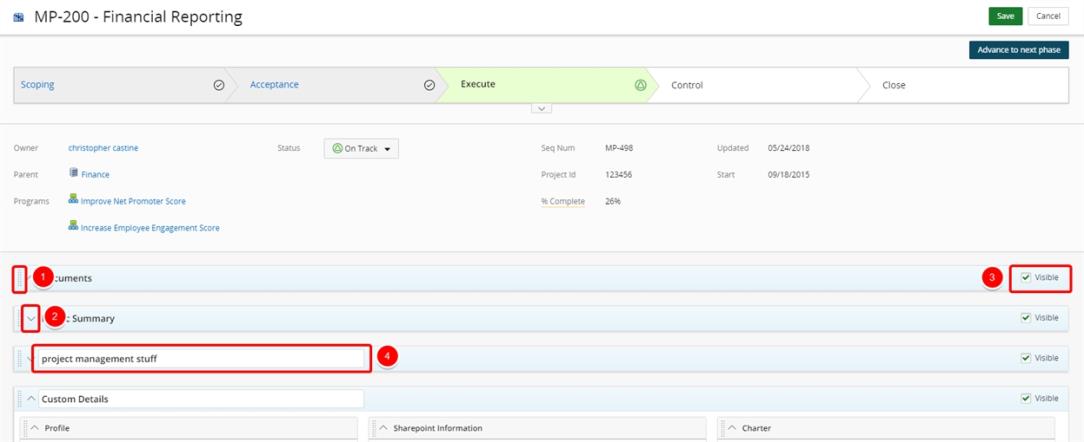
Description: Administrators are able to apply multiple changes to the Project Summary sections.
Benefit: From the Project Summary page, administrators can make changes to any section. Changes made will affect the default summary page view of the current object type.
Selections can be made to:
- Rearrange the display order of the sections
- Expand/collapse any section by default
- Determine the visibility of a section
- Edit the default name of the section
See Edit and Configure the Summary Page for detailed information.
9. Editing and Configuring Project Modals for Administrators

Description: Administrators are able to apply multiple changes to the Project Modals.
Benefit: From the Project Modal pages, administrators can make multiple changes. Changes made will affect the default modal view of the current object type.
Selections can be made to:
- Rearrange the display order of the columns
- Add visible columns
- Change the sort order for each column
- Change the number of items viewed per page
See Edit and Configure the Project Modals for detailed information.
10. Nominating Documents as Best Practice
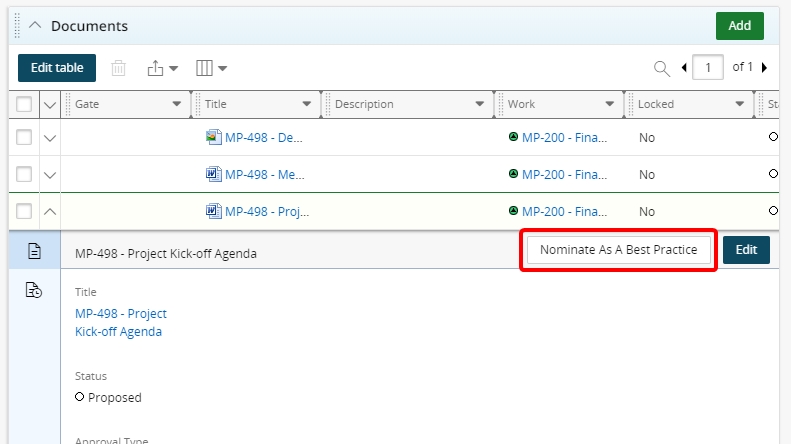
Description: Users can nominate a document as a best practice.
Benefit: Users can designate a document that they feel should be labeled as a best practice by clicking the Nominate as Best Practice button. A star icon appears next to the document indicating that it is worth reviewing as a reference.
See Nominate a Best Practice for detailed information about using the new function.
11. Calculating Cost by Workstation Entry
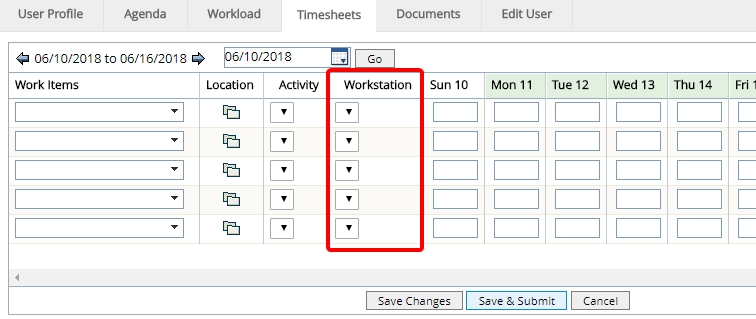
Description: A column has been added for users to specify a workstation.
Benefit: This column allows users to select a specific workstation (with a pre-determined cost associated) for their work hours on their timesheet.
See Enter Time for detailed information about using the new column.
Note: To add this column, please contact your PowerSteering Customer Success Manager.
12. Updating Home Page Sections
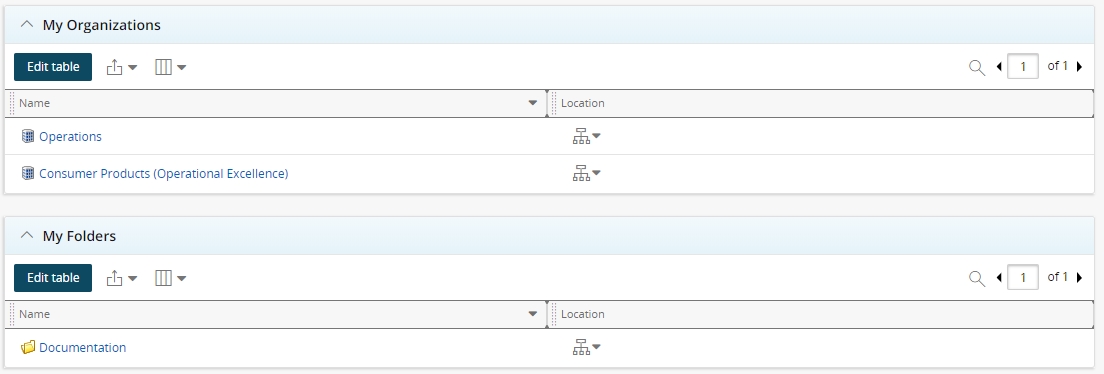
Description: The My Organizations and My Folders sections have been updated to use the new grid.
Benefit: The My Organizations and My Folders section use the same grid layout as the other sections on the Home Page. Users are able to add/remove columns, change column layouts, perform inline editing, and export lists.
See Home Page Overview for detailed information about using the new grid.