The following steps are necessary to establish a connection between PSA and Microsoft Teams:
- Your internal IT department must create an App in Azure which will be used for the integration.
- Access Azure Active Directory
- Register a new application using the Azure portal
- Create a new application secret
- Add API permissions
- Configure Microsoft Teams integration in PSA
Note: Information from this step is needed in step 3 to configure the Integration in PSA.
- The Microsoft Teams integration license in PSA must be turned on. For assistance, please contact PSA Support.
- The integration can then be configured in PSA. For more information refer to Setting up the Integration with Microsoft Teams
This article details the necessary steps in your Azure portal to enable this integration for the step 1 above.
1- Access Azure Active Directory
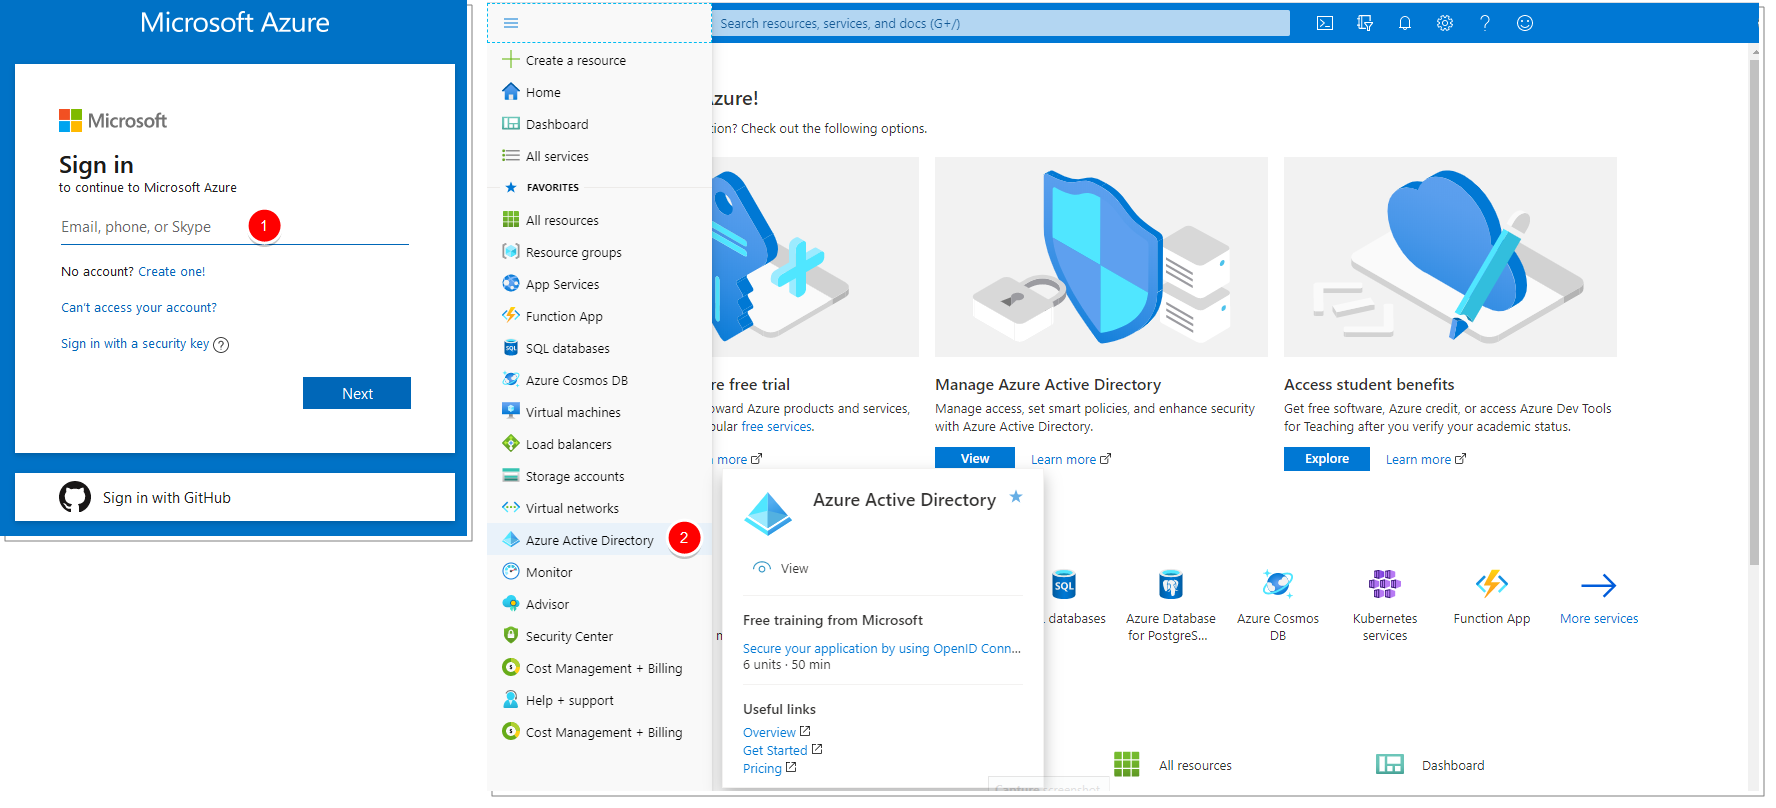
- Go to portal.azure.com and sign in with your account.
- In the left navigation pane in the Azure portal, click Azure Active Directory.
- The Azure Active Directory admin center is displayed.
2- Register a new application using the Azure portal
You must register an application using the App registrations experience in the Azure portal.
The Application (client) ID & Directory (tenant) ID created in this step are necessary when configuring the integration in PSA.
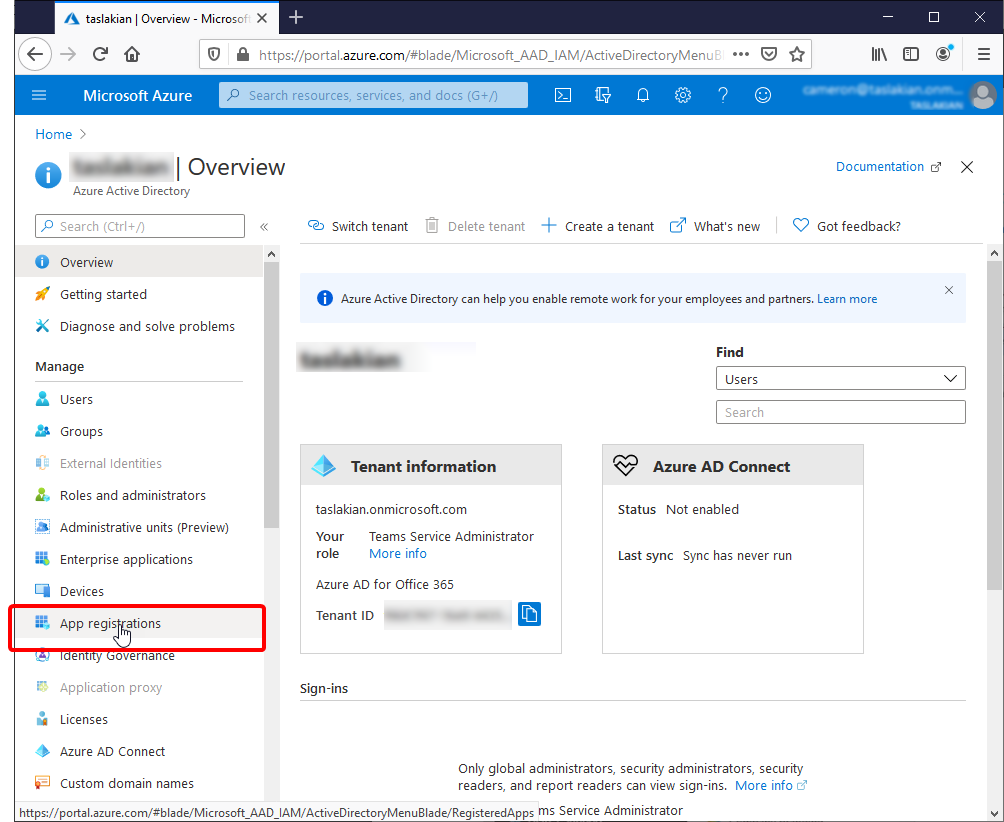
From the Azure Active Directory Overview page select the App registrations option to navigate to the App registrations page.
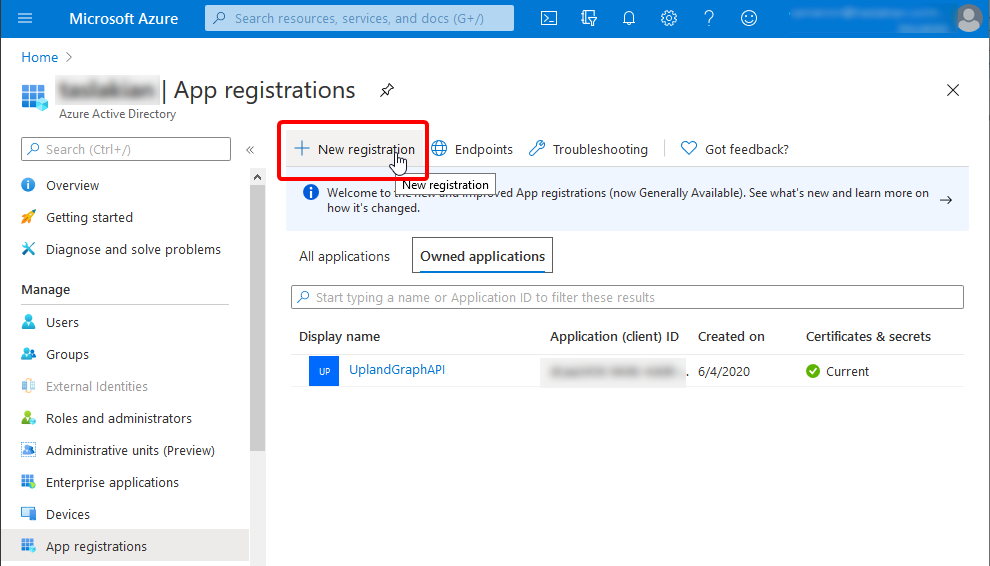
From the App registrations page select the New registration option to navigate to the Register an app page.
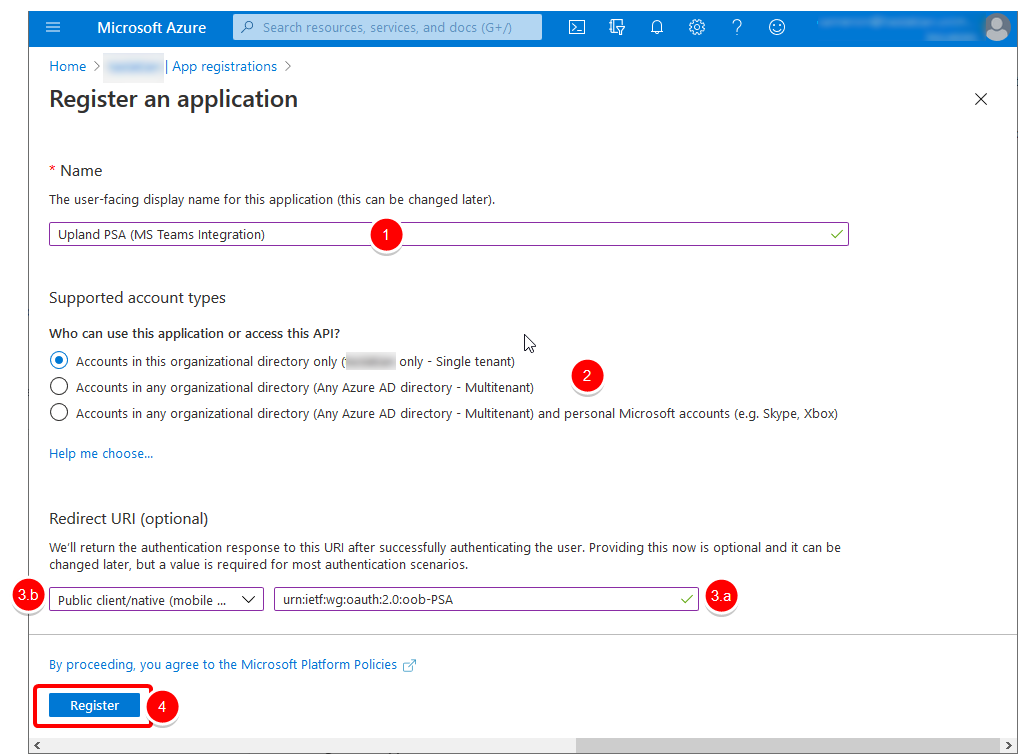
From the Register an application page:
- Enter a meaningful application Name to display to users.
- Specify who can use the application, as follows:
- Accounts in this organizational directory only
- Accounts in any organizational directory
- Accounts in any organizational directory and personal Microsoft accounts
- Under Redirect URI
- Enter
urn:ietf:wg:oauth:2.0:oob-PSAas the Redirect URI. - Then choose the Public client/native (mobile & desktop) option.
- Enter
- When finished, select Register.
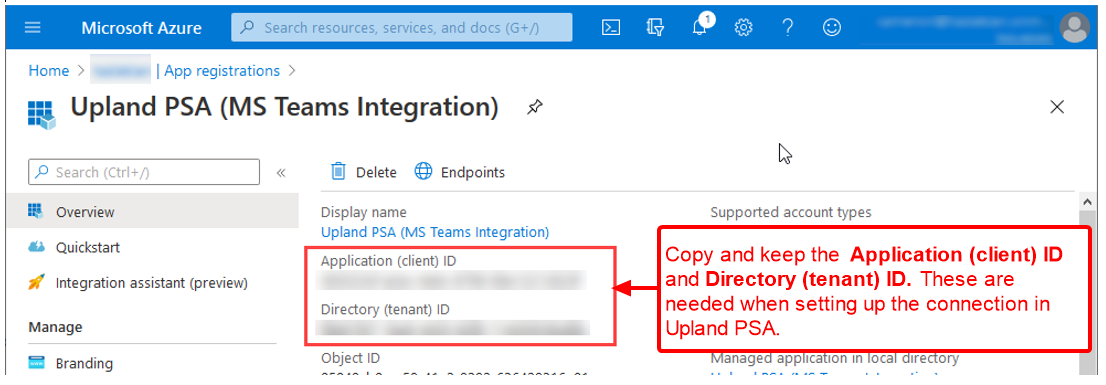
Upon registering the application, the page for this new application will be displayed.
Copy and keep the following necessary information as they are needed when configuring the integration in PSA:
- Application (client) ID: Is used as the Client Id
- Directory (tenant) ID: Is used as the Tenant Id
3- Create a new application secret
An application secret must then be created and upon saving it, the displayed value of the client secret must be copied because you won't be able to retrieve the key later.
This client secret value will be used for the Client Secret when configuring the Microsoft Teams integration in PSA.
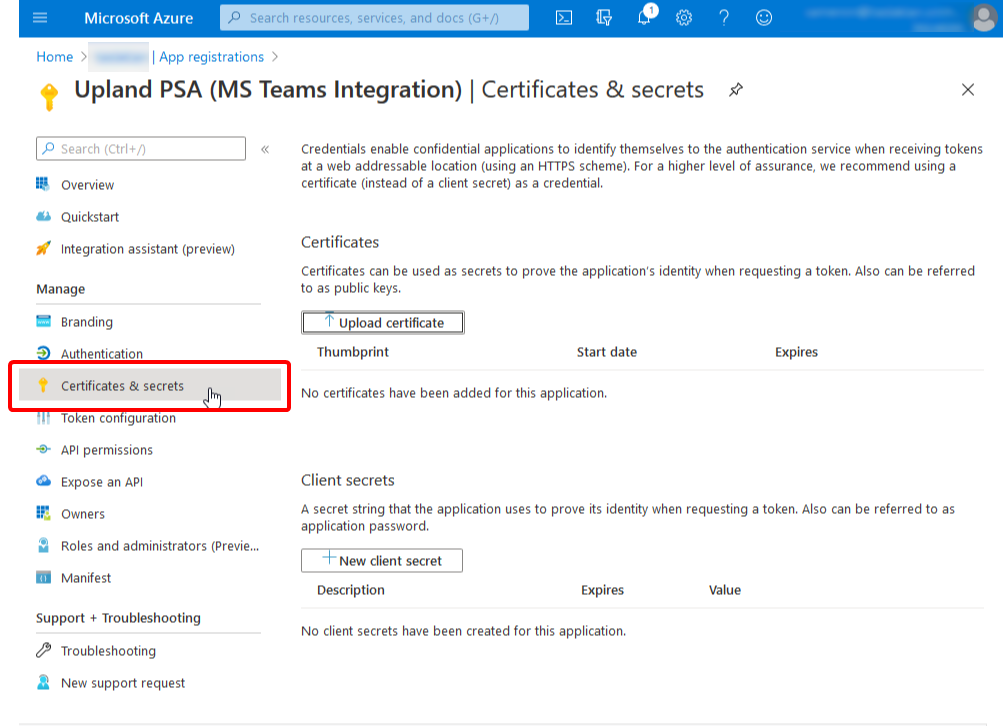
Select the Certificates & secrets menu item to navigate to the Certificates & secrets page for your new application.

Select New client secret to generate a new secret.
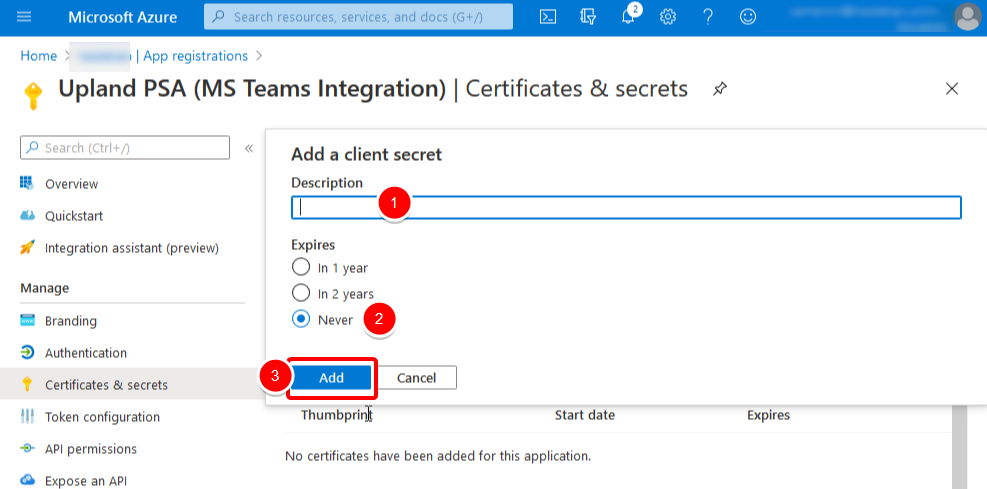
Create a new client secret in the Add a client secret pop-up by providing a description of the secret, and a duration:
- Enter a brief Description
- Select one of the following Expires options:
- In 1 Year
- In 2 Years
- NeverNote: We recommend selecting the option to never expire so the integration configuration does not require updates every year.
- When ready select Add.
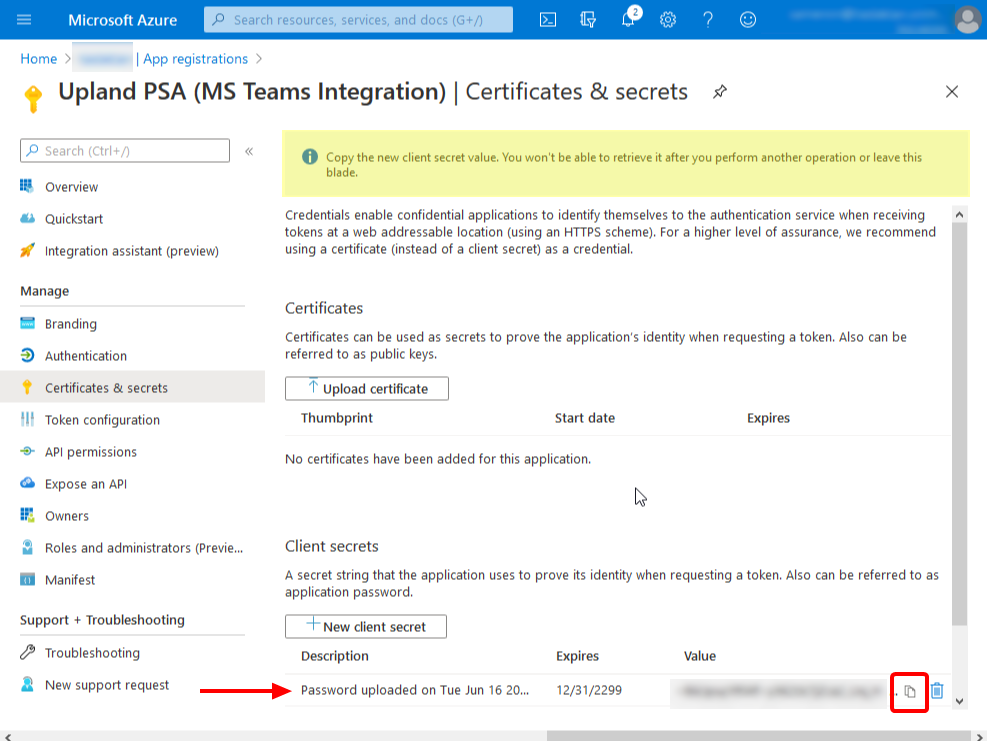
After saving the client secret, the value of the client secret is displayed under the Client secrets section.
The client secret must be copied by clicking the Copy button. This client secret value will be used for the Client Secret when configuring the Microsoft Teams integration in PSA.
Caution: This client secret can be copied once and cannot be recovered after performing another action or leaving the page. New client secrets can be generated if needed.
4- Add API permissions
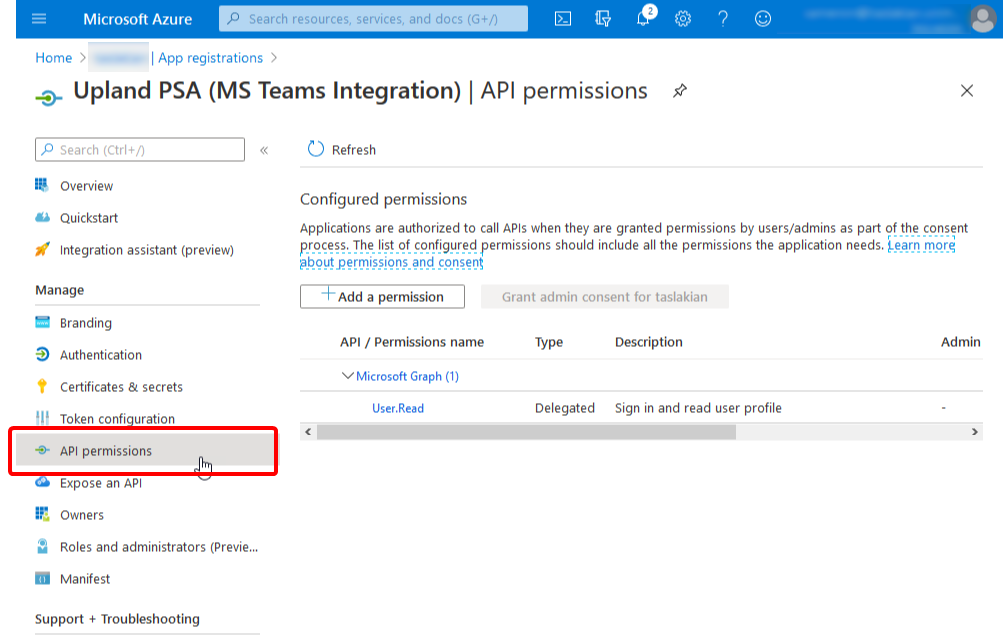
Click the API permissions option from the menu and navigate to the API permission page of the application where the required permissions can be set.
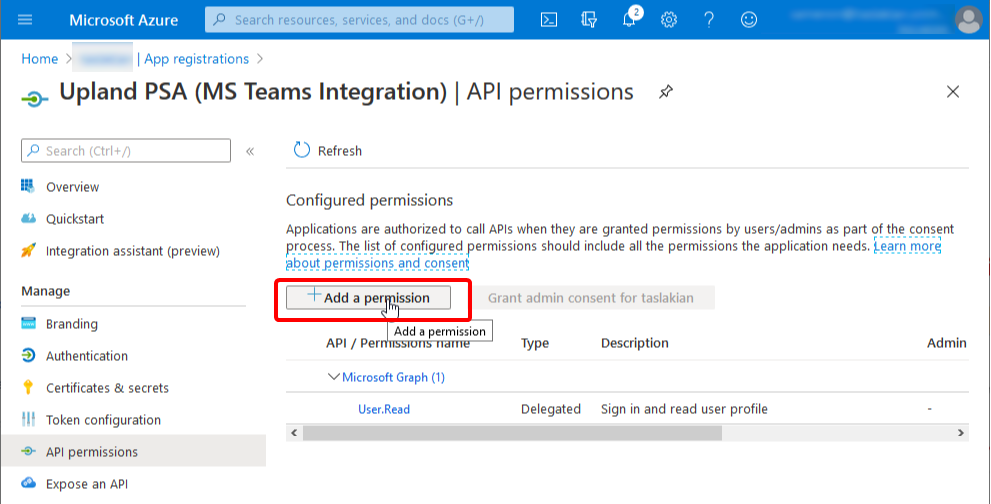
Click the Add a permission button to open the Request API permissions fly-out.
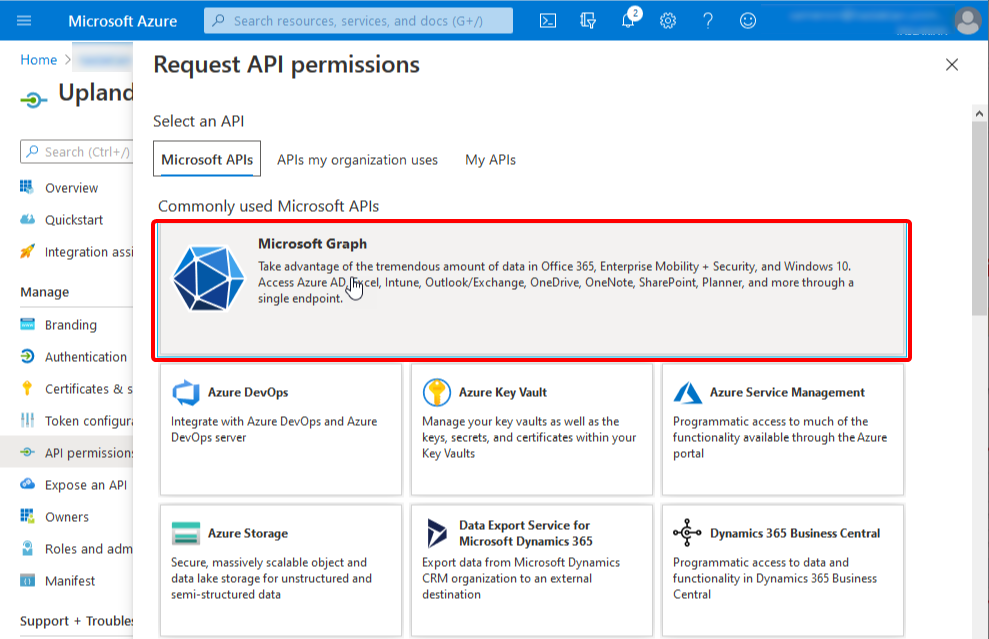
From the Request API permissions fly-out select Microsoft Graph
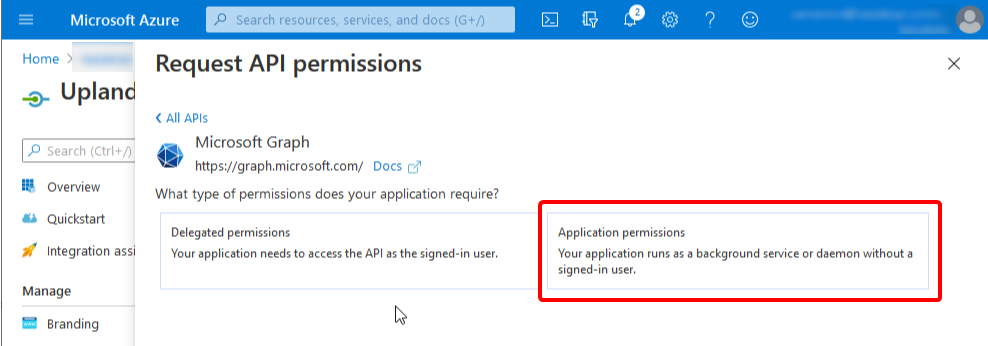
Grant the following permissions:
- Directory.Read.All (Application permissions)
- Group.ReadWrite.All (Application permissions)
- User.Invite.All (Application permissions)
- User.Read.All (Application permissions)
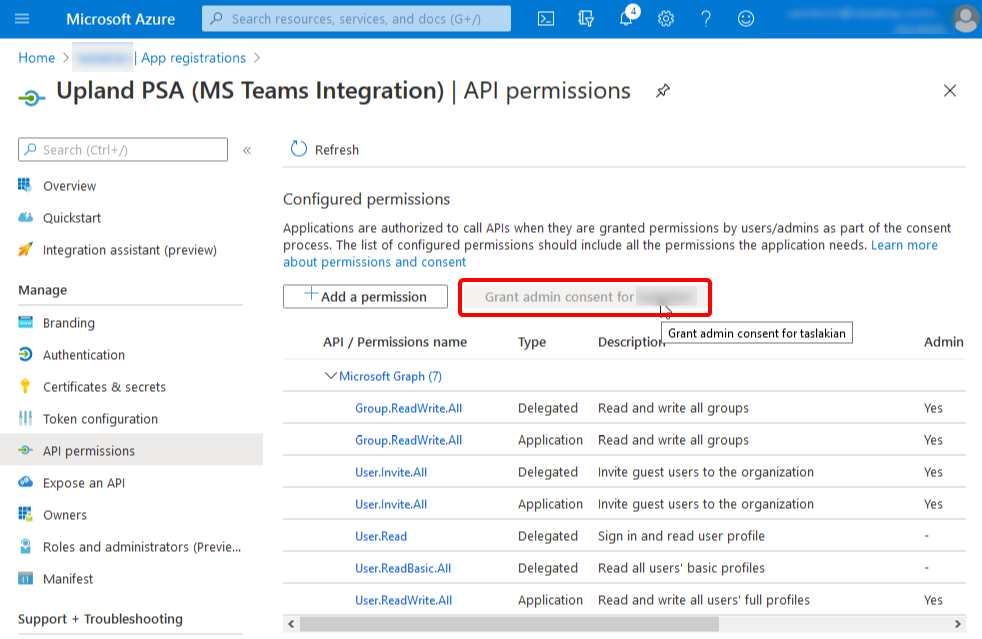
When all permissions have been added to the application an administrator must select the Grant admin consent button.
5- Configure Microsoft Teams integration in PSA
After completing the steps above, the Azure application is now ready to be used as part of the Microsoft Teams configuration in PSA.
You can now follow the steps outlined in Setting up the Integration with Microsoft Teams to configure this integration.