The Documents & Links as well as Notes (where applicable) are managed from the Attachments page.
This article details the Notes tab located within the Attachments page:
Note: When adding a new Note, You must save the Note to be able to access the Note Attachments tab. Refer to Add Attachments to a Note and Add Links to a Note for further details.
Add Note:
- Navigate to the Edit page of the object where you wish to attach Documents and Links.
- Depending on the object either:
- Click the Attachments button.
OR - Click the Attachments link within the menu item.
Note: The screenshots in this article are taken from the User Edit page.
- Click the Attachments button.
- From the Notes tab click New.
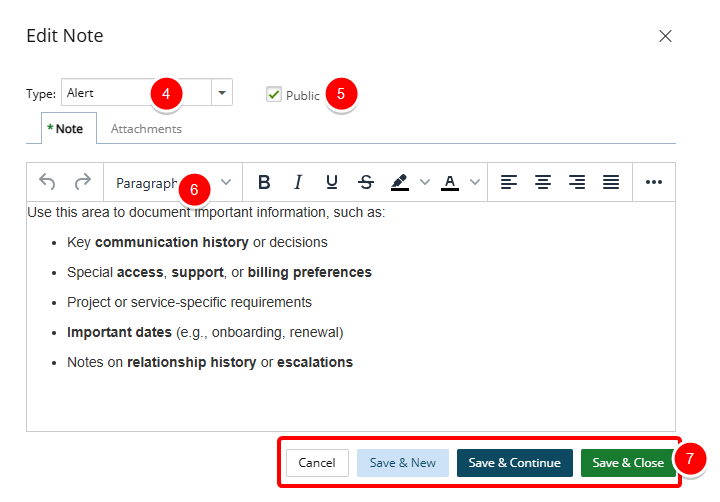
- From the Add Note dialog box select a note Type from the following available options:
- Alert
- Hourly
- Invoice
- Notice
- R&D
- Rejection
- Specifications
- Status
- Decide whether the note should be public or not, and select the Public box accordingly.
- Enter your note in the Note box.
Note: You can customize the message body using the Rich Text Editor. For formatting options and features, see Rich Text Editor.
- Select one of the following:
- Cancel: To cancel your changes and to return to the previous page.
- Save & New: To save the Note and create a new one.
- Save & Continue: To save the Note and continue editing it.
- Save & Close: To save the Note and close the dialogue box.
Caution: When creating a new Note, You must save the Note to be able to access the Note Attachments tab. Refer to Add Attachments to a Note and Add Links to a Note for further details.
Add Attachments to a Note
From the Add Note dialog box, navigate to the Attachments tab.
To attach a document either:
- Click the Add Attachments
 button.
- Click Browse to upload an individual file. You may also attach multiple files by holding down either the CTRL or Shift key, and selecting more than one file.
- Click Open.
- You will see your files appear in the Attachments tab.
- Drag files from your computer to attach them to your Note by following these steps:
- Open File Explorer.
- Navigate to the folder with the documents that you want to upload.
- Drag the files to the space where you see: You can drag and drop any document into this area.
- You will see your files appear in the Attachments tab.

- Click either one of these buttons:
- To Save your note:
- Save & New: To Save the Note and create a New one.
- Save & Continue: To Save the Note and Continue editing it.
- Save & Close: To Save the Note and Close the dialogue box.
- Or click Cancel to Cancel your changes and to return to the previous page.
- To Save your note:
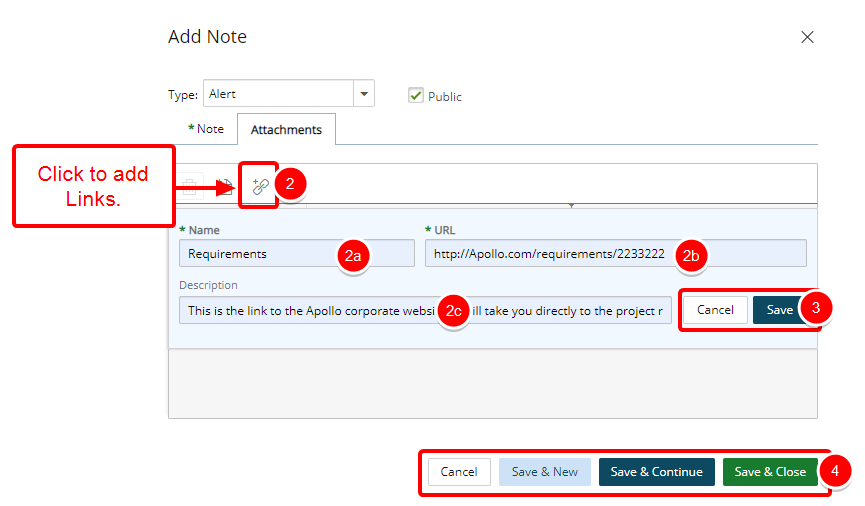
Add Links to a Note
- Click the Attachments tab.
- Click the Add Link
 button and enter the following information:
- Name: Enter the Name of your Link.
- URL: Enter the URL.
- Description: Enter a brief description in the Description box.
Tip: You can click Cancel to cancel the link attachment process and to return to the previous state of the dialog box where you can choose to include an Attachment instead, for example, without the need to close it.
- Click Save or Cancel.
- Click either one of these buttons:
- To Save your note:
- Save & New: To Save the Note and create a New one.
- Save & Continue: To Save the Note and Continue editing it.
- Save & Close: To Save the Note and Close the dialogue box.
- Or click Cancel to Cancel your changes and to return to the previous page.
- To Save your note:
Viewing and Managing Notes
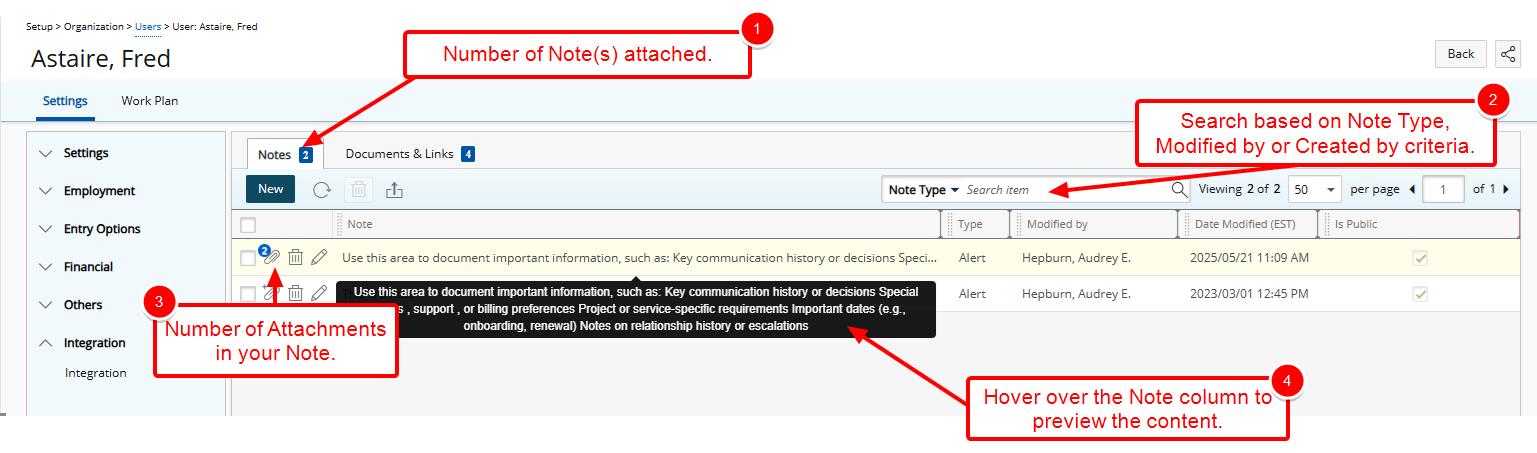
- Note that a counter is present on the Note tab, indicating the total number of Notes present for your User.
- Searches can be performed based on Note Type, Modified by or Created by criteria.
- Upon returning to the Notes tab you will notice a counter on the attachment icon against your Note, indicating the number of attachments.
- Hover over the Note column to preview the content.
Note: Formatting is not displayed in this preview.