Enabling the connection in PSA to Concur
To set up the connection between PSA and Concur, some setup needs to be done in both systems.
Once the configuration has been completed in Concur, you can proceed to enable the connection in PSA, which will allow the integration with Concur. This article covers the process in enabling the connection in PSA. Click here to view the article that defines the type of information required on the Concur Integration page in PSA.
Note: The following are Concur-related articles:
- How do I grant security access to the Concur setup page for a security profile?
- How do I select a system level default expense work type option?
- How do I select a project level default expense work type?
1. Access the Concur Integration page
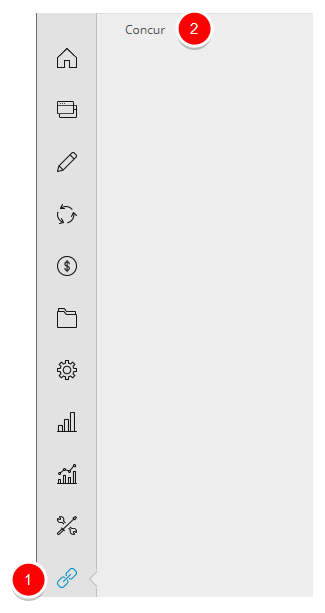
- On the Icon Bar, click the Integrations button, and then select Concur.
Note: The Concur option in the Navigation Menu is visible only with the Concur license enabled and with you, as the logged in user, having been granted functional security rights to access this page.
2. Enter required information
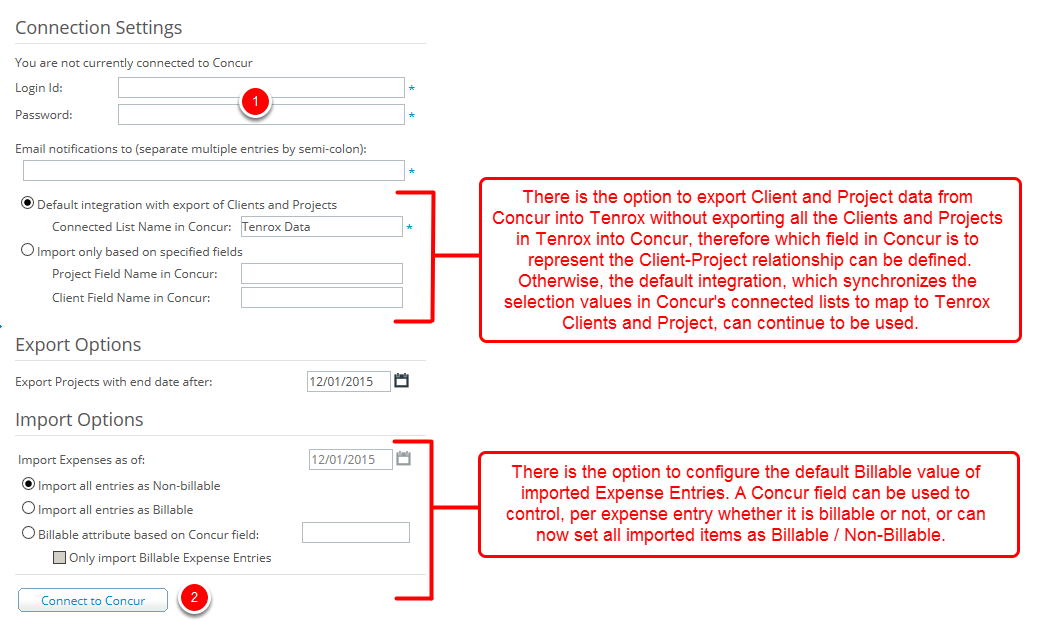
- Enter the required information in the mandatory fields, The Logon Id and the Password are for the Web Services Admin account (for the Concur Professional edition) or for an account with Can Administer rights (for the Concur Standard edition).
- And then click Connect to Concur.
Note: If all the required fields are entered, the following actions will automatically trigger:
- Use the login ID & password, together with the PSA public key to retrieve your token.
- Use the token to validate if the "PSA Data" linked list is configured in Concur
3. Successfully connected to Concur

- View the notification, "Successfully connected to Concur", and the integration settings are saved.
Note: Once the token is obtained and stored, both the login ID and password are no longer required. And, the Concur Expense Tracking Workflow is created.
4. View the page after successfully connected
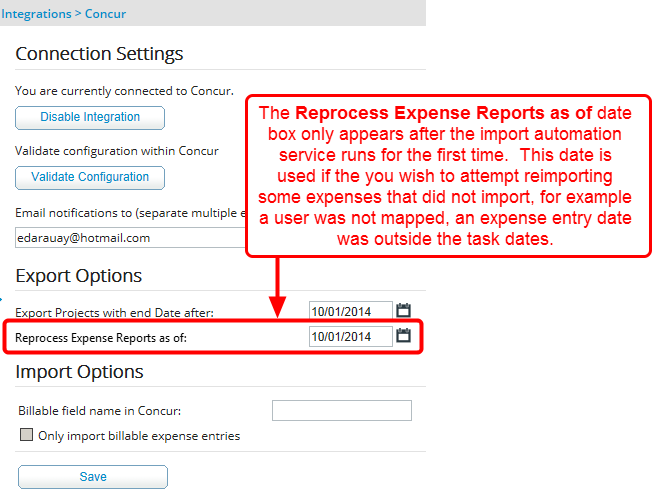
- View the page upon having successfully established connection.
- The Reprocess Expense Reports as of date box only appears after the import automation service runs for the first time. This date is used if the you wish to attempt reimporting some expenses that did not import, for example a user was not mapped, an expense entry date was outside the task dates.
Note:
- The Reprocess Expense Reports as of date will not be useful on reading in historical data because the outdated expenses in Concur will not have the PSA project associated to them, and given they've been paid out long ago, there is no option to modify them in concur.
- With a successful connection, it is now possible to execute other actions when required, including disable the connection, modify the settings (using the Save button) and validate the Concur Configuration in case there are issues later on in the export/import.