Concur Integration Settings
To set up the connection between PSA and Concur, some setup needs to be done in both systems.
Once the configuration has been completed in Concur, you can proceed to enable the connection in PSA, which will allow the integration with Concur. This article defines the type of information required on the Concur Integration page in PSA (Connection Settings and Integration Options), which is where the connection to Concur is established. Click here to view the article on the process of enabling the connection in PSA.
Note: The following are Concur-related articles:
- How do I grant security access to the Concur setup page for a security profile?
- How do I select a system level default expense work type option?
- How do I select a project level default expense work type?
Connection Settings (required)
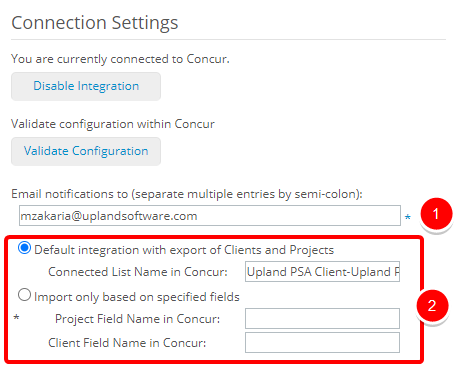
- Email notifications to (separate multiple entries by semi-colon): This box allows entry of email addresses, the recipients of whom are to receive the log of errors. Multiple email addresses can be entered, separated by semi-colons (;).
- Select either:
- Default integration with export of Clients and Projects:
- Enter the Connected List Name in Concur: the Field names in Concur separated by a dash "-"
- Import only based on specified fields:
- Enter Project Field Name in Concur
- Enter Client Field Name in Concur (optional)
- Default integration with export of Clients and Projects:
Export Options (optional)

- Export Projects ending after: The earliest end date for Projects to be exported. By default, the current date is selected.
- Remove project from Concur when PSA Project is suspended: When selected, suspended projects in PSA are removed from Concur when Export Projects to Concur Automation Service is run.
Import Options (optional)
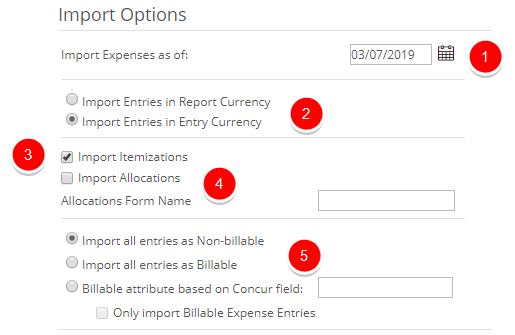
- Import Expenses as of: The earliest end date for Projects to be Imported. By default, the current date is selected.
- Select whether to:
- Import Entries in Report Currency
- Import Entries in Entry Currency
- Import Itemizations: Select if you want to Import Itemizations
- Import Allocations: Select if you want to Import Allocations
- Allocations Form Name: Enter the Allocations Name to import
- Select whether to :
- Import all entries as Non-billable
- Import all entries as Billable
- Billable attribute based on Concur field: Enter the Field Name then select whether or not to: Only import Billable Expense Entries