Approving a Timesheet Through the User Timesheet Page
This article covers approving a Timesheet from the User's Timesheet page.
Note: You can also approve or reject a time entry within a user Timesheet selectively. For more information, click here.
- From the Icon Bar click Entries
 .
. - From the Navigation Menu click Timesheet Manager.
- From the Timesheet Manager page select a Timesheet by clicking the User Name, Id, Group, Start Date or End Date.
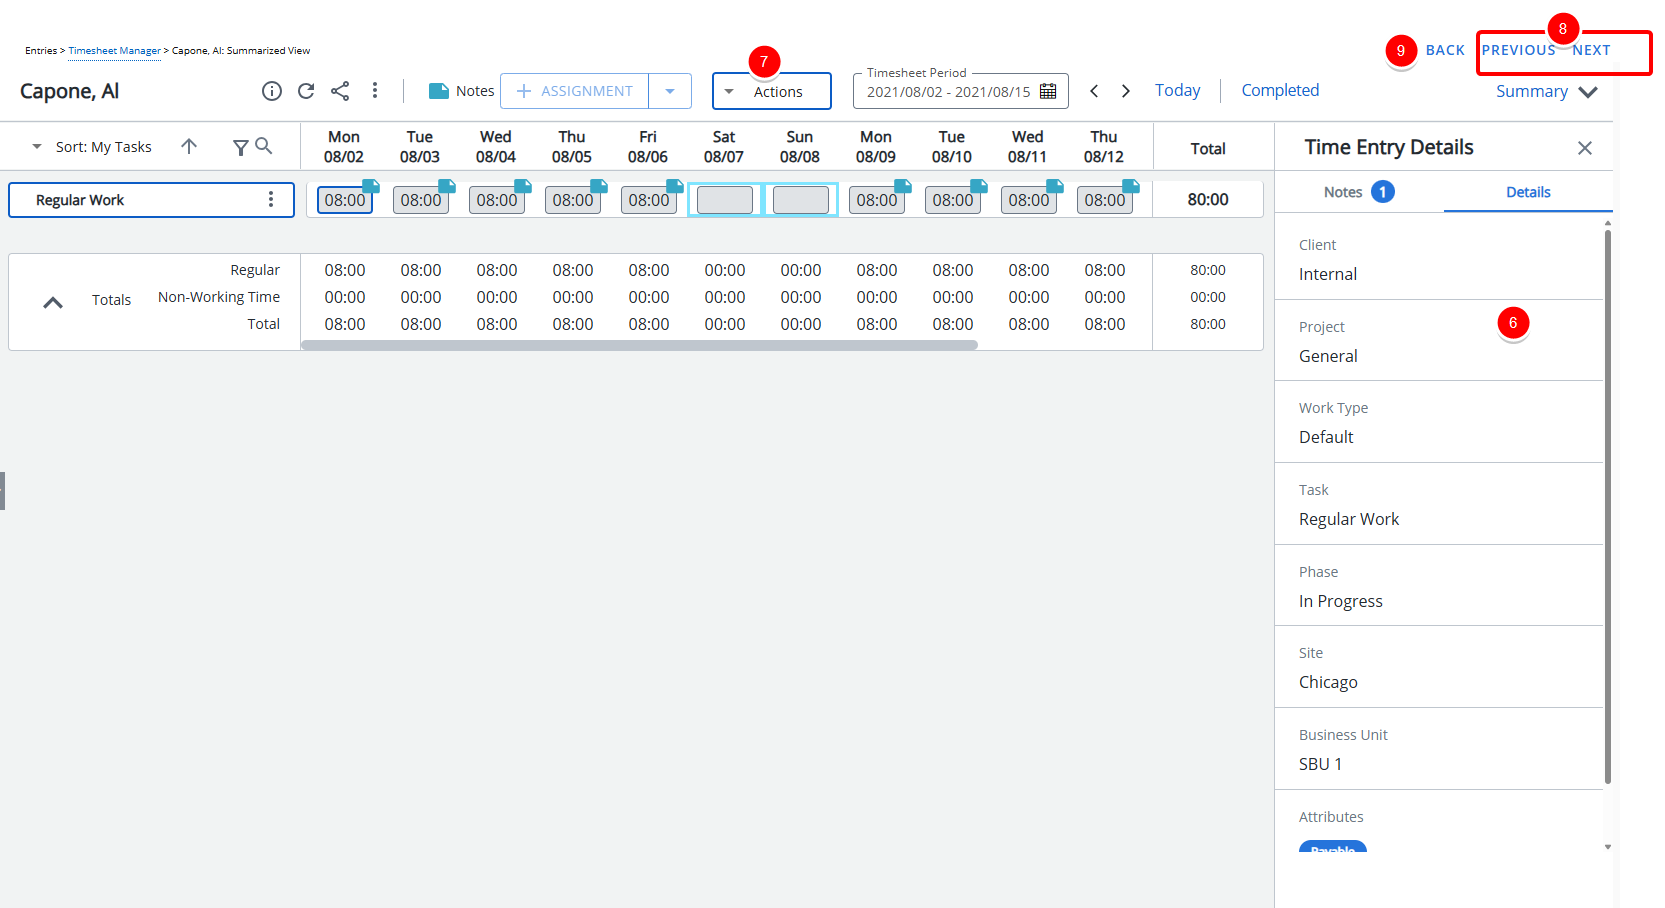
- Review the User's Time Entries.
- Use the tab key to navigate between Time Entry cells.
- As you navigate between cells, the right panel is also refreshed to show the relevant data based on the currently selected cell.
- Click Actions and then choose Approve.
Note:
- Only timesheets in a Completed State, can be approved.
- The Approve link may vary between managers as per their assigned rights.
- You can navigate through your list of Timesheets (as listed on the Timesheet Manager page) by clicking the Previous/Next links.
Note: The right panel remains open during the current session and retains the selected tab when navigating between Timesheets using the Next and Previous buttons.
Example: If a Timesheet approver opens the panel and views the Notes tab, the system will remember this selection within the current session and keep the panel open on the same tab when moving to the Next or Previous Timesheet.
Caution: The Pin Right Panel On setting in the Timesheet Template assigned to the logged-in User takes precedence. To enable session-based panel behavior, this setting must be turned off.
- Click Back to return to the Timesheet Manager page.