This article covers how to create a Leave Request.
Note: The pages and/or format in which the page(s) is/are shown in this article may differ from yours as your organization may have required a different set up altogether.
- Upon accessing the Leave Request Manager page, click the Create Leave Request button.
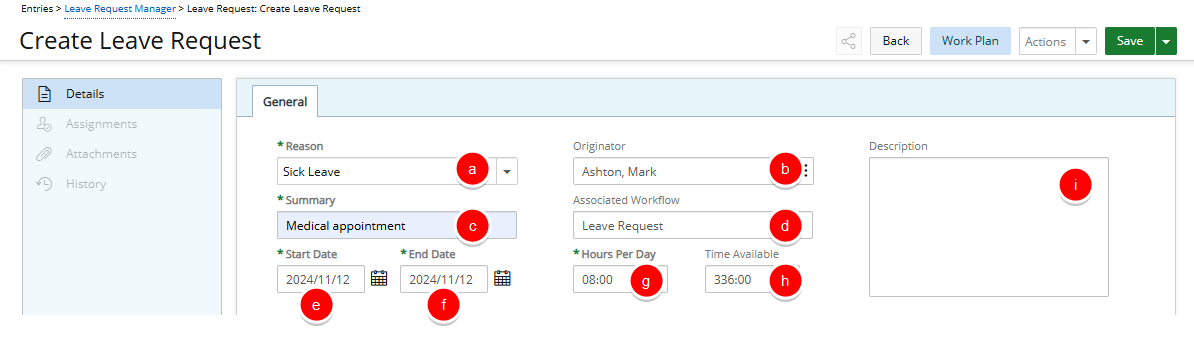
- Enter and select applicable general information:
- Reason: Click to select a Reason from the list of available options.
- Originator: Select the Originator of the Leave Request.
- Summary: Enter a Summary for the Leave Request (maximum of 255 characters with spaces).
- Associated Workflow: Default value (Read only).
- Start Date: Enter or select the Start Date of your Leave Request.
- End Date: Enter or select the End Date of your Leave Request.
- Hours Per Day: Enter the number of Hours Per Day if different from the Default value as set in the Timesheet Template.
- Time Available: Default value (Read only).
- Description: Enter a Description for the Leave Request (maximum of 255 characters with spaces).
- Click Save to create the Leave Request or Back to discard your changes. Selecting this option will save the Leave Request without exiting the Leave Request edit page.
You can optionally click the arrow button open the Save context menu. The available options from the Save context menu are:- Save & Close: Selecting this option will save the Leave Request and close the Leave Request edit page.
- Save & New: Selecting this option will save the Leave Request and close the Leave Request edit page giving you the option to create a new one.
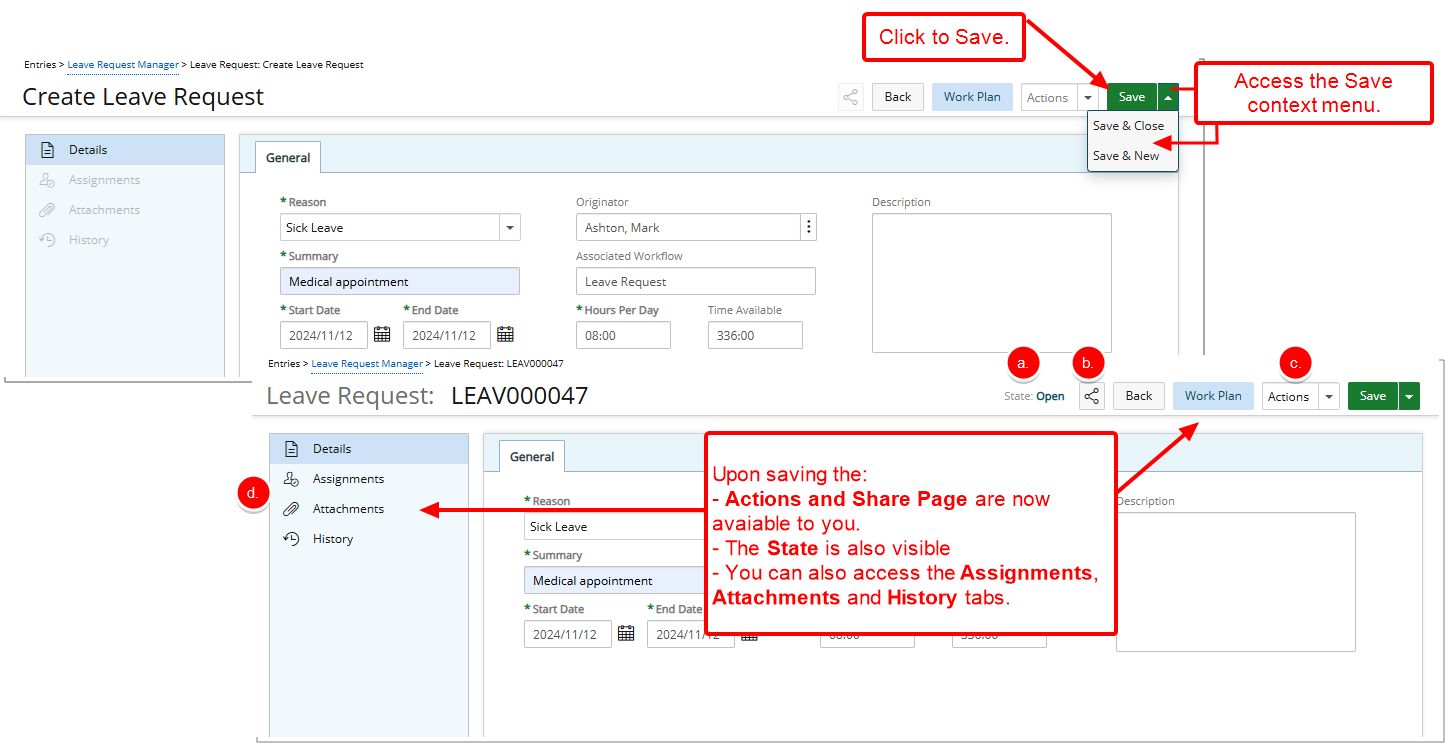
- Upon saving:
- The current State of your Leave Request is now visible.
- You can Share the Leave Request with your manager.
Note: When a Leave Request is opened via the Share functionality, the Workflow State is also displayed, providing managers with immediate insight into the current State of the request.
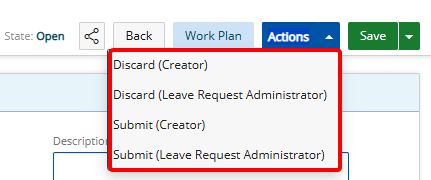
- You can also move the Leave Request to the next State via the available Transitions located under the Actions button.
- The Leave Request navigation menu items Assignments, Attachments and History are enabled.
- Click Assignments to view a list of the workflow States as well as the Assigned to information.
Note: You can modify the Assignments, provided you have the proper permissions.
- Click Attachments to create or manage Notes and Attachments. For more details refer to Adding Note(s) & Note Attachment(s) to Leave Requests.
Note:
- You can add attachments and Notes, provided you have the proper permissions.
- When creating a new Note, You must save the Note to be able to access the Attachments tab.
- When Public is selected, any user with access to manage Leave Requests can view the Note, Link or Attachment.
- All previous Actions and State changes will be listed in the History tab.
- Click the Actions button at any time to view the available transitions, which allow you to move the Leave Request to the next State. The available Actions depend on your Role and assigned permissions..