You can personalize your view in the Leave Request Manager by adding or removing columns to display only the information relevant to you. This flexibility helps you focus on the most important details.
This article details how to adjust the visible columns to streamline your review and management of Leave Requests.
Note: The pages and/or format in which the page(s) is/are shown in this article may differ from yours as your organization may have required a different set up altogether.
- From the Icon Bar click Entries
 .
. - From the Navigation Menu click Leave Request Manager.
- Upon the Leave Request Manager displaying, click Column Selection
 button.
Tip: For a detailed list of all available Column selection options refer to the Column Selection Options | Leave Request Manager article.
- Select the item from the Available Columns list.
- Click the arrow to add it to the Selected Columns list.
- View the added item in the Selected Columns list.
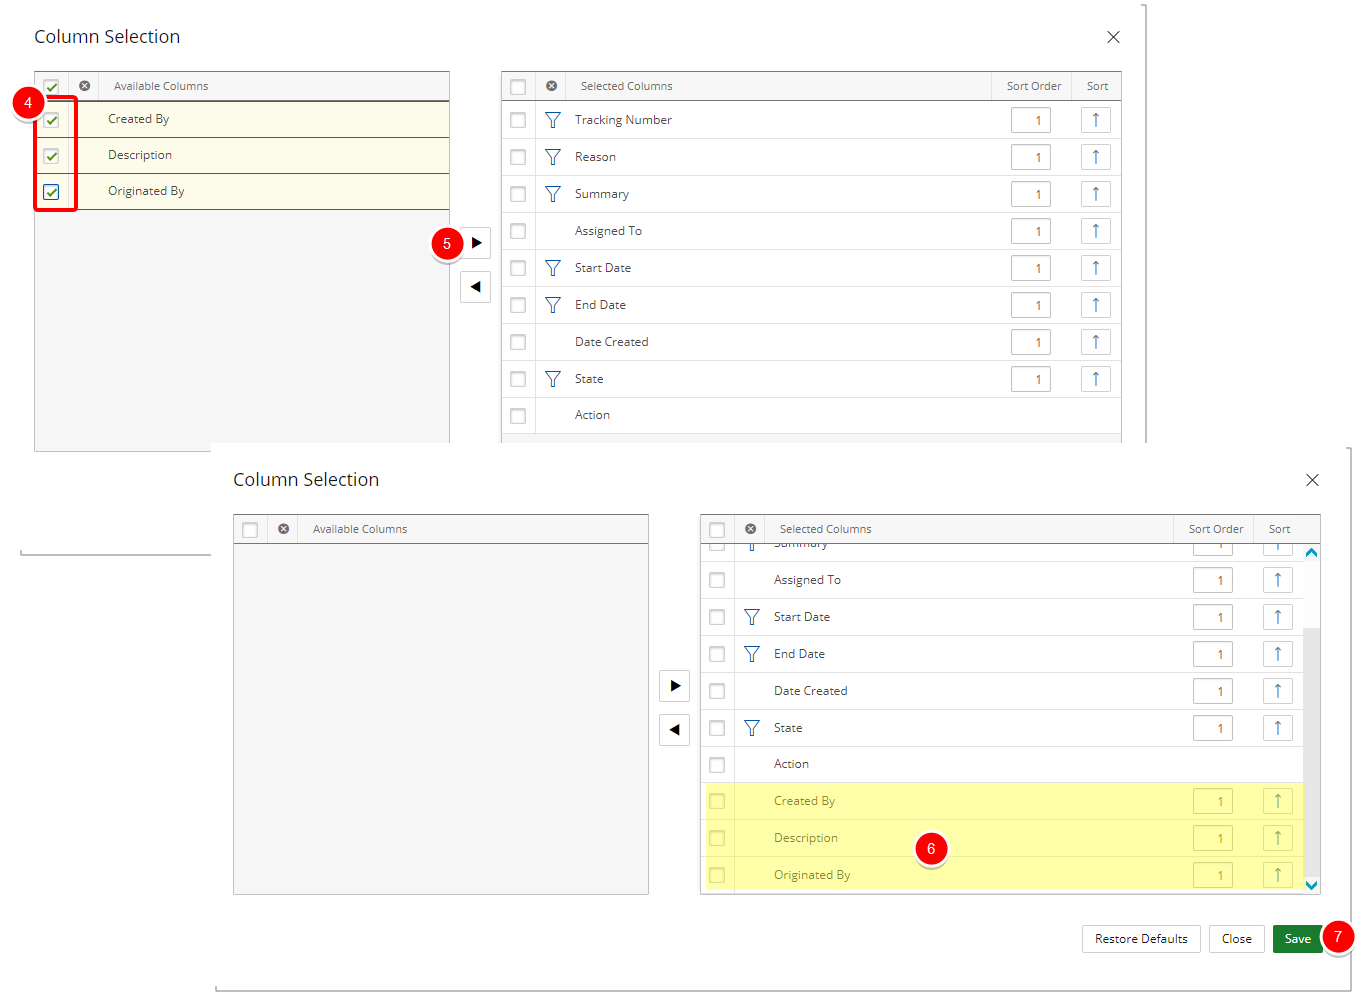
-
Click Save to save your modifications and to return to the Leave Request Manager page.
- View your saved modifications on the Leave Request Manager page where the added columns are now displayed.
