This article covers expanding/contracting the rows of the Financial Planner.
- From the Icon Bar click Project List
 .
. - From the Project List page, select the Project you wish to edit by following one of these steps:
- Click the Project context menu button
 to expand it. From the available options click Edit.
OR - Click the name of the Project you wish to access.
Tip: Use the search capability for an efficient way of finding the specific project. For further details refer to Searching for a Project within the Project List page.
- Click the Project context menu button
- From the Project Edit page, hover your mouse over the Planners tab and select Financial Planner from the available options.
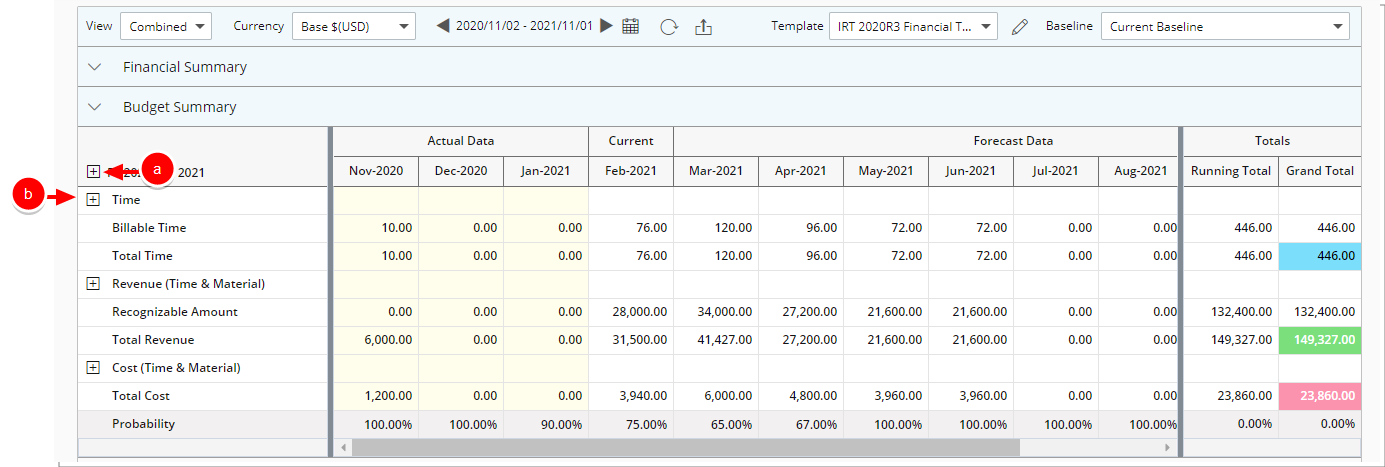
- Click the respective Expand
 / Collapse
  icon based on what you wish to be displayed/hidden:
- Click the Expand / Collapse icon to the bottom left-hand corner of the Financial Planner to expand or collapse all rows simultaneously.
- Click the Expand / Collapse icon to the left of the section or category name(s) to display/hide all categories under the given section or items under the given category.
- Click the Expand
- View your expanded/collapses sections/categories:
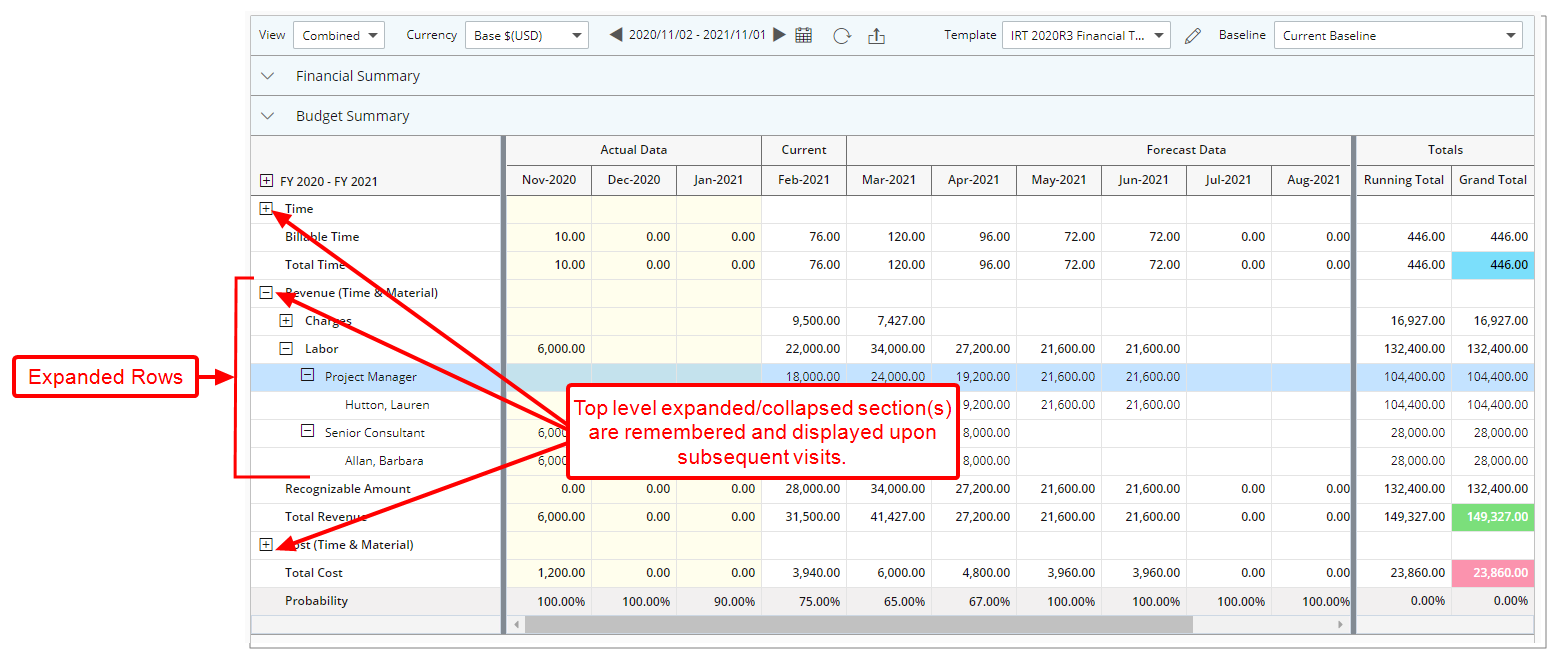
Note: When expanding/collapsing the top level section(s) within the Financial Planner, your selection will be remembered and displayed upon subsequent visits to the page using the same Browser until modified. Note that expanded/collapsed categories/subcategories are not remembered upon subsequent visits.