The Financial Planner allows you to compare saved Baselines and current/forecasted values. This article details saving a Baseline within the Financial Planner.
- From the Icon Bar click Project List
 .
. - From the Project List page, select the Project you wish to edit by following one of these steps:
- Click the Project context menu button
 to expand it. From the available options click Edit.
OR - Click the name of the Project you wish to access.
Tip: Use the search capability for an efficient way of finding the specific project. For further details refer to Searching for a Project within the Project List page.
- Click the Project context menu button
- From the Project Edit page, hover your mouse over the Planners tab and select Financial Planner from the available options.
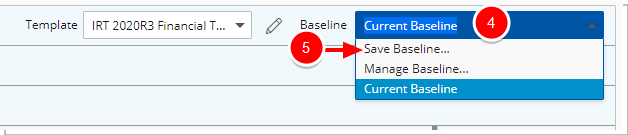
- Click the Baseline list box.
- Click Save Baseline, which opens the Save Baseline dialog box.
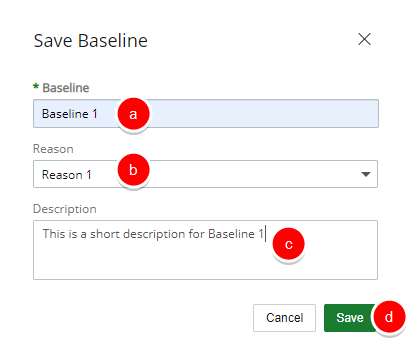
- Enter Baseline information:
- Upon the Save Baseline dialog displaying, enter the Baseline name.
- Select the Reason and additional information in the Description box.
- Click Save Baseline, which will save all three views and its data (Forecast, Actuals and Combined).
- .Click Close to return to the previous page.
- The newly added Baseline can be accessed by click the Baseline list box. Then selecting the baseline name.
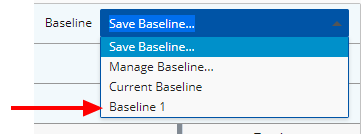
Tip: You can manage your baselines by selecting the Manage Baseline option.