You can choose the date range while running the Financial Planner without the need to modify the associated Template.
You can select a From and To date or select one of the predefined available date Filters. The Start and End dates will be adjusted to fall within the chosen Calendar Period associated to the Template, for a maximum of 36 periods.
This article details how to choose the date range while running the Financial Planner.
- From the Icon Bar click Project List
 .
. - From the Project List page, select the Project you wish to edit by following one of these steps:
- Click the Project context menu button
 to expand it. From the available options click Edit.
OR - Click the name of the Project you wish to access.
Tip: Use the search capability for an efficient way of finding the specific project. For further details refer to Searching for a Project within the Project List page.
- Click the Project context menu button
- From the Project Edit page, hover your mouse over the Planners tab and select Financial Planner from the available options.
- Upon the Financial Planner displaying note the current rendered date range which is based on the setting of the Financial Planner Template.
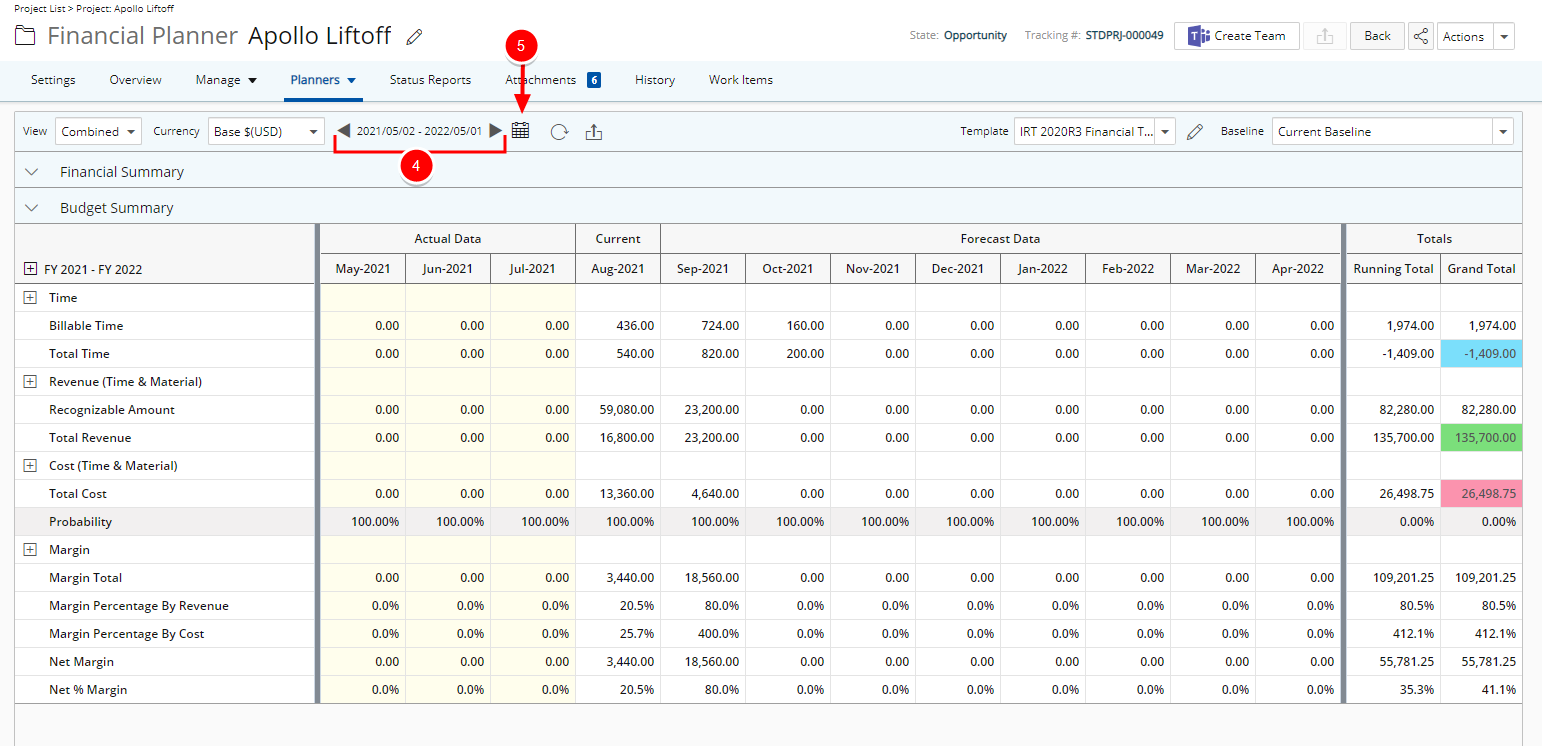
- Click the date picker
 button to access it.
 - Select either a predefined date Filter based on: Today, This Week, Last Week, This Month, Last Month, This Quarter, Last Quarter, This Year, Last Year, Year to Date, This Fiscal Year, Last Fiscal Year, Fiscal Year To Date or Custom
In our example we are going to choose Custom and then pick January 1st 2021 and July 31 2021 as the respective Start and End Dates.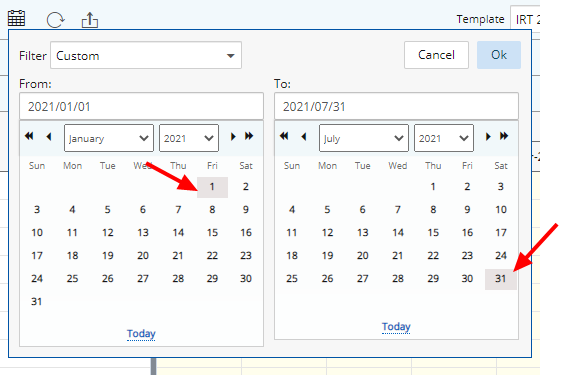
- Click OK.
- The Date Picker window will close and the Financial Planner page will be refreshed. Note that the Start and End dates will be adjusted to fall within the chosen Financial Calendar Period associated to the Template, for a maximum of 36 periods.
