The Summary section allows you to view a summary overview of your Project as defined in the Summary Setup page accessed through Setup > Work > Project Overview.
This article covers adding the Summary section to the Project Overview page.
- From the Icon Bar click Setup
 .
. - From the Navigation Menu click Work to expand the corresponding menu.
- From the Work menu items, click Project Overview.
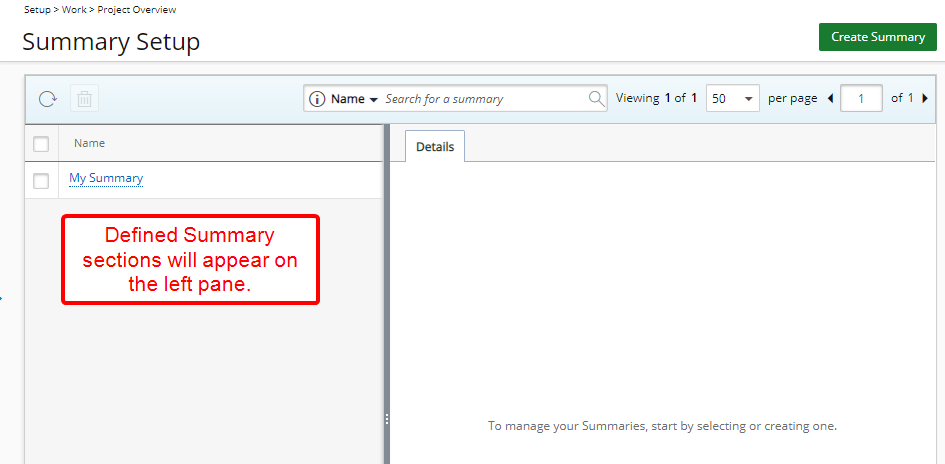
- Within the left pane of the Summary Setup page you will see the previously defined Summary sections.
- The right pane will initially be empty until you select an existing summary to edit it or click on Create Summary to add a new one.

- Click Create Summary.
- You will see a mandatory Name box in the details tab. Enter a Name.

Note: Summary name must be unique.
- Click Save. Note that upon saving the Summary section, you can now add a Filter and define the Layout.
- Adding a Filter (Optional)
- From the Details tab, click the Add
 icon to add a Filter.
 - A new inline editing line item will be added to the table. Make your selection as necessary
- Field Name: You can choose from:
- Portfolios - One or more Portfolios can be selected at the same time.
Note: Suspended or Placeholder Portfolios cannot be selected.
- Project Workflows - One or more Project Workflows can be selected at the same time.
Note: Suspended or Placeholder Project Workflows cannot be selected.
- UDFs - All UDFs of type Selection associated to the Project .
- Portfolios - One or more Portfolios can be selected at the same time.
- Condition: Select the Condition to apply the Filter on.
- Available options for Portfolios and Project Workflows are: In and Not In.
- Available options for UDF Fields tare: Equal to, Not equal to, Like, Not like, In and Not In
- Value: The Value options depend on the selected Field Name and can be either a Browse a combo box or a selection.
- Field Name: You can choose from:
- Click Save
 to save the Filter settings.
Note: The Filter selected here defines whether or not the Summary Layout you are creating/editing will be available/visible on a given Project Overview page. For example, if the given Summary Layout should only be visible for projects associated to the "Standard Project" Workflow, then select the Workflow with a condition In "Standard Project".
- To define a Layout click the Layout tab.
- Drag the available Layout options From the Available Fields to the Layout area and place them as necessary. You can choose from all User Defined Fields as well as the System Fields listed here to define your Summary Layout.

Caution: At least one Field must be added to the Layout for the Summary layout option to appear on the Project Overview page.
- Drag the available Layout options From the Available Fields to the Layout area and place them as necessary. You can choose from all User Defined Fields as well as the System Fields listed here to define your Summary Layout.
- Click Save to apply your changes.
- View your changes:
- From the Icon Bar click Project List
 .
. - From the Project List page, select the Project you wish to edit by following one of these steps:
- Click the Project context menu button
 to expand it. From the available options click Edit.
OR - Click the name of the Project you wish to access.
Tip: Use the search capability for an efficient way of finding the specific project. For further details refer to Searching for a Project within the Project List page.
- Click the Project context menu button
- From the Project Edit page, navigate to the Overview tab.
- Select the newly created Summary Section from the list of available options to see your changes:

Note:
- The selected Summary View Layout will be remembered by the system and displayed the next time you visit the Project Overview page.
- Upon Exporting the Project Overview page to Excel, the select Summary information will be exported.
- From the Icon Bar click Project List