The Rates History can be accessed by clicking the history (![]() ) button located against a Resource or Role name.
) button located against a Resource or Role name.
This article details how to access the Rates History page and the available options.
Accessing and Viewing the Rates History page
- From the Icon Bar click Project List
 .
. - From the Project List page, select the Project you wish to edit by following one of these steps:
- Click the Project context menu button
 to expand it. From the available options click Edit.
OR - Click the name of the Project you wish to access.
Tip: Use the search capability for an efficient way of finding the specific project. For further details refer to Searching for a Project within the Project List page.
- Click the Project context menu button
- From the Project Edit page, hover your mouse over the Manage tab and select Project Team from the available options.
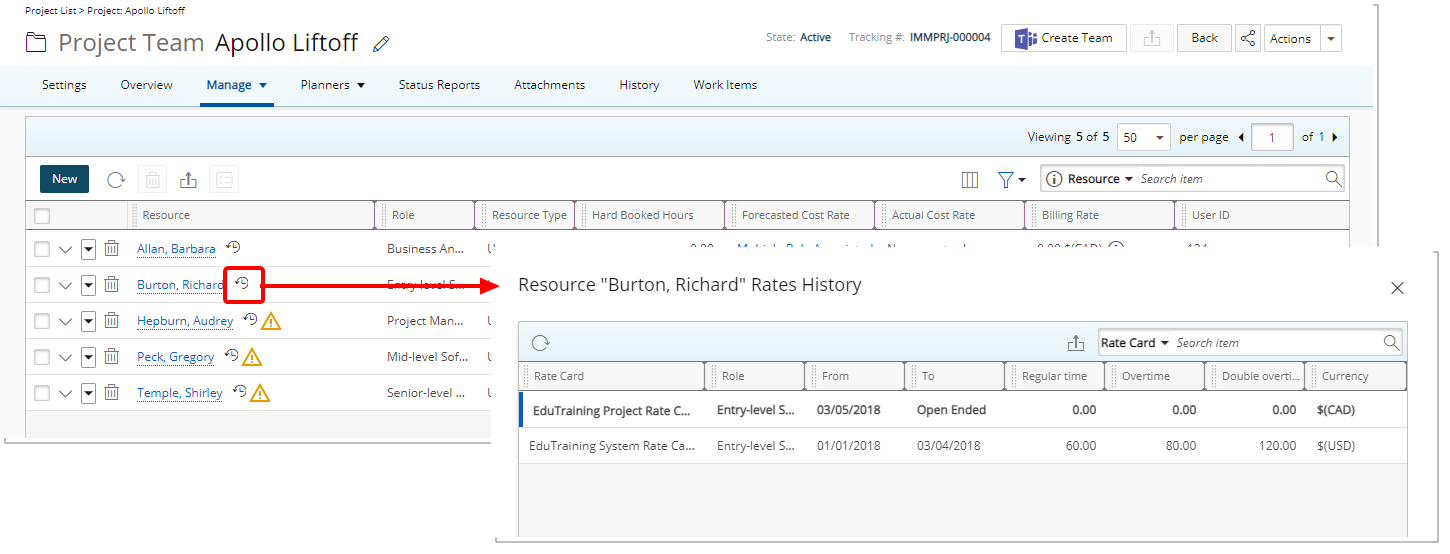
- View the list of Resources/Roles assigned to the Project Team.
- When the Project has a Rate Card association, you can access the resource or role's Rates History by clicking the history (
 ) button located against their name.
Available options from the Rates History page
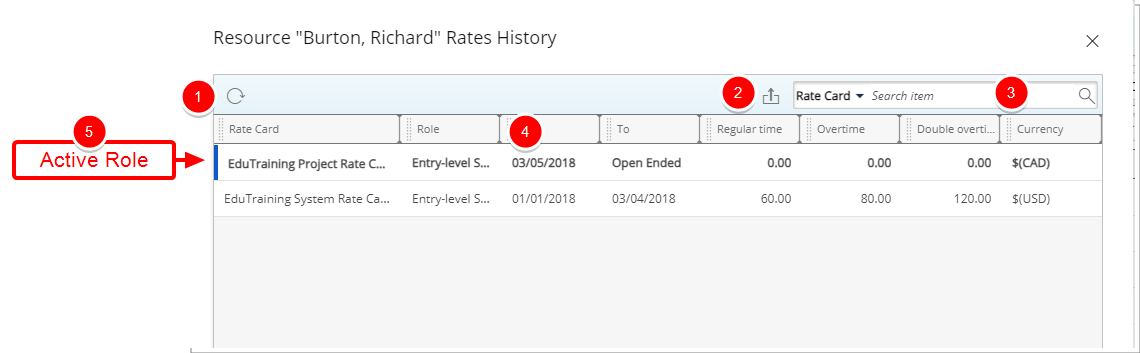
- Click the Refresh
 button to refresh the list.
 - Click the Export
 button to export the list to Excel.
 - Click the Search down arrow (), select a criterion and then enter the corresponding value. Then either click the Search
 button or the [Enter] key. The following criteria are available: Role, From, To, Regular Time, Overtime, Double overtime, Currency and Rate Card.
 - From the table headers:
- You can easily sort the columns by ascending or descending order simply by clicking a column header. Note that an arrow indicates the descending (
 ) or ascending (
 ) order applied to the column.
 - You can dynamically resize column(s), to your preferred width. Simply move your cursor to the column boundary
 you want to resize. When the cursor becomes a resize cursor, click and drag the column accordingly.
 - Click
 and move a column to the desired position.
- You can easily sort the columns by ascending or descending order simply by clicking a column header. Note that an arrow indicates the descending (
- Active Role is highlighted in a bold font. Furthermore, a blue bar located at the beginning of the row also differentiates it from the other roles.