Project Budget Baselines
Project Budget Baselines provide a valuable way to track and compare budget changes throughout the life of a Project. With support for multiple baselines, you can save and manage several snapshots of your Project Budget, each reflecting key financial milestones or adjustments—such as contract updates, scope changes, or revised cost estimates.
Baselines can be created for Project, Task, Assignment, and Role-based Budgets, offering flexibility across various budgeting approaches. These baselines can be referenced at any point, allowing you to measure Project progress against original or previously approved Budget states.
This article guides you through the process of creating, viewing, and managing baselines within the Project Budget page.
Project/Task/Assignment or Role based Budgets.
Creating Baseline(s)
Use the following steps to create a Project Budget Baseline. While this process outlines how to create an individual baseline, you can repeat these steps to define multiple baselines over the course of a project. Each baseline serves as a snapshot of your budget at a specific point in time, enabling you to track financial changes and compare historical data as the project evolves.
- Access the Project Budget page.
- From the left-hand panel, select the name of the required Project, Task, or Assignment where a budget is already defined.
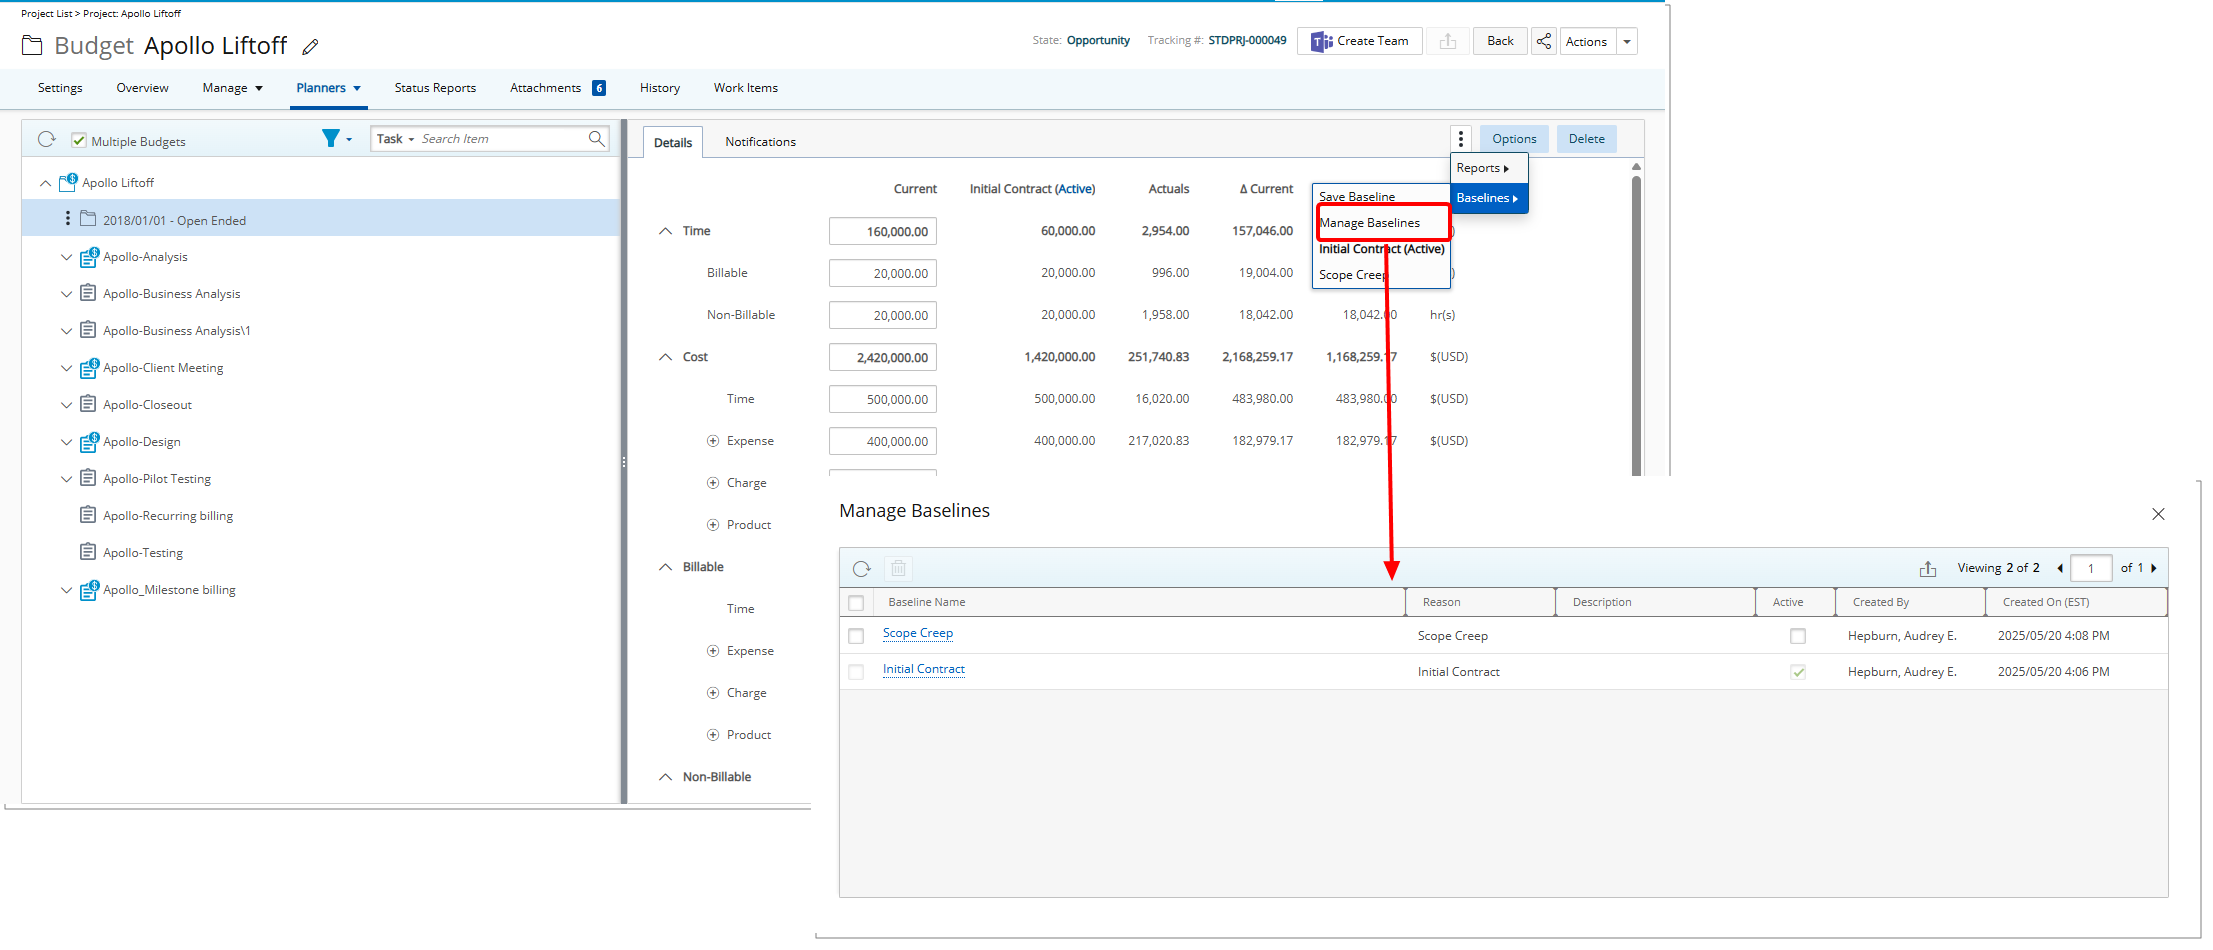
- From the right pane click the context menu
 .
. - From the available options click Baselines. Then choose Save Baseline.
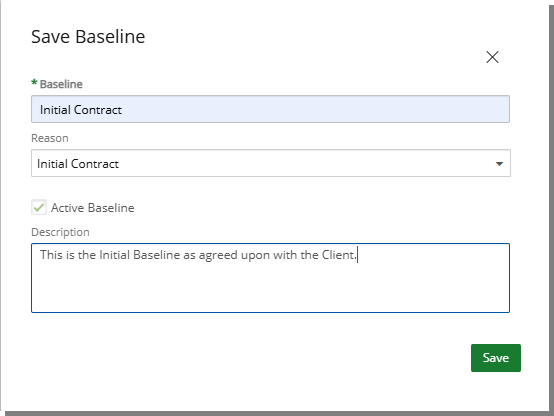
- Upon the Save Baseline dialog box displaying, enter a Baseline name.
- Select a Reason from one of these available options:
- Initial Contract
- Scope Creep
- Unforeseen Costs
- Changes in Timeline
- If this is the first baseline being created, the Active Baseline checkbox is automatically selected and is read-only.
Note: Only one Baseline can be marked as Active at any given time.
- Enter a short Description.
Note: When creating the first Baseline, the Active checkbox is selected by default. For any subsequent Baselines, the checkbox is cleared by default, allowing you to choose whether to make the new Baseline active.
- Click Save to apply your changes.
- Save Baseline dialog box will close automatically and the Budget page will be refreshed.
- Note that your newly created Baseline is now visible.
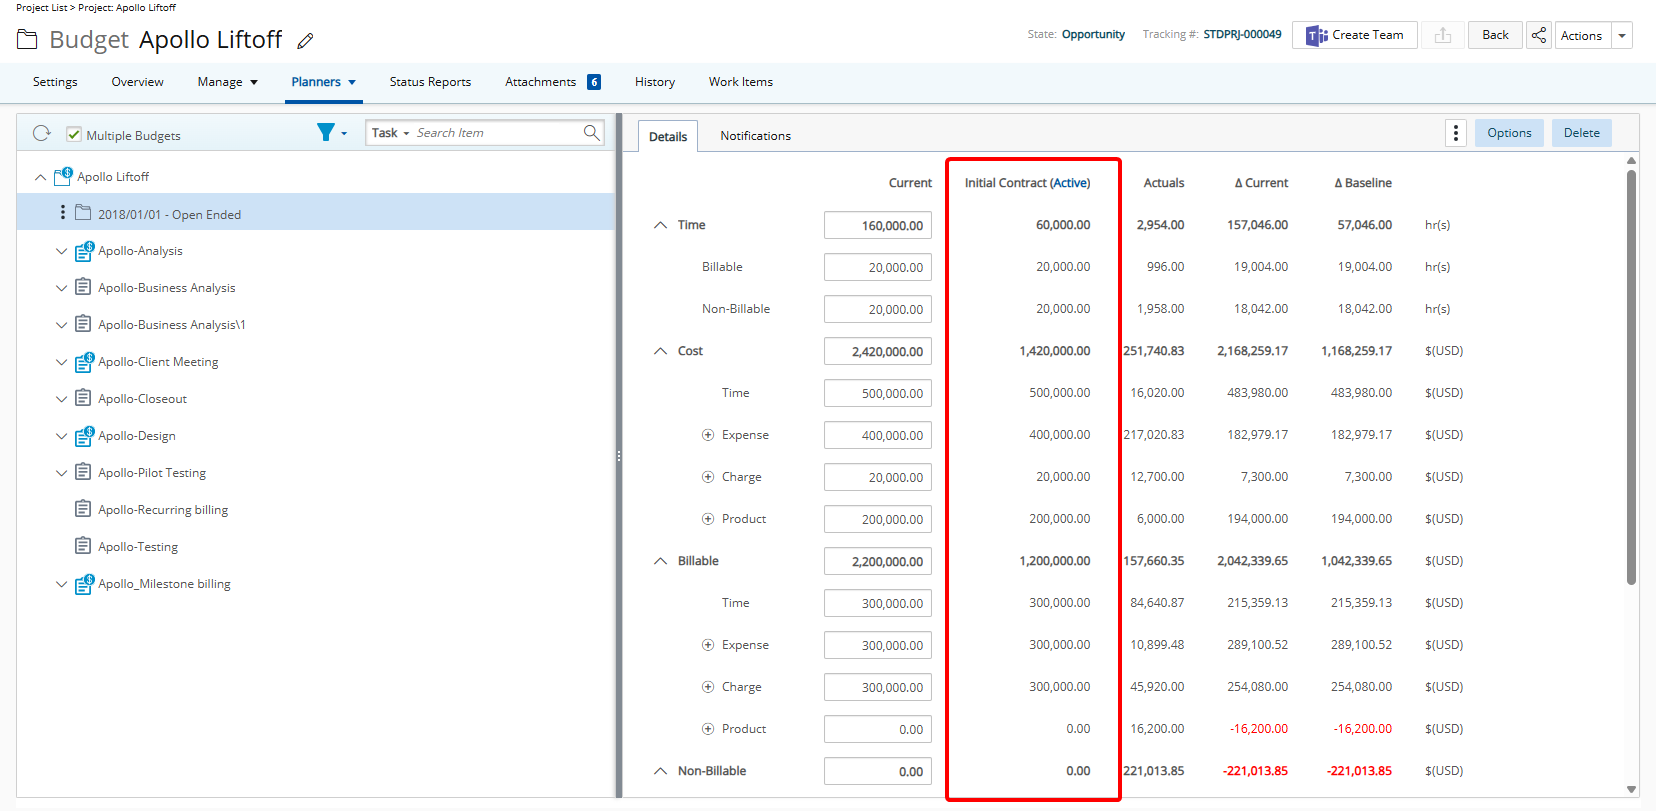
Note: The Active Baseline is clearly indicated to help you quickly identify which baseline is the current Active one:
- On the Budget page, the word Active appears in the Baseline column next to the Baseline name.
- In the context menu, the active baseline is displayed in bold, with the label Active shown beside its name.
Viewing Baselines
A project manager may maintain multiple baselines to capture different stages of a project’s financial planning—such as the initial approved budget, a revised version following contract changes, and another after scope adjustments. From the Budget interface, you can easily switch between baselines to track how budget figures have evolved over time and assess project performance against earlier expectations.
To view a saved Baseline:
- From the right pane click the context menu .
- From the available options click the Baselines name you wish to view.
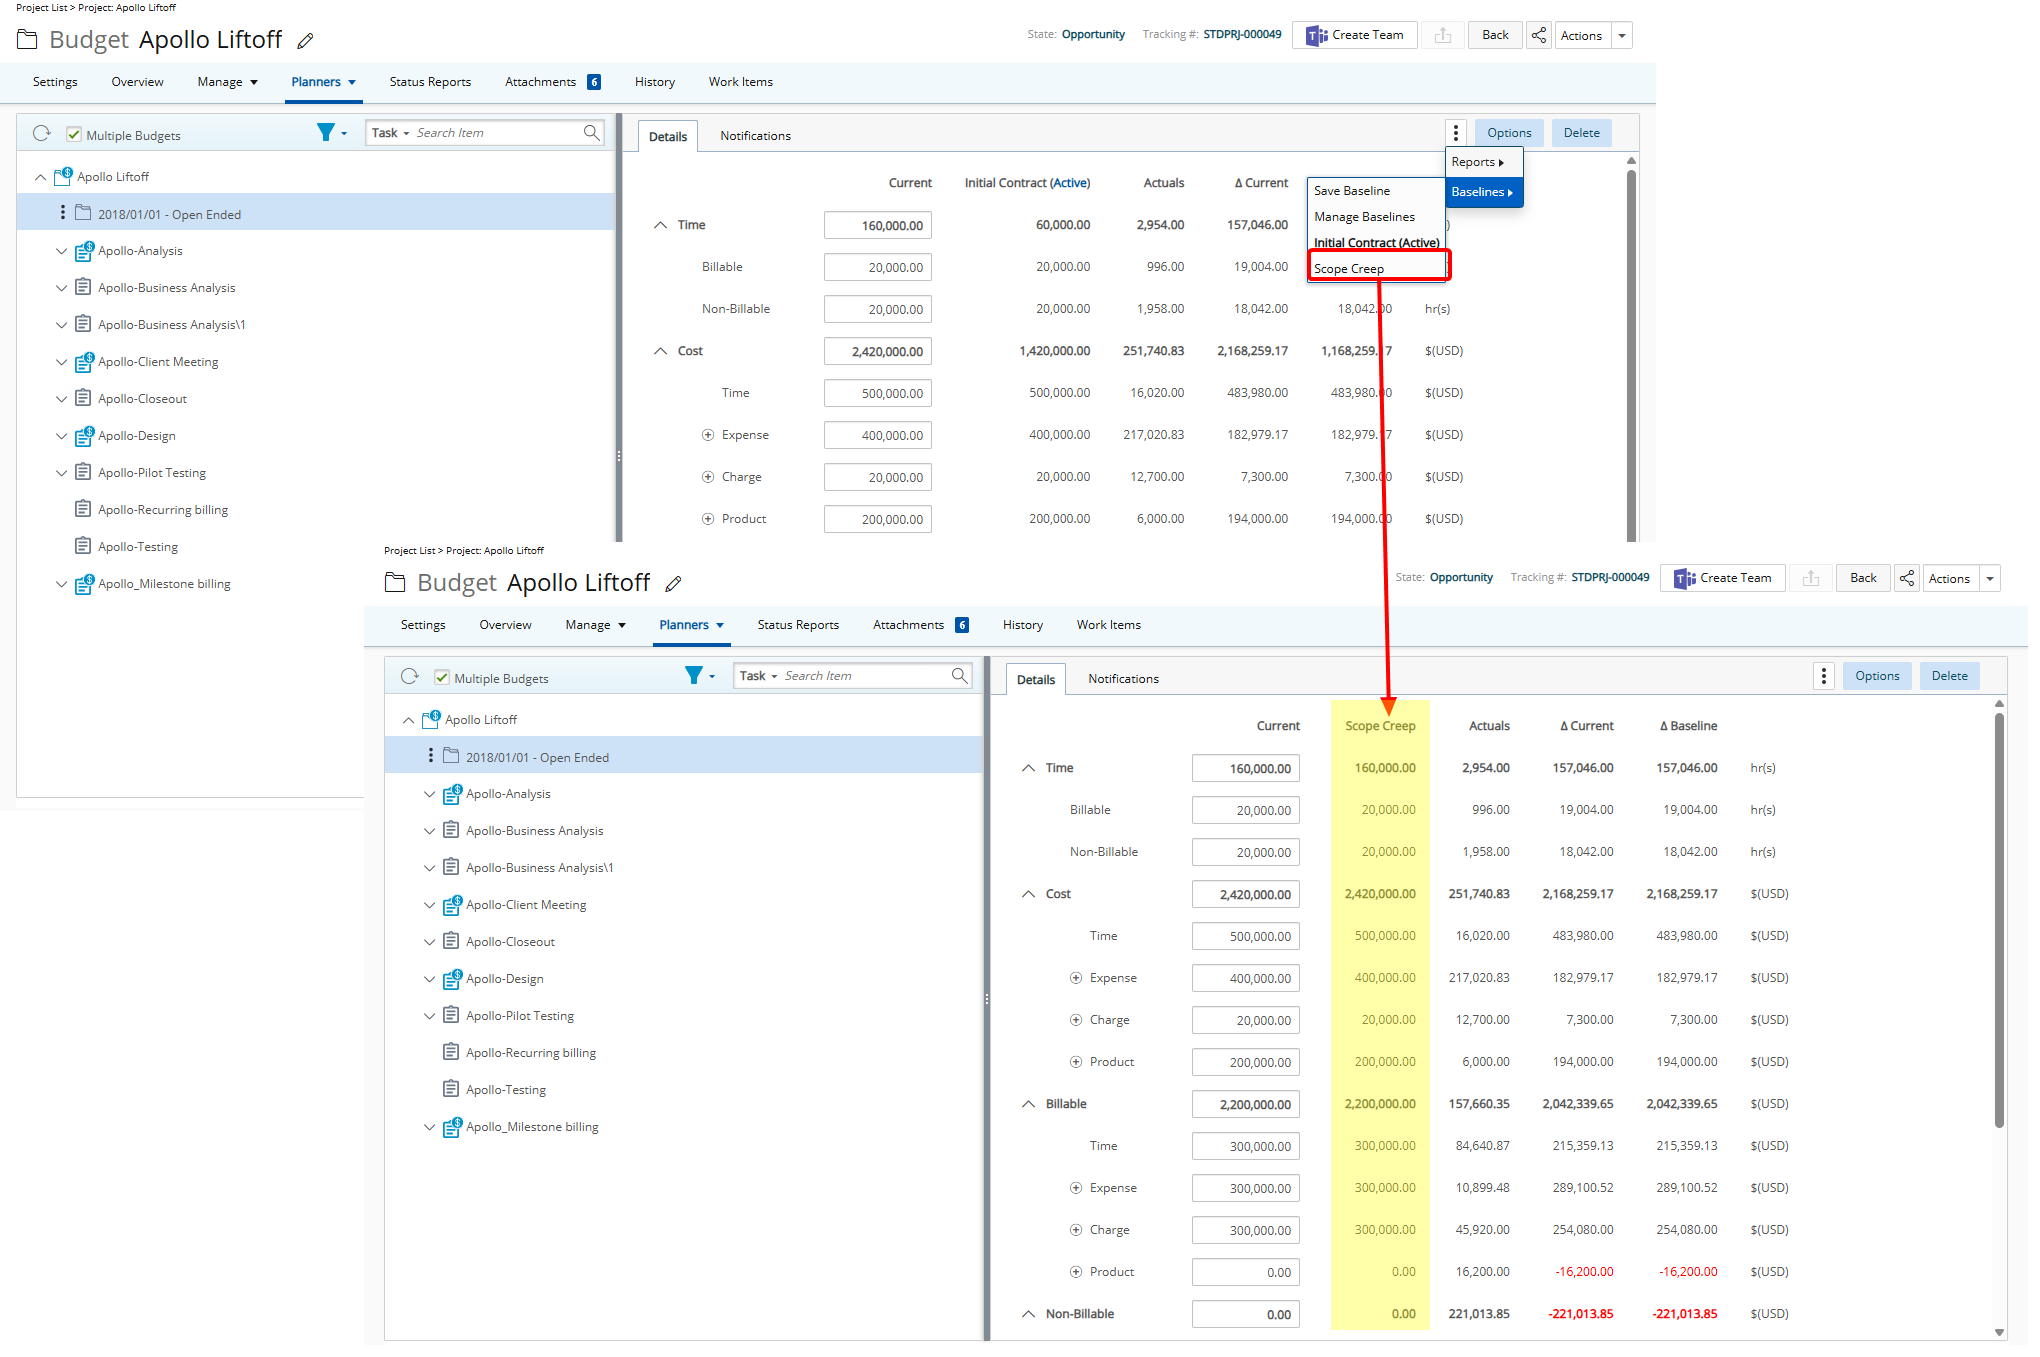
Note: Selecting a different Baseline to view does not automatically change the Active Baseline. This allows you to compare or review other Baselines without affecting which one is currently set as Active.
- The page will refresh and display the selected Baseline: The selected baseline's name is displayed at the top of the Baseline column.
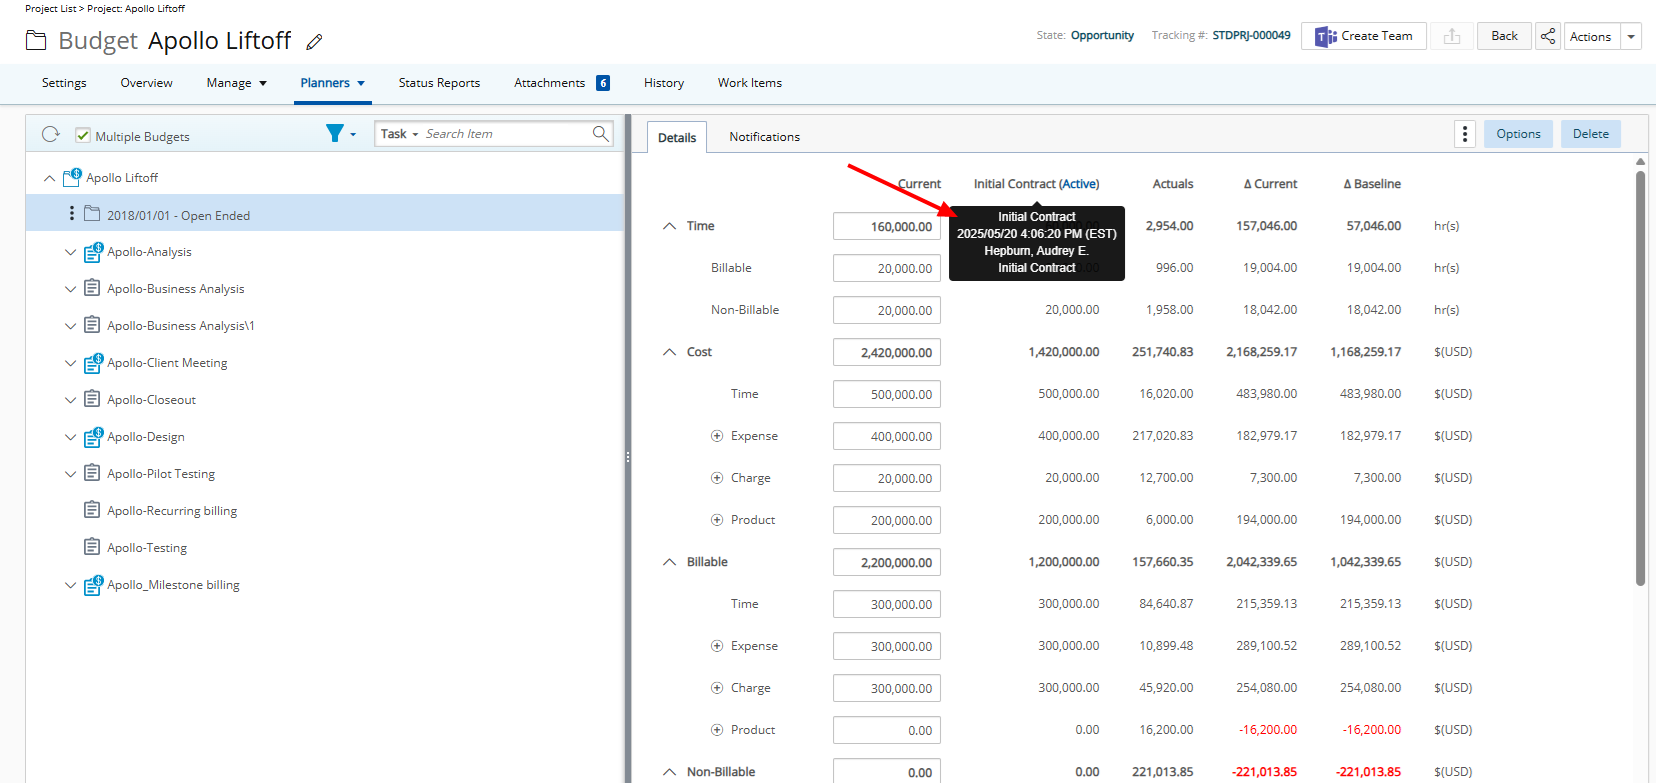
- When hovering over a Baseline Name, a detailed tooltip will appear, displaying the following information:
- Name: The Name assigned to the baseline.
- Creation date: The date when the baseline was created.
- Created by: The name of the user who created the baseline.
- Reason: The reason or purpose defined for the baseline
- The budget entries associated with this baseline are loaded into the Baseline column, and the Delta Baseline values are recalculated to reflect any changes.
Example:
Audrey, the project manager, is overseeing a web development project. During the project, there are significant scope changes, adjustments in timelines, and alterations to the budget. To track these changes effectively, Audrey decides to save multiple baselines at different points in the project to have a reference of the original plan and the various revisions made throughout the project lifecycle.
Initial Contract: At the start of the project, Audrey creates the first baseline as the “Original Plan.” This baseline includes the initial project time and monetary budget. It serves as the reference for the original project goals. The budget values entered in the Current column are saved as the entries for the newly created baseline.
Baseline After Mid-Project Scope Changes: Halfway through the project, the client requests additional features, which require adjustments to the project time and monetary budget. She Modifies the Current column and then creates a new baseline called “Mid-Project Revision” to reflect these changes. This baseline captures the updated scope and budget.
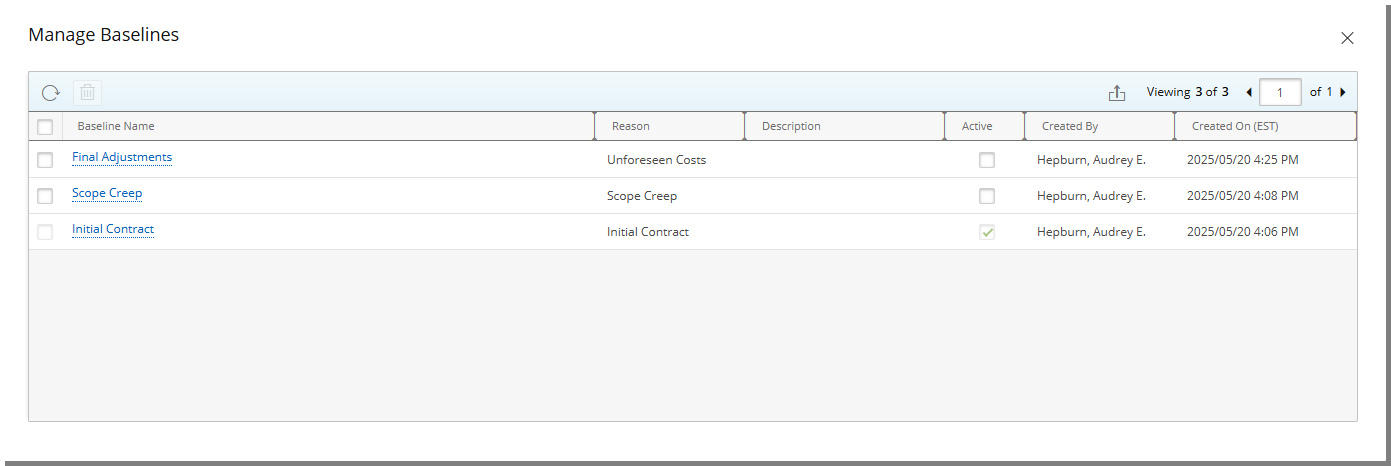
Baseline After Final Adjustments: Towards the end of the project, there are minor adjustments to the timeline and budget to account for unforeseen delays and additional costs. Audrey creates a third baseline called “Final Adjustments.” This baseline represents the final version of the project time and monetary budget before the project completion.
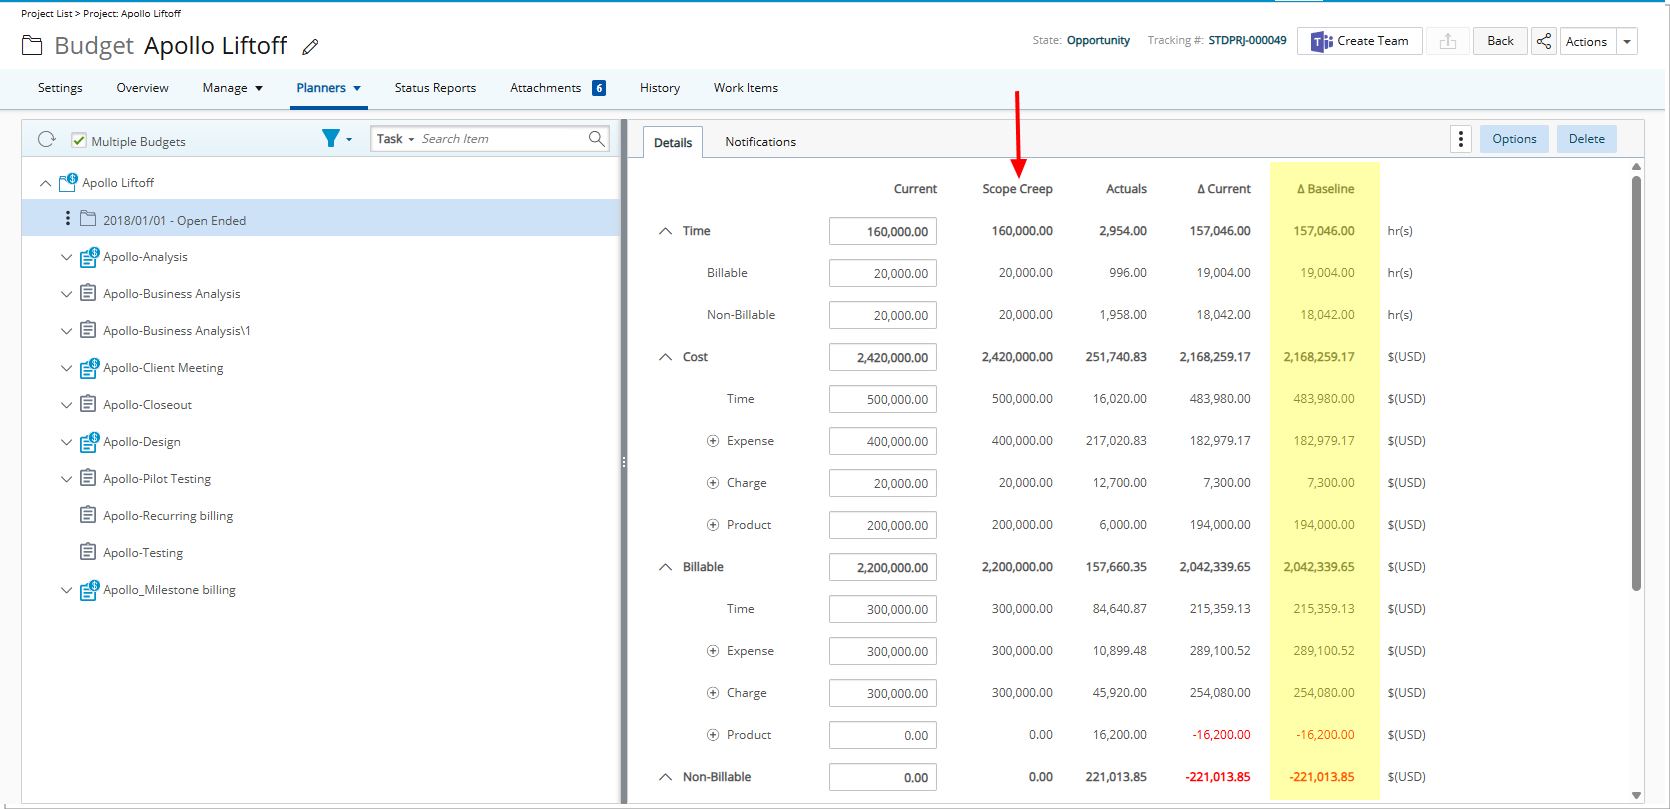
She can choose any of these baselines as the Active Baseline. The Active baseline's name is displayed at the top of the Baseline column. The budget entries associated with this baseline are loaded into the Baseline column, and the Delta Baseline values are recalculated to reflect any changes.
Managing Baselines
The Manage Baselines page provides a centralized view for reviewing and administering all Baselines created for a Project/Task/Assignment or Role based Budgets. From this interface, you can modify baseline details, delete baselines that are no longer needed, and export the full list to Excel for further analysis or reporting.
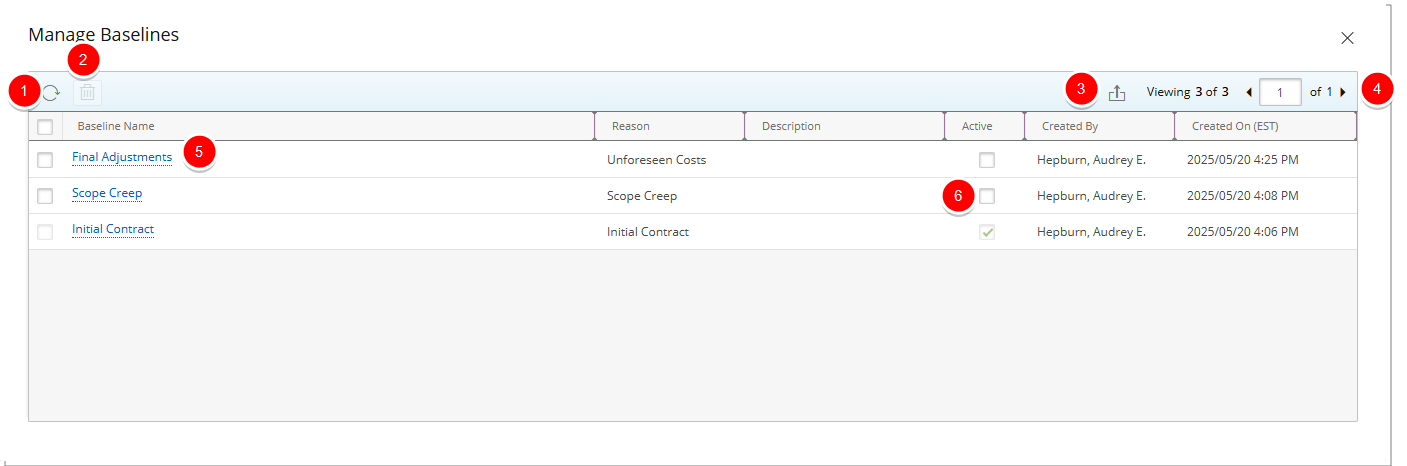
- Refresh
 the page.
 - Delete
 selected Baseline(s). Active Baseline cannot be deleted.
 - Export
 the list to Excel.
 - The Pagination facilitates moving to a new list page and to view the number of list items and pages.
- To edit the details of a baseline, click the name of the baseline you want to open. This will allow you to access the Edit Baseline dialog box where you can modify the following information:
- Baseline Name – You can either enter a custom Baseline Name or select from one of the four default options: Initial Contract, Original Plan, Mid-Project Revision, or Final Adjustments.
- Reason – choose a Reason from the available list to explain the purpose of the baseline. Available out-of-the-box reasons include: Initial Contract, Scope Creep, Unforeseen Costs, and Changes in Timeline.
- Description – An optional field to include more detailed information or notes about the baseline, such as specific changes or assumptions.
- Active checkbox – Designates the selected baseline as the active one. Only one baseline can be active at a time. The active baseline is used as the primary reference and is displayed on the main Budget page.
- Select this checkbox to designate a different Baseline as the Active Baseline. Your selection updates the active status immediately—no additional save action is required.