Upon accessing the Project Status Reports list page, you can create a new Report by selecting New. The PSR will be created based on the associated Template for the current period.
This article details how to create and submit a Project Status Entry.
-
Access the Project Status Reports page. The Project Status Reports can be accessed from:
- Project Edit > Status Report tab
- Project List > Context menu
- Work Plans > Project Context Menu
Note: For further details refer to Accessing the Project Status Reports page.
- Upon the Project Status Reports page displaying, click New.
- A new Project Report Entry will be listed on the left pane based on your Current Period.

- From the right pane:
- If required click the Period picker and choose a different date.
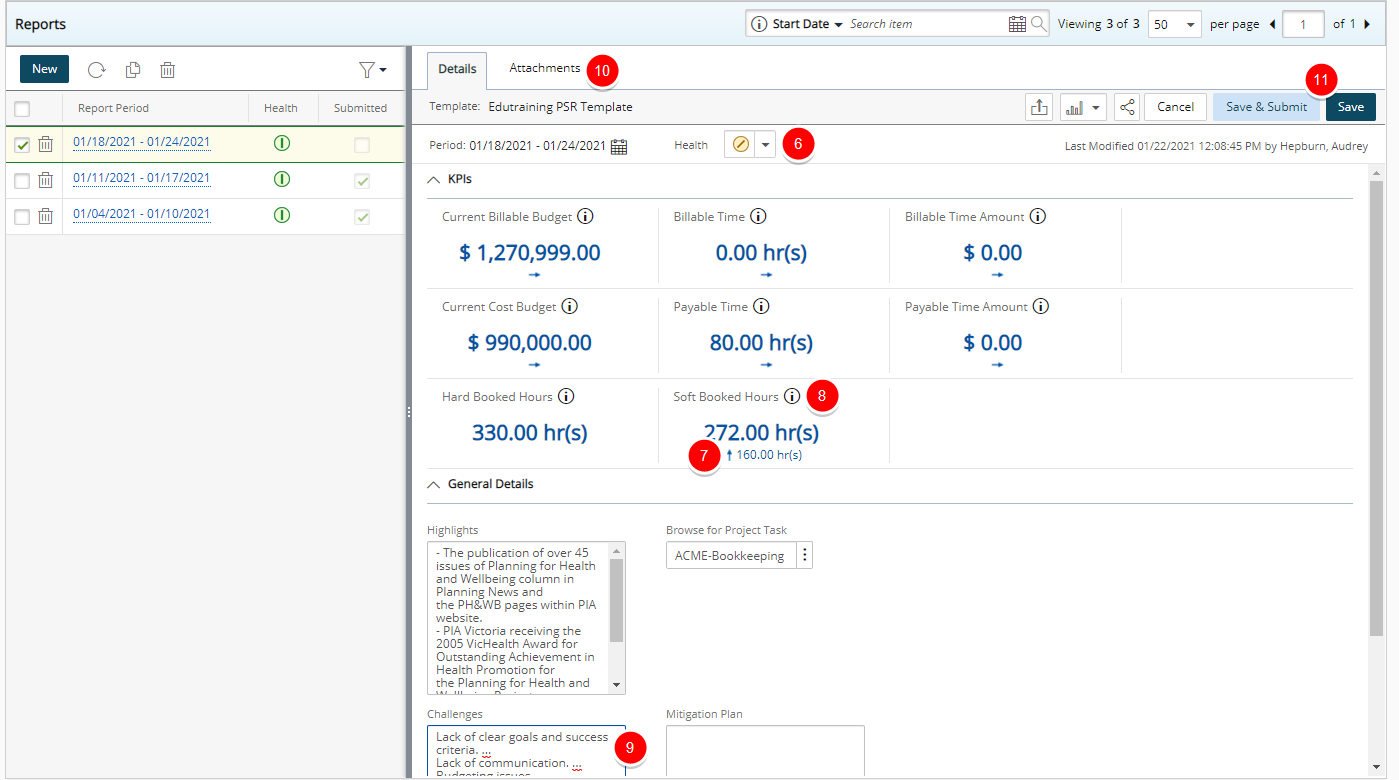
- Click the Health indicator and choose one of the available options.
- Click Save.
Note: Upon saving the PSR, the Attachments tab is available to you. Any changes to the KPIs since your last saved PSR are also reflected in your newly saved PSR.
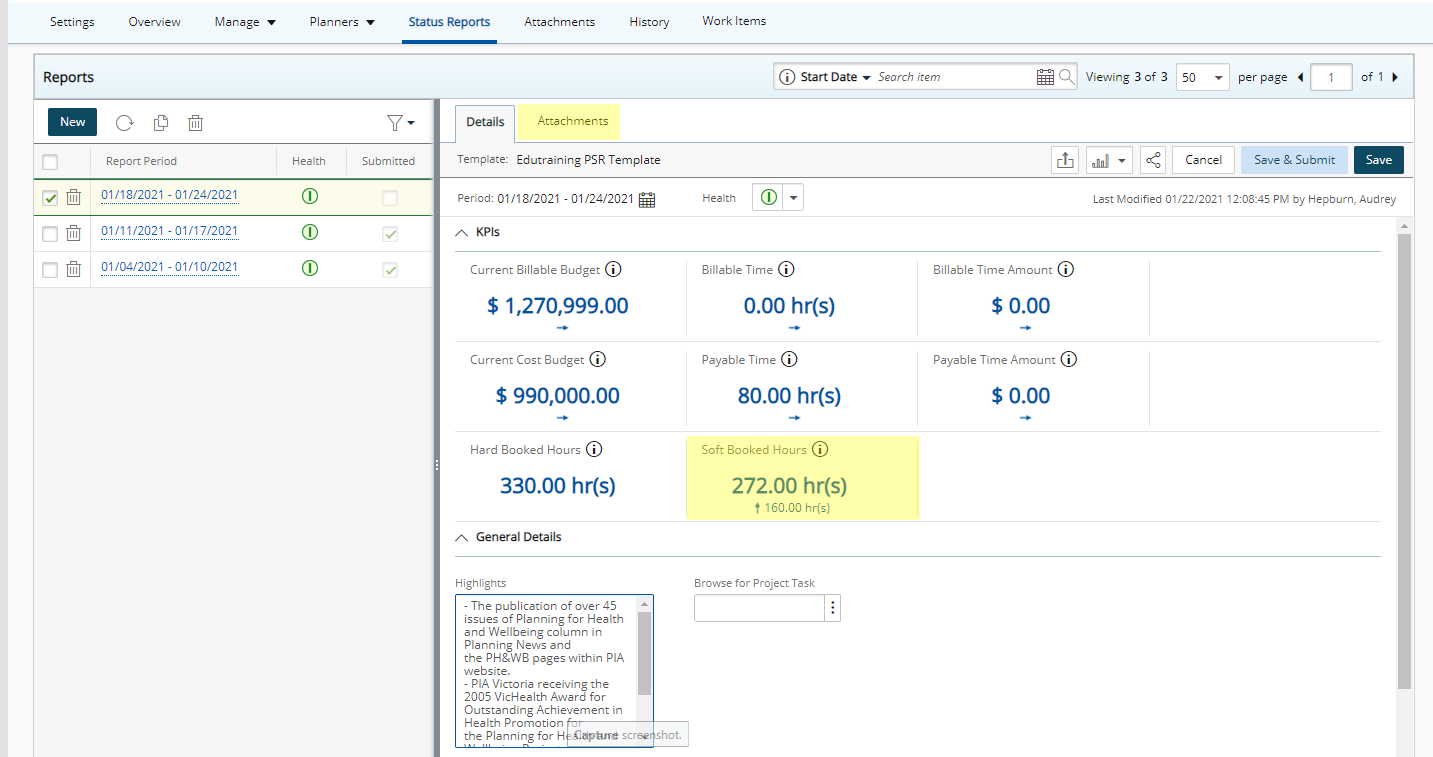
- View the right pane, where values in the top frames, Project Information and KPIs, along with the Health (within the Project Status frame), all automatically display based on the selected project and the period currently selected.
-
Visual indicators next to the values with the KPIs section allow you to quickly identify if there have been any changes since the last submitted Project Status Report.
- Up arrow (
 ): Indicates an increase.
 - Down arrow (
 ): Indicates a decrease.
 - Right arrow (
 ): Indicates no change.
Note: Hovering your mouse pointer over the
 or
or  KPI indicator icons will trigger a tooltip with the +/- change since the last submitted PSR.
- Up arrow (
- Hover your mouse over the information icon
 to trigger the tooltip. From the respective KPIs tooltip you can access the Key Performance Indicators in PSA help article for more details by clicking See More.
 - Complete the Project Status information required to be entered within the General Details section.
- Click the Attachments tab where you can access the Notes, Document & Links sub-tabs to attach additional information.
- Click Save & Submit to save the entries/changes you have made and mark the entry as Submitted and allow for others to see the status entry. It will also trigger a refresh of the calculated KPIs. Once clicked, the button changes to a Recall button. Otherwise, you can opt to simply Save the entry or Cancel it altogether:
- Cancel: Clicking this button will prompt you to discard the changes you have made to the status update. Selecting Yes will delete the entry.
- Save: Click this to save the entries/changes you have made. A save confirmation will be displayed once the save is complete. The message will read "Entry saved successfully."
Note: If a User Defined Field is associated to both Project and Project Status Report template and the Update From Project Status Report option is selected at the Project level, upon submitting the Project Status Report the corresponding Project field will inherit its values from the submitted Project Status Report.