Creating a New Project
This article details the steps of creating a new project with the required base information, under the General tab.
When the project is successfully created, you can enter the additional information and set the other properties, under the Options, or the User Defined Fields tabs, at a later time. Furthermore Scope, Phases, Accounting, WIP Policy, Recognition Scheduling, Business Unit, Pay Codes, Integration and Security Settings as well as Financial (Cost and Billing) options can be setup at a later time and are covered in separate topics.
- From the Icon Bar click Project List
 .
. - Upon the Project List displaying, click Create Project.
- Enter the base information:
- Project Name *: Enter the project name.
- Project Code *: Enter a prefix, no longer than 32 characters, that is to be assigned to all tasks associated with the project.
Note: Project Code must be unique.
- Id: Enter a unique identifier assigned to the project (optional).
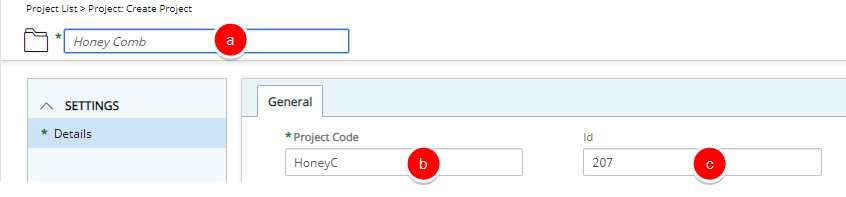
Note: The mandatory boxes are denoted with an asterisk (*), and must be all completed to successfully create a project. Click here to view the article defining the boxes.
- Upon clicking Create Project from the Project List page, the Project Settings tab immediately displays, with the focus on the Project Name.
-
Edit and/or select the necessary information.
- Portfolio *: Click the browse button to select the portfolio, from the Portfolio List page, to be associated with the project. The project portfolio dictates the default workflow for a project.
- Workflow *: The system default workflow is selected by default. Click the browse button to select and change the workflow, from the Workflow List page, if different from this default selection. There are three out-of-box workflows: Immediate Execution, Selection Committee and Standard Project
Note: The workflows displaying are the active project workflows in the system that the logged user has permission to view.
- Client *: Click the browse button to select the client, from the Client List page, to be associated with the project.
- Parent *: Click the browse button to select and designate, from the Project List page, under which placeholder the project is to be displayed.
- Manager: Click the browse button to select the manager, from the User List page, to be assigned to the project.
- Alternate manager Click the browse button to select the alternate manager, from the User List page, to be assigned to the project.
- Program: Click the browse button to associate a program from the list of available programs.
Note: A Project can only be associated to one Program.
The boxes with ellipsis buttons will open the corresponding list page from where you can select the required option (see the substep below).
 Click the ellipsis to make a selection
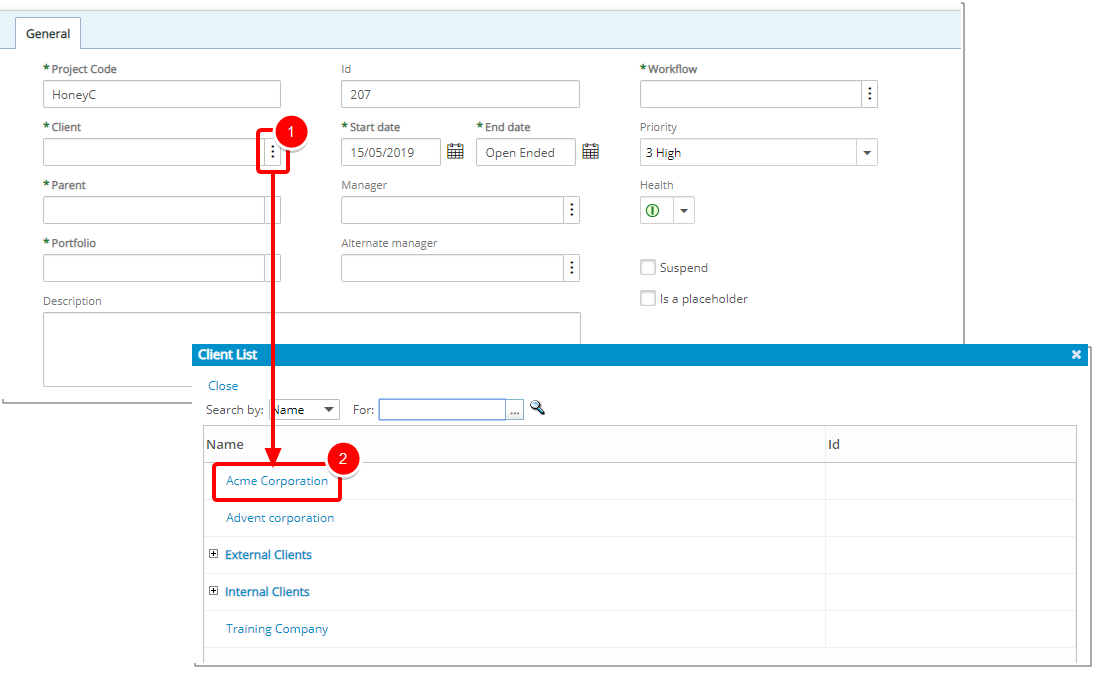
- Click the ellipsis button located on the right of the corresponding box.
- Upon the corresponding list page displaying, select the required option.
- Repeat Steps (i) and (ii) above to make your selections for the following settings:
- Portfolio *
- Workflow *
- Client *
- Parent *
- Manager
- Alternate Manager
- Program
- If necessary, modify the Priority. Select the project’s priority level from the following available options:
- Low
- Medium
- High
- Important
- Urgent
- If necessary, modify the effective period by selecting a Start and End date.
- Start date *: Click the calendar button to select the date that work on the project is to begin.
- End date *: Click the calendar button to select the date of the last day of work on the project: if set up by the administrator, the system automatically suspends all project-related tasks after the end date is reached.
Note:Until an End date has been clearly defined, it is recommended that it remain Open Ended.
Modifying a project's start date and end date automatically updates the start date and end date of all the related assignments and tasks, for as long as they are exactly the same date.
- Select the Suspend option to remove all tasks associated with the project from the timesheets of all resources assigned to the project tasks.
Caution: If users already have time entries for the tasks associated to the suspended projects, then those tasks are not removed. A suspended task shows in red font color on the Tasks List page.
- Select the Is a Placeholder option to design a hierarchical project item tree for organizational purposes.
Note:
- If a project is marked as a placeholder, it cannot be used as a regular project.
- The Is a placeholder checkbox is unavailable (dimmed) when the project contains tasks. To enable the Is a placeholder option for a project, you must remove all associated tasks first.
- Enter additional information in the Description box.
- Click Save to apply your changes.
- Upon the page refreshing, view the newly created project.
- You can easily rename the project by clicking the Edit icon.
- The Tracking # and Project State are now visible on the Title bar.
- The Actions button allows you to Action on the Project.
- Click Back to return to the Project list to access the Project Overview page.

Note: You can now enter the additional information and set the other properties, under the Settings, Security, Financial and Integration menu items at a later time.
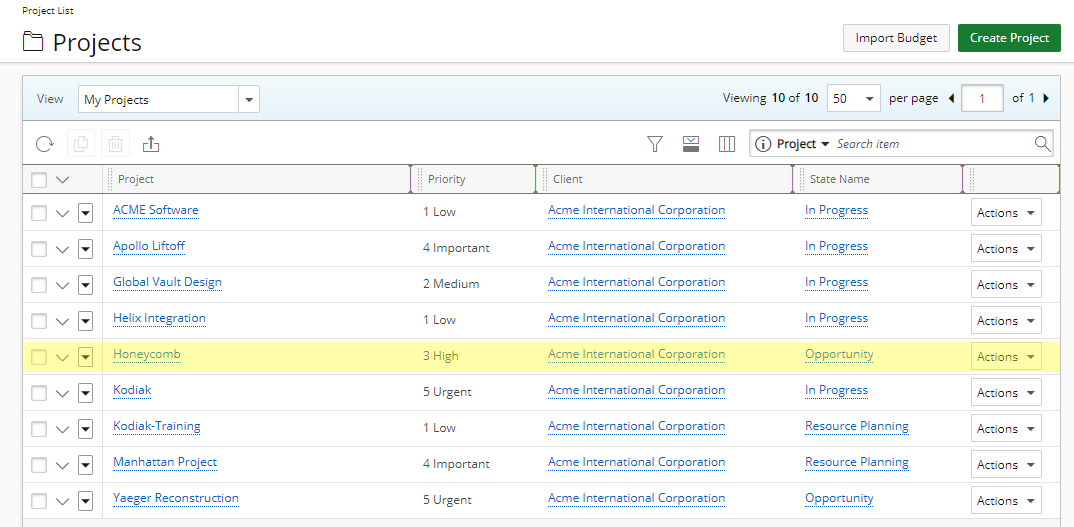
- View the newly created project in the Project list.
Note: Click here to view the article on creating tasks for a project.