Choosing what Information is Available when Expanding a Project in the Project List
This article covers how to add or remove information displayed in the Expanded Row section.
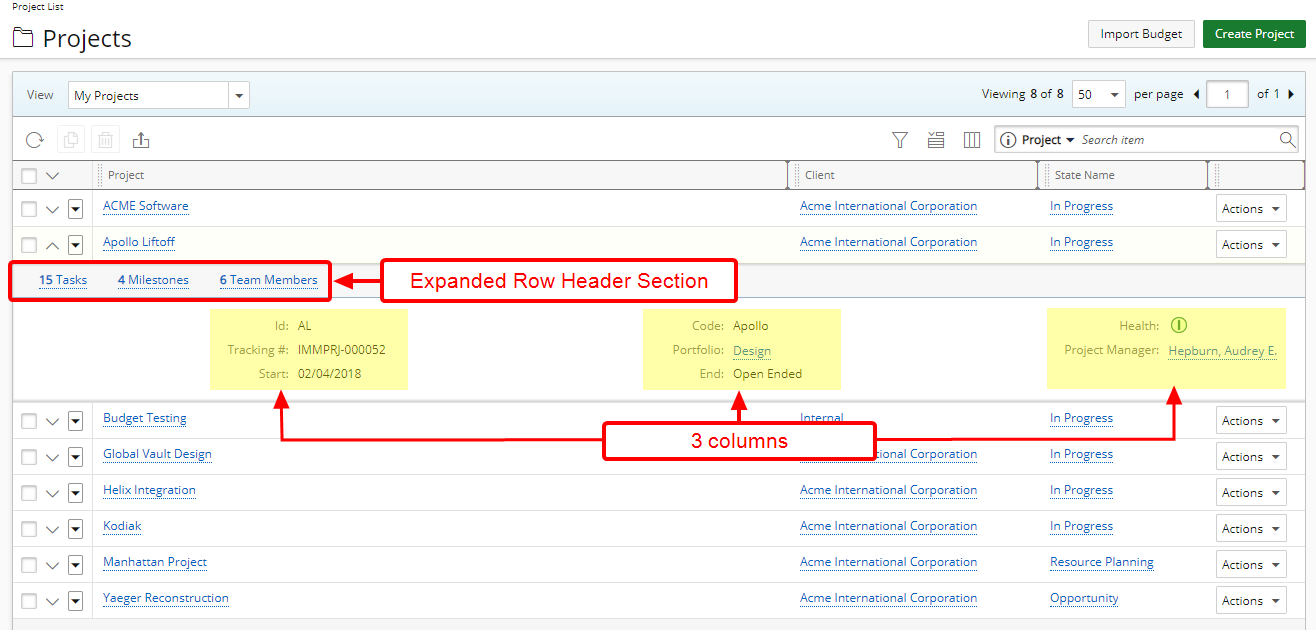
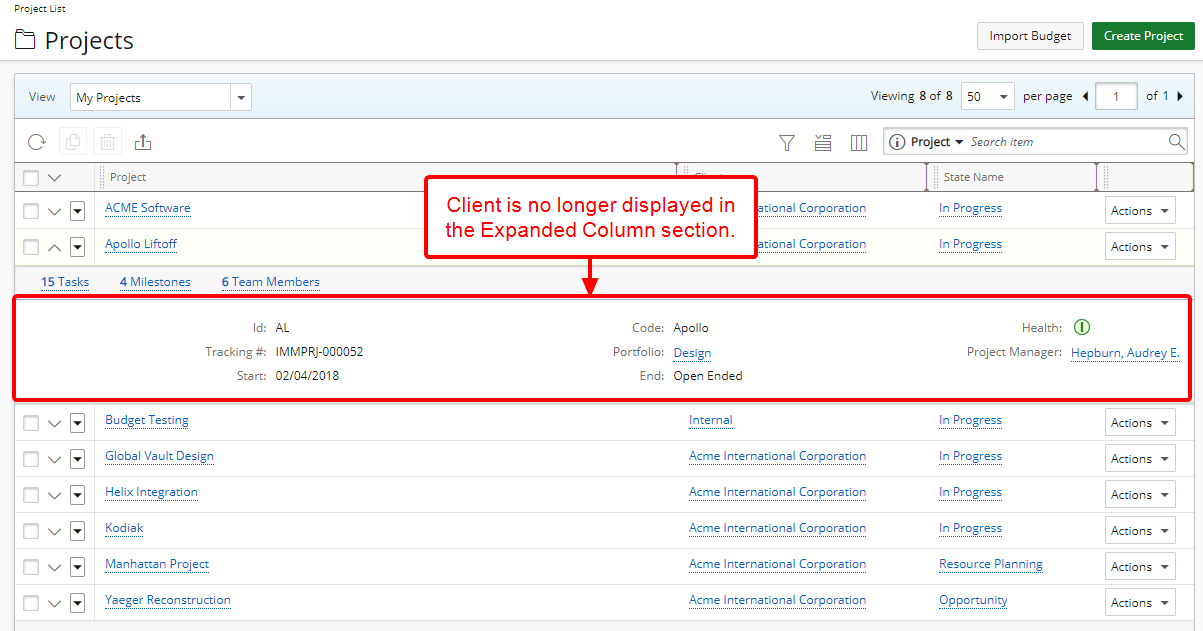
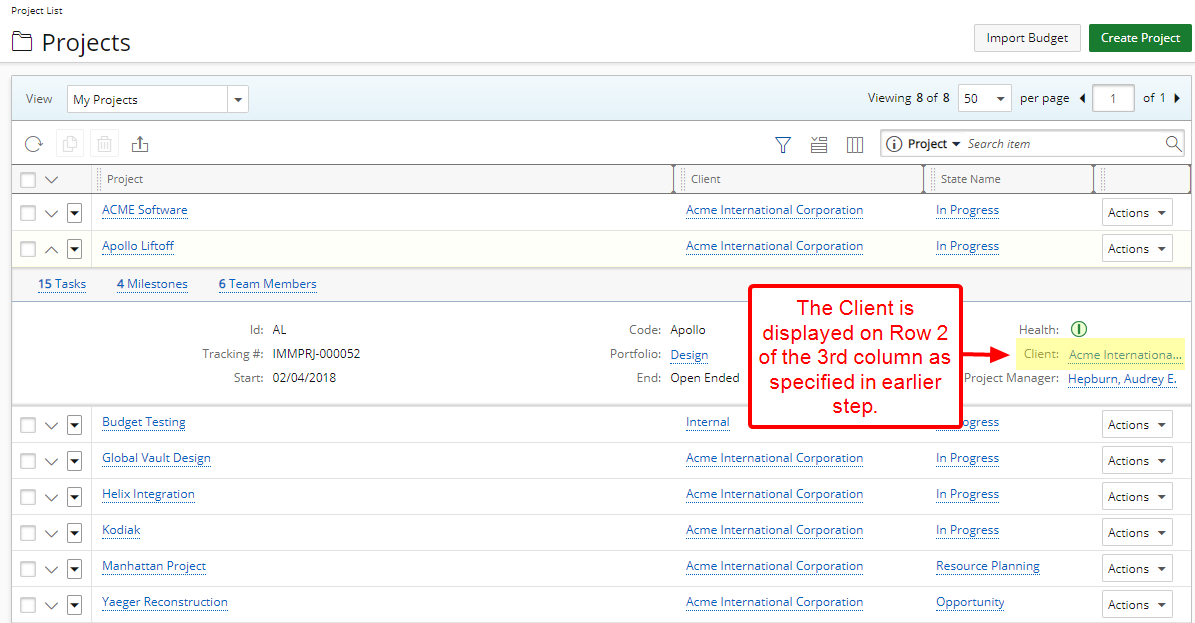
The Expanded Row consists of a
- Header section (denoted in light grey background) where Task(s), Milestone(s), Team Member(s), Invoice(s), Note(s), Document(s), Action Item(s), Bug(s), Incident(s), Issue(s), Leave Request(s), Risk(s), Scope Change(s), Service Request(s), Skill Update Request(s), Travel Request(s) or any other related work process information is displayed. All information within this section is linked to their respective pages.
- The information below this header section, is separated in 3 columns and as many rows as necessary to represent the required information.
- From the Icon Bar click Project List
 .
. - Click Expanded Row Column Selection
 button.
 - Select the columns to be displayed within the Expanded row. For further details on the available column selection options for the Expanded Row section refer to Out-Of-The-Box Column Selection options - Project List page.
Adding Column(s) to the Expanded Row
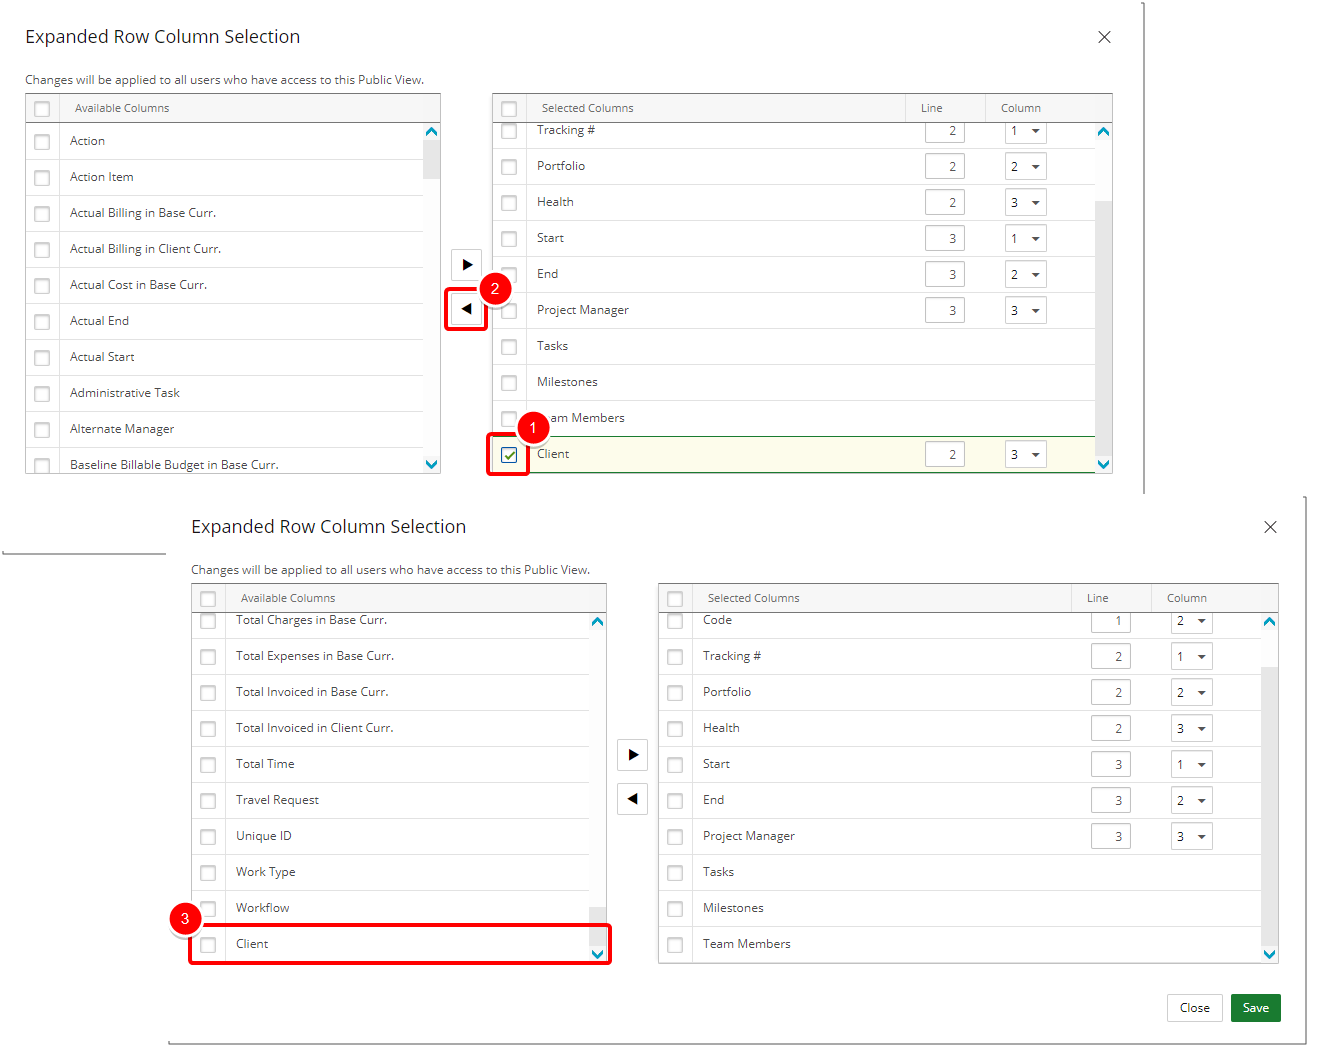
- Select the columns(s) from the Available Columns list.
- Click the arrow to add it to the Selected Columns list.
- View the added item in the Selected Columns list.
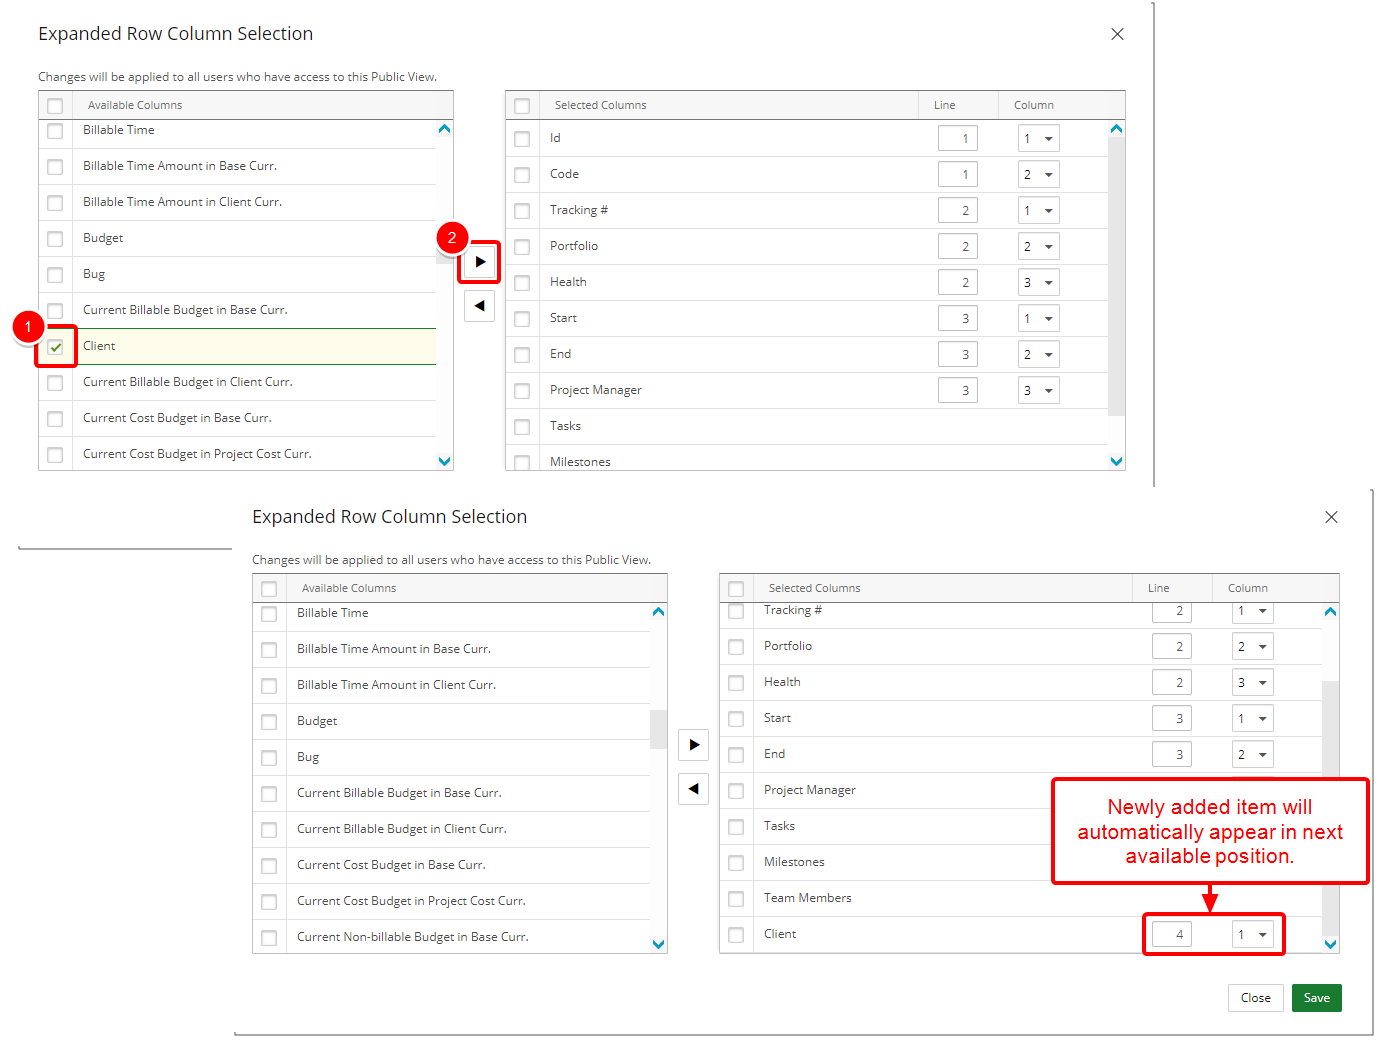
- If necessary, change the Line or Column number to display the newly added item in a different position.
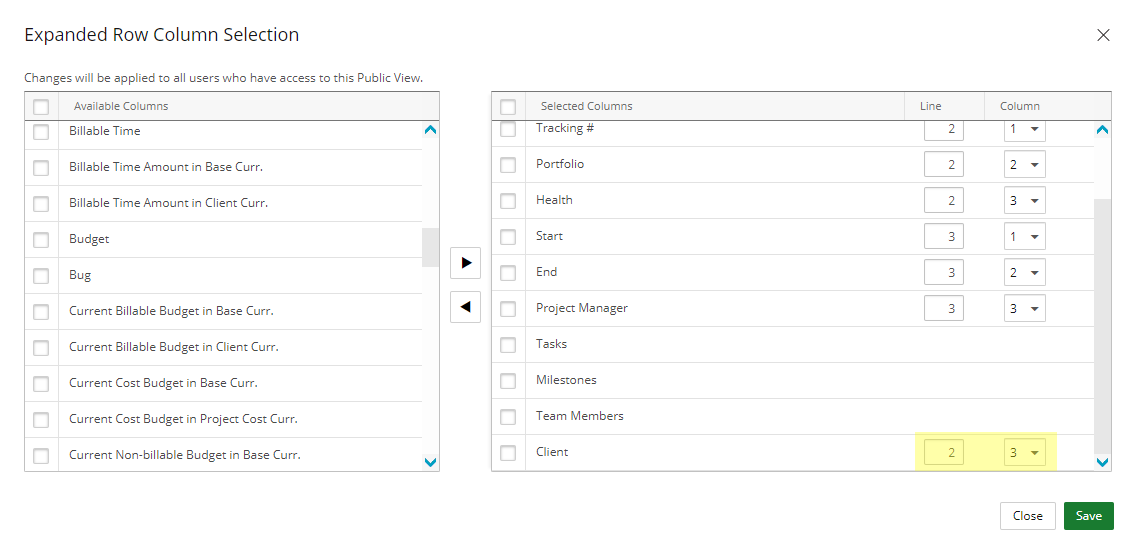
- Click Save to save your modifications and to return to the Project List page.
- View your saved modifications on the Project list page.
Removing Column(s) from the Expanded Row
- Select the item from the Selected Columns list.
- Click the arrow to add it to the Available Columns list.
- View the added item in the Available Columns list.
- Click Save to save your modifications and to return to the Project List page.
- View your saved modifications on the Project List page.