From the Linked Items tab you can easily link either existing Work Item Entries or new ones.
This article details how to link Project Risk Entries.
Note: A Project Work Item Entry can be linked to multiple Entries.
Linking existing Work Item Entries
- From the Icon Bar click Project List
 .
. - From the Project List page, select the Project you wish to edit by following one of these steps:
- Click the Project context menu button
 to expand it. From the available options click Edit.
OR - Click the name of the Project you wish to access.
Tip: Use the search capability for an efficient way of finding the specific project. For further details refer to Searching for a Project within the Project List page.
- Click the Project context menu button
- Click the Work Items tab to access the Project Work Items.
- The list of available Work Items Workflows can be found on the left navigation pane. Select the required Workflow.
- Either:
- Access the Work Item Entry drawer by clicking the expand button
 located against the Entry.
 - Access the Work Item Entry edit page by clicking the Tracking # of the Entry.
Note: Regardless of your choice in step 5, the process of linking Work Item Entries is the same. For the purpose of this article we are going to use expand the drawer.
- Access the Work Item Entry drawer by clicking the expand button
- Select the Linked Items
 tab.
tab. - Click the Link Items button.
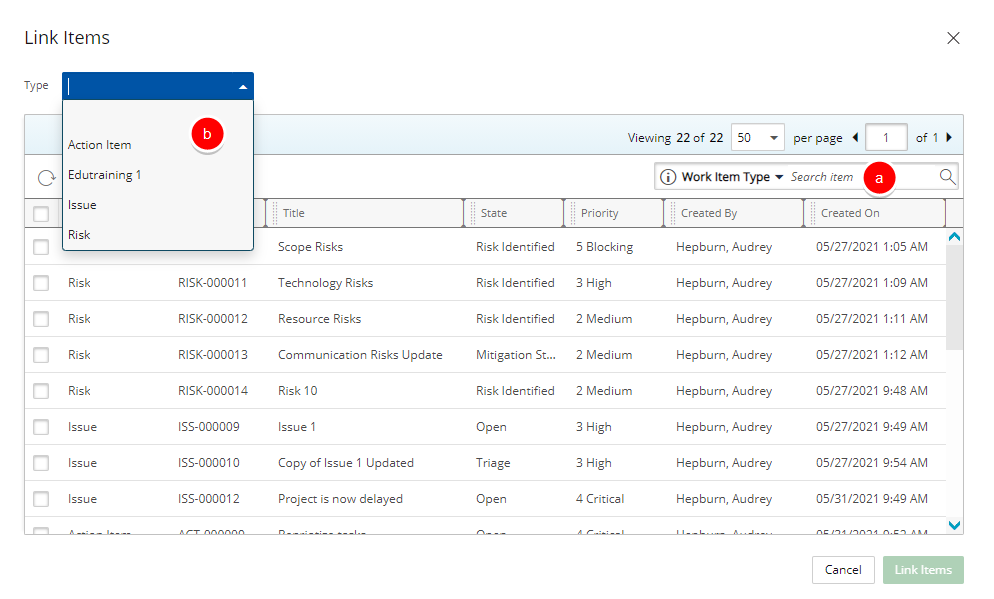
- From the Link Items dialog box, you can narrow down the list of Items by:
- Searching
 for a Work Item Entry by Work Item Type, Tracking #, Title, State, Priority, Created By or Created On criterion.
And/Or - Choose the required Workflow from the Type selection box.
Note: By default all active Work Items are listed by date created in ascending order.
- Searching
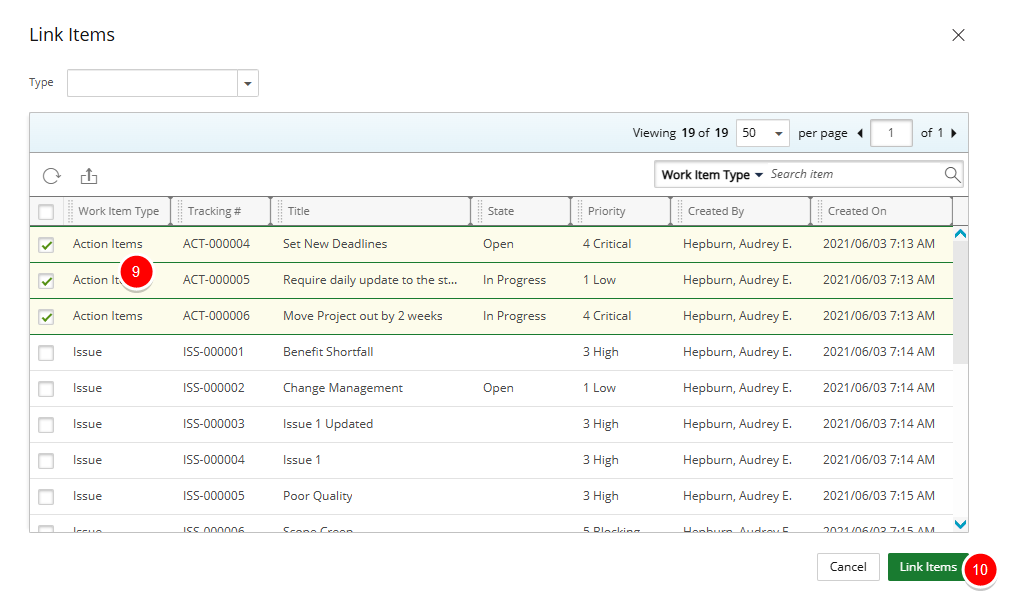
- Select the Work Item Entries you wish to link.
- Click Link Items.
Tip: You can click Cancel to return to the previous page at any time.
- The Link Items dialog box will close automatically. Upon returning to the Linked Items tab, note that the newly linked Entries are listed.
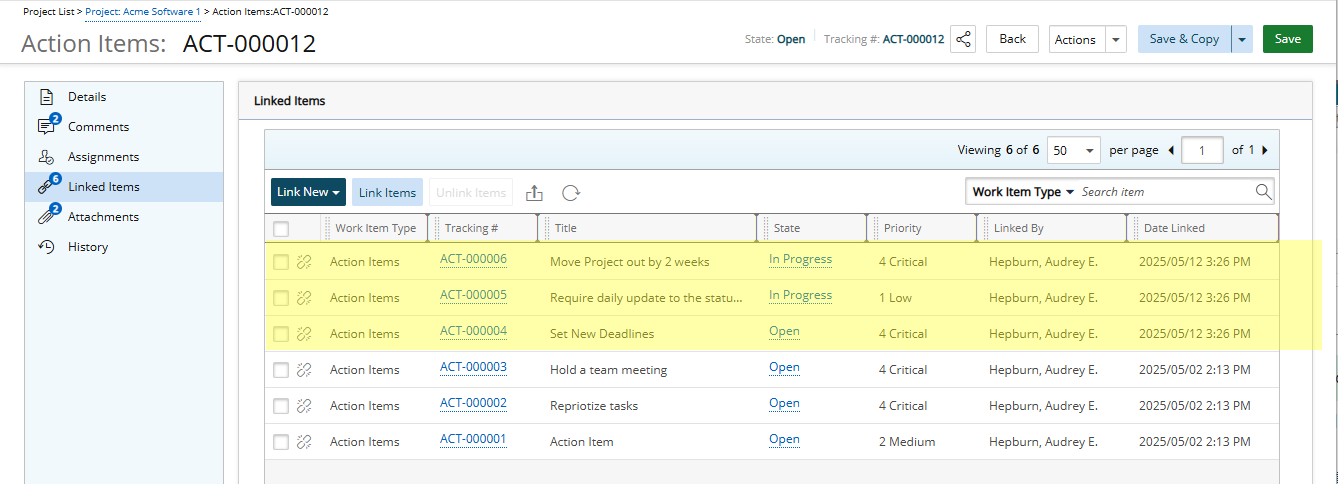
Note: A count appears next to the Linked Items icon, providing a visual indication of the total number of Linked Items.
Linking a new Work Item Entry
- From the Icon Bar click Project List .
- From the Project List page, select the Project you wish to edit by following one of these steps:
- Click the Project context menu button to expand it. From the available options click Edit.
OR - Click the name of the Project you wish to access.
Tip: Use the search capability for an efficient way of finding the specific project. For further details refer to Searching for a Project within the Project List page.
- Click the Project context menu button
- Click the Work Items tab to access the Project Work Items.
- The list of available Work Items Workflows can be found on the left navigation pane. Select the required Workflow.
- Either:
- Access the Work Item Entry drawer by clicking the expand button located against the Entry.
- Access the Work Item Entry edit page by clicking the Tracking # of the Entry.
Note: Regardless of your choice in step 5, the process of linking Work Item Entries is the same. For the purpose of this article we are going to use expand the drawer.
- Access the Work Item Entry drawer by clicking the expand button
- Select the Linked Items tab.
- Click the Link New button to access the context menu where you can choose the required workflow from the available options.

- The corresponding Create Work Item Entry page will display allowing you to create a new Entry.
- Enter the required Information and click Save.
- Click the Back Link to return to the previous page.
- Upon returning to the Linked Items tab, note that the newly linked Entry is listed.
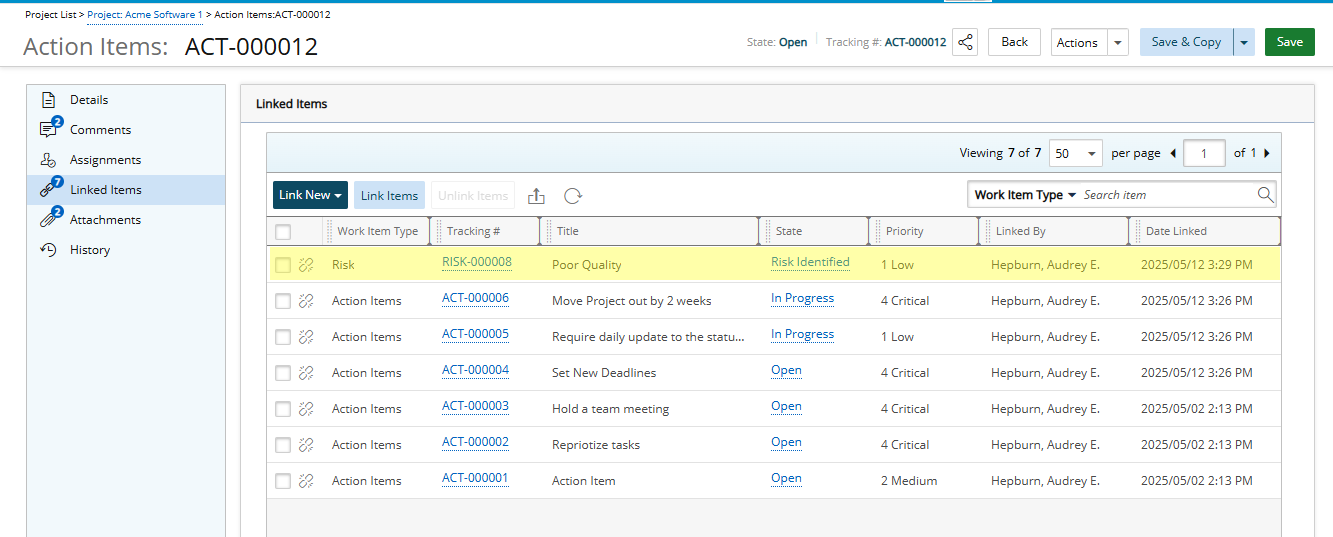
Note: The counter against the Linked Items icon is updated to show the recent changes.