This article details creating an Expense Entry under your Expense Report through PSA Mobile.
- Choose My Expense Reports either from the Home screen or the Navigation Menu
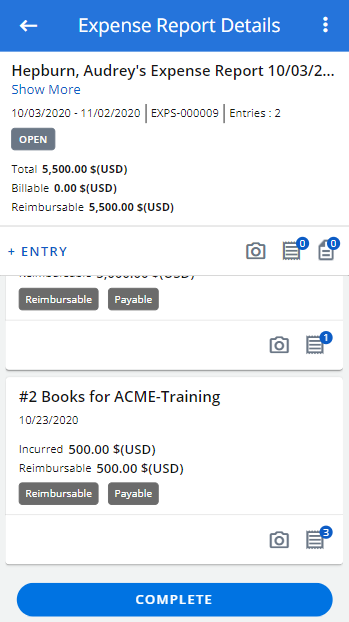
- Upon accessing My Expense Reports , select the tab where your Expense Report is located:
- To Submit: Lists Expense Reports that are in Open State.
- In Progress: Lists Expense Reports that are not in the Final State nor Open State.
- All: Lists Reports in all states except Final.
- You may also Search for it using the Search
 button. For more information on how to search for an Expense Report in PSA Mobile click here.
 - Tap + Entry located against the Expense Report where you wish to add a new Entry. You can also select an existing Expense Report then add an Entry by tapping the + Entry button from the Expense Report Details screen.
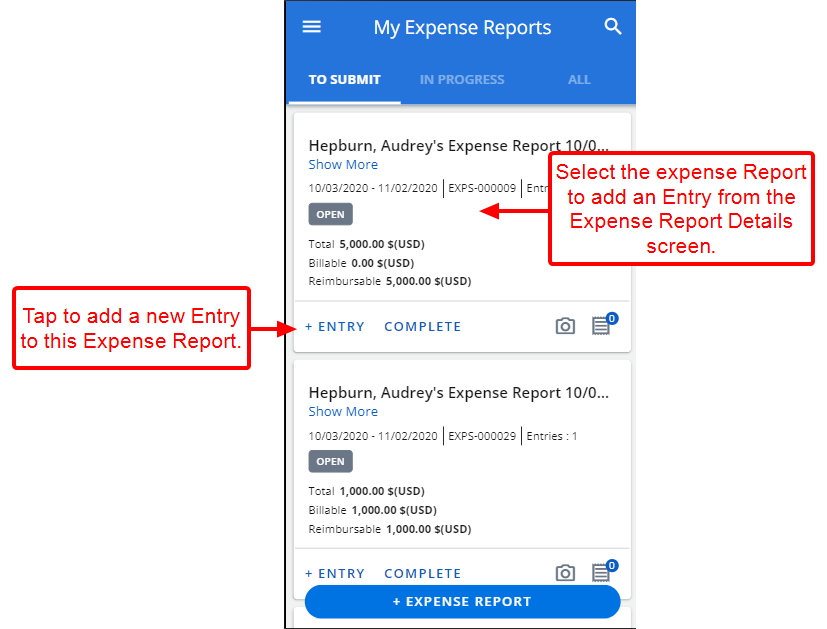
Tip: Tap the Report Receipts button to add Receipts to the Expense Report and associate them to an Entry later.
- Upon tapping Add Entry you will access the Add Expense Entry screen. Note that the Screen has the following sections: Report Details, Receipts , Details, Expense Item, Payment, Attributes, Memo and Totals.
The Report Details section is collapsed by default and all other sections are expanded. Furthermore, when creating a new Expense Entry, the Report Details and Receipts sections are static and remain visible while you enter the required information.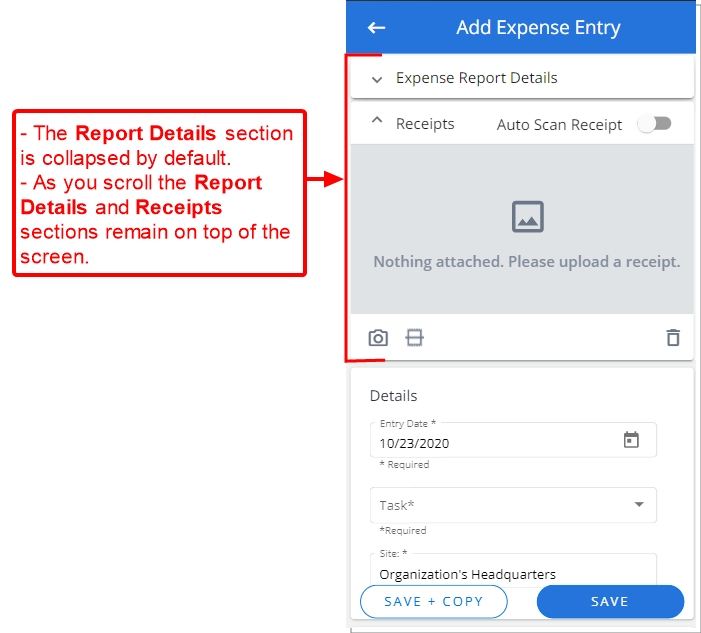
- Enter the required information in the respective boxes.
-
 Report Details section
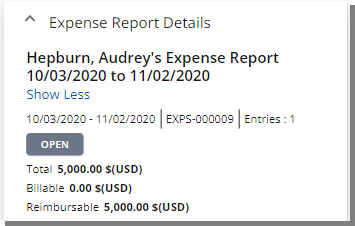
The Expense Report Details section displays the Expense Report details while creating the Report Entries. The following static information is available:
- Report Title
- Report Period
- The Report Tracking number is always visible on the Report Details header.
- Number of Entries that have been created in the Report..
- The Report State.
- The Report Total, Billable and Reimbursable amounts.
-
Receipts section
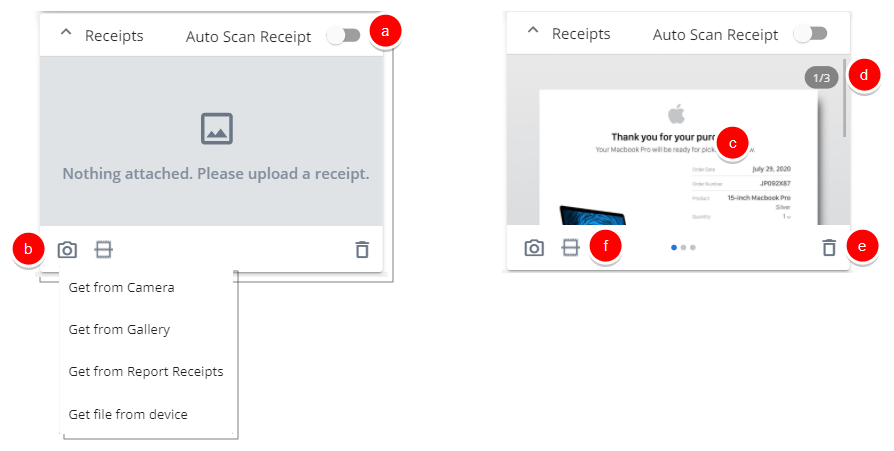
- Auto Scan Receipt: When turned on it allows for the reading and capturing of the receipt information where the corresponding Expense Entry boxes will be populated. For more details on which Information is mapped to the Expense Entry boxes click here. If you prefer to enter the information manually, you can turn the option off. You can also scan the receipt after attaching it to the Entry as detailed in step 4 below. Note that some scanned results such as Tax and/or Tip are hidden until you select an Expense Item.
- Tap Add Receipts
 button to access the associated menu to:
- Get from Camera: Tapping this option will open your device camera, where you can take a picture and attach it to the Expense Entry
- Get from Gallery: Tapping this option will open your device Gallery, where you can choose a picture and attach it to the Expense Entry.
- Get from Report Receipts: Tapping this option will open the Report Receipts screen, where you can choose previously attached Receipts at the Expense Report level to either be moved or copied to the Entry.
- Get file from device: Tapping this option will allow you to upload a variety of file types downloaded to your device
- Once Receipts have been added at the Entry level:
- You can preview it in the preview pane. Note that the preview functionality within the Expense Reports is only available for .PDF, .jpg and .png file types.
- A counter is shown on the header of the Receipts section allowing you to quickly see the number of Expense Receipts attached to the Entry.
- You can navigate between multiple Expense Receipt(s) attached by swiping the image to the left or right.
- You can use Pinch in or out to zoom in or out of the attachment. Single-tap to zoom out of an attachment completely. When zoomed out, you can single-tap to view it in full screen
- Tap Delete
 to remove a Receipt from your Expense Entry. Note that the Receipt will be deleted only upon saving the entry
 - You can scan the attached Receipt by tapping the Scan Receipt button.
Caution: Capturing an acceptable quality image of your receipt is necessary to ensure that the OCR can successfully read the information. It is also important for you to verify the Expense Entry for accuracy before submitting your Expense Report. For more information refer to the Image capturing guidelines.
-
Details section
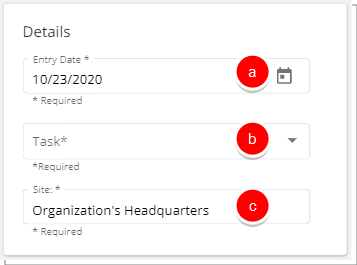
- Tap the Entry Date box to access the date picker and select a date.
- Tap the Task box to select a Task. Note that you can Search for Tasks by Project, or by Task name. Select the appropriate one and tap Next from the task selection screen.
Tip: When you select a Task, an information icon
 will appear next to the Task selection box. Tap the icon to access a tool-tip that displays the complete Task name for your reference.
 - Tap the Site box to choose a Site other than the default one.
-
Expense Item section
Tap the Expense Item box and choose a an Expense Item relevant to your Expense Entry from the list of available options.
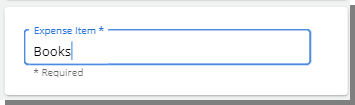
Note: The selection of specific Expense Item automatically generates the required fields accordingly within the Payment section.
-
Payment section
- Enter the Amount in the appropriate box.
- Then choose if the amount entered is the Gross Amount or the Net Amount. The Reimbursable Total will calculate accordingly, taking info consideration any applicable tax, mark-up and/or tips.
- Tap the Payment Method box and select a Payment Method from the list of available options.
- Tap the Currency box and select a Currency from the list of available options.
- Tap the Tax Group box and select a Tax Group from the list of available options. Depending on which option was chosen the appropriate Tax boxes will appear.
- Tap the Tax item and edit as necessary.
- The Total Tax is read-only and shows the total Tax amount.
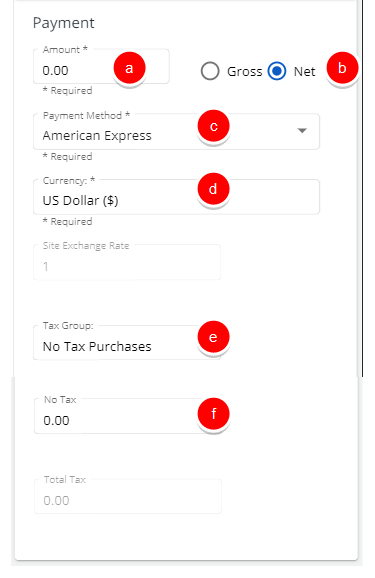
Note: The fields within the Payment section are generated according to Expense Item chosen and may differ from what is shown.
-
Attributes section
Within the Attributes section you can select the Expense Entries attribute(s) relevant to your Expense Item.

-
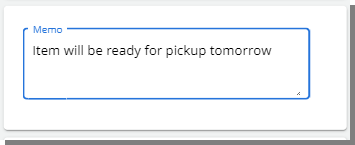
Memo section
Enter a brief memo regarding your Expense Entry.
-
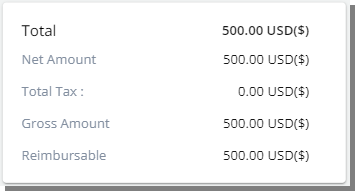
Total section
The Total section lists the total amounts such as: The Total amount, Net Amount, Total Tax, and Gross Amount.
- Review the information entered by expanding each section.
Caution: Capturing an acceptable quality image of your receipt is necessary to ensure that the OCR can successfully read the information. It is also important for you to verify the Expense Entry for accuracy before submitting your Expense Report. For more information refer to the Image capturing guidelines.
- Tap Save.
- Review your Expense Report Details where the newly added Expense Entry is listed.
- Tap Complete to submit your Expense Report.