Object Unique IDs for Sites, Users, Clients, Portfolios, Projects, Work Types, Tasks, Skills and Skill Associations, are crucial when updating existing items in PSA using the Excel Import. These unique identifiers ensure accurate mapping and seamless integration during the import process.
This article will guide you through accessing the Upland Analytics Schema to manage the visibility of these unique identifiers in Data Sources and provide detailed steps for creating reports that include them.
Note: The Upland Analytics Administrator security right (Setup > Organization > System > Security > Security Profile > Reports) is required to access Analytics Settings. For further details refer to Granting administration access to Upland Analytics.
Caution: You must have a clear understanding of the database schema to be able to manage Upland Analytics Data Sources and Views. Database Schemas are blueprints of how the data is organized in the database. Upland Analytics allows for great flexibility in managing the Data Sources and Views but it is only recommended for users with knowledge and understanding of the Database Schema and its administration.
- From the Icon Bar click Upland Analytics
 .
. - Click the Analytics Settings
 on the Analytics Menu and then click Data Views located under Data Configuration menu section. The Data Views page displays a list of all available data views.
- Click the hyperlink of the Data View that you want to edit. The Edit View page displays on the right pane.
- Click Next.
- Click the name of the required Key (You may need to scroll or Filter the list to find the key):
- For Sites: UA_DT_SITELIST
- For Users: UA_DT_USERLIST
- For Clients: UA_DT_CLIENTLIST
- For Portfolios: UA_DT_PORTFOLIOLIST
- For Projects: UA_DT_PROJECTLIST
- For Work Types: UA_DT_UAWORKTYPELIST
- For Tasks: UA_DT_TASKLIST
- For Skills: UA_DT_SKILLLIST
- For Skill Associations: UA_DT_USERSKILLASSOCIATIONS
Tip: You can Filter
 the list based on the above mentioned Key.
- Click the name of the Unique Id Key to access the Schema.
- Upon the Schema page displaying, click Next.
- Scroll to the required objects Unique Id Field and ensure the Hide column is set to No. Depending on your selection in step 3:
- For Sites: Site_Unique_ID
- For Users: User_Unique_ID
- For Clients: Client_Unique_ID
- For Portfolios: Portfolio_Unique_ID
- For Projects: Project_Unique_ID
- For Work Types: Work_Type_Unique_ID
- For Tasks: Task_Unique_ID
- For Skills: Skill_Unique_ID
- For Skill Associations: Skill_Association_Unique_ID
- Scroll back to the top of the table and click Edit selected Fields to enable inline editing.
- If the Hide column is set to Yes, this means the specific Unique ID is currently hidden from view.
- To make it visible, click the name of the field to access the Edit Row dialog box..
- Uncheck the Hide Field selection box.
- Click Save.
- By doing so, the setting will change to No, indicating that the Unique ID is no longer hidden and can be used as needed. This allows you to control the visibility of specific identifiers within the system based on your preferences or reporting requirements.
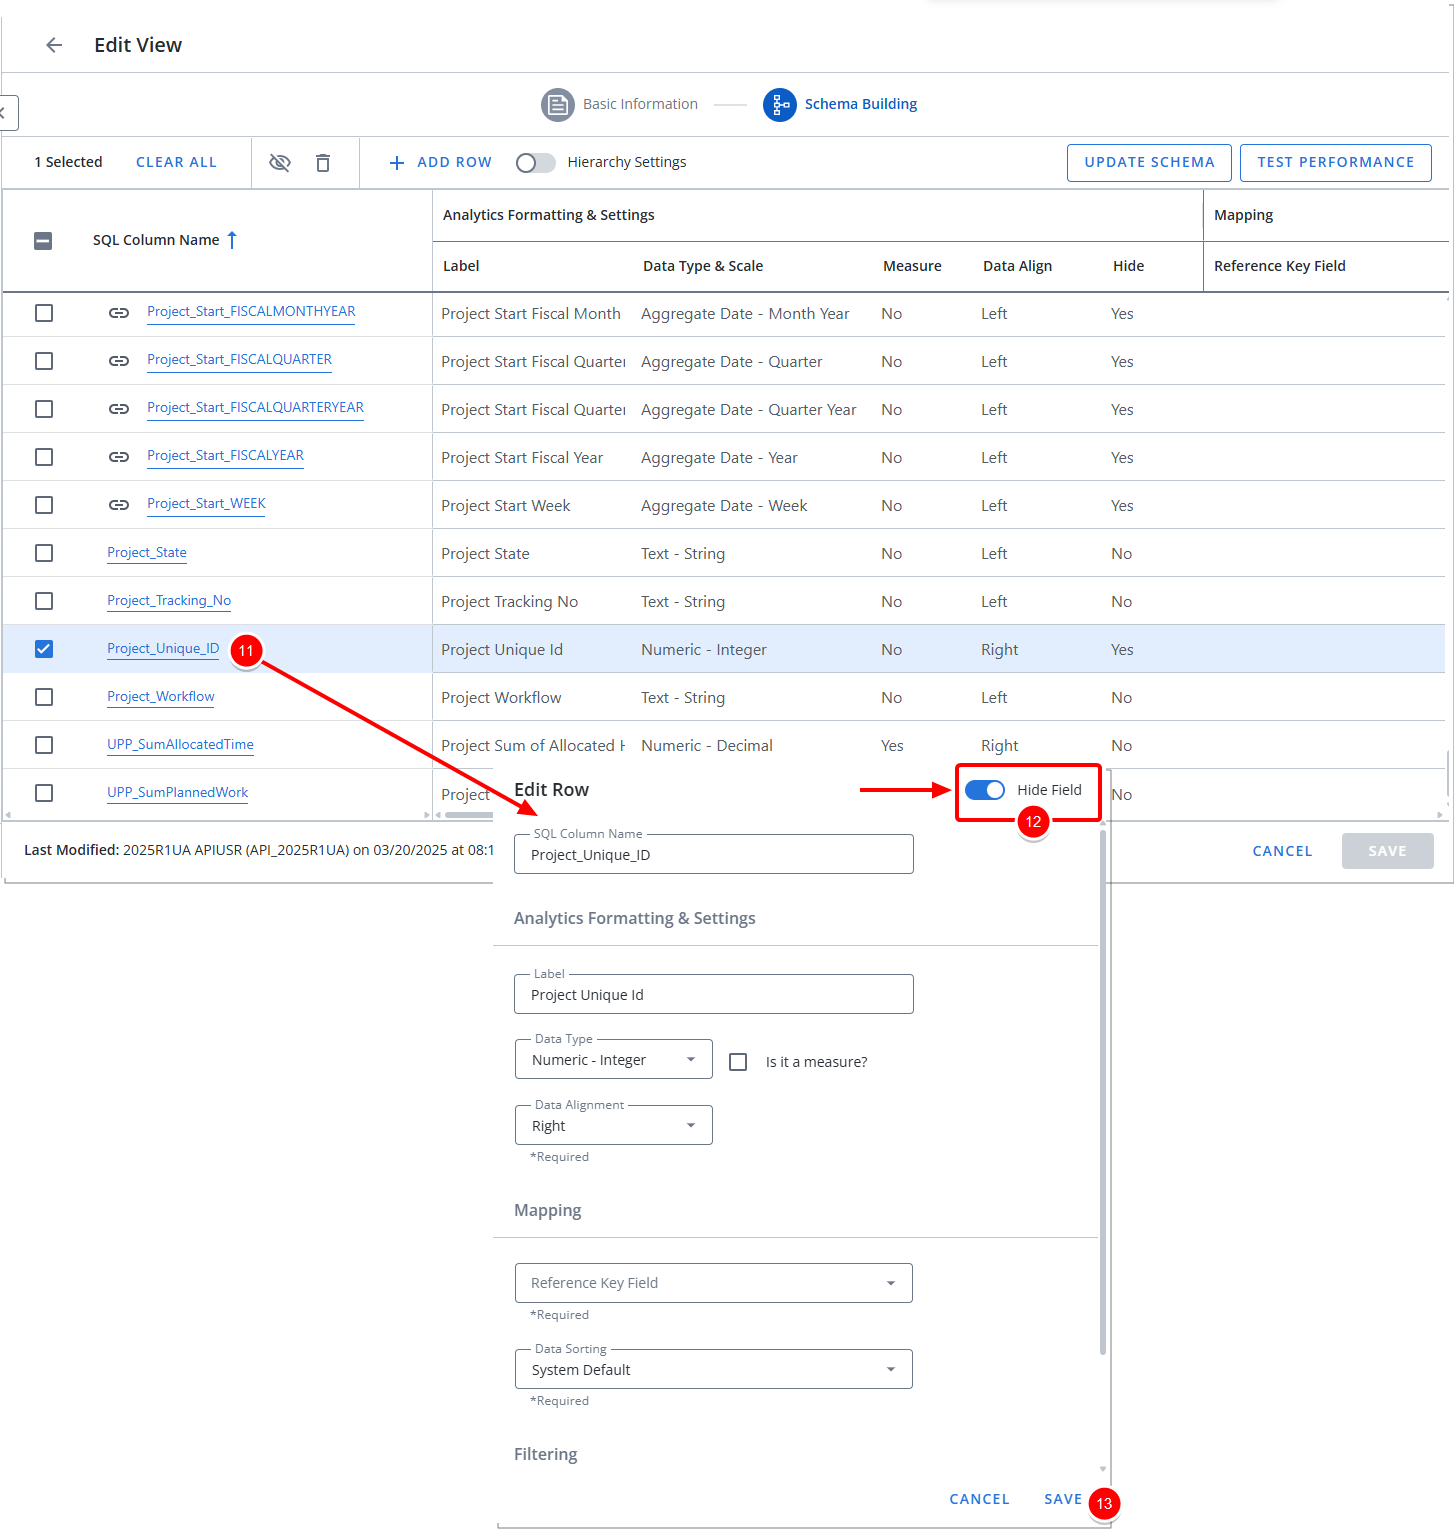
Note: In our example we are modifying the Project_Unique_ID making the it accessible. This same concept applies to other Unique IDs across different objects.
- Upon returning to the Edit View page, click Save.
- The Unique ID Field will now be available through the corresponding View and Data Source. Please refer to the table below for the Data Source, View Key, View Title, and Field name details:
Data Source View Key View Title Unique ID Field Name Organization UA_DT_SITELIST Active Site Site Unique Id Organization UA_DT_USERLIST User User Unique Id Work UA_DT_CLIENTLIST Client Client Unique Id Work UA_DT_PORTFOLIOLIST Portfolio Portfolio Unique Id Work UA_DT_PROJECTLIST Project Project Unique Id Work UA_DT_UAWORKTYPELIST Work Type Work Type Unique Id Work UA_DT_TASKLIST Task Task Unique Id Skill Associations UA_DT_SKILLLIST Skill List Skill Unique Id Skill Associations UA_DT_USERSKILLASSOCIATIONS User Skill Associations Skill Association Unique Id
Create a Report using the Unique ID Field
In our example, we modified the Project_Unique_ID, making it accessible for reporting. The same concept applies to other objects—creating a report to view the Unique ID can be done for all objects.
To help with the report creation, please refer to the table above for the specific Data Source, View, and Field name details for each object’s Unique ID.
Note: You must first ensure that the required Unique IDs are visible before creating the report.
- Click Upland Analytics.
- Click Report from the Create New dropdown list.
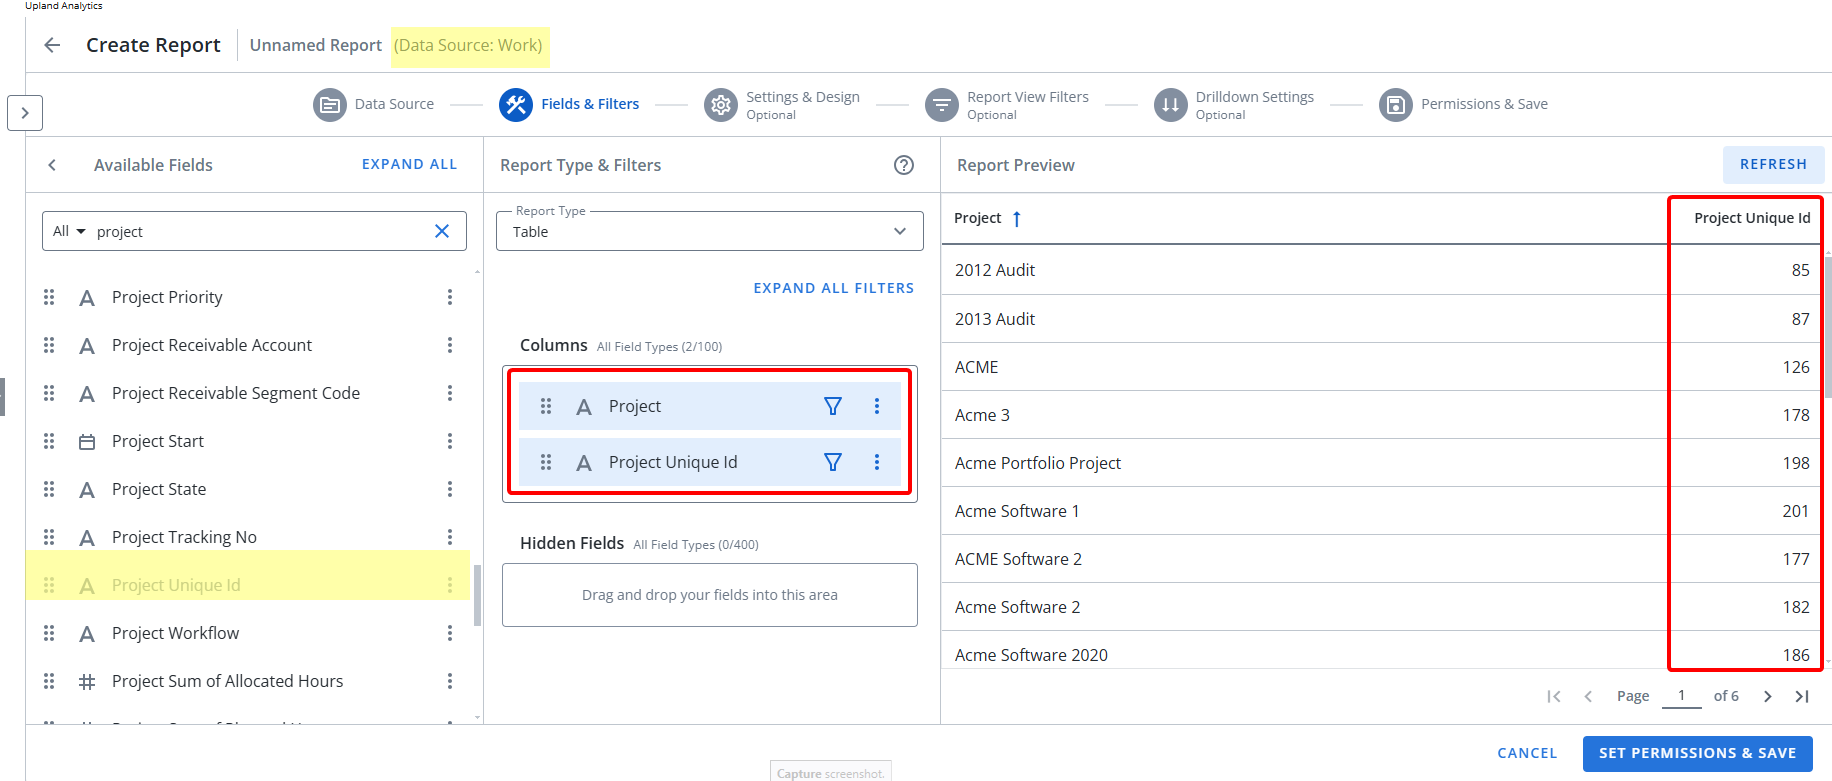
- In our example, we made the Project Unique Id Field visible which is located under the Project View of the Work Data Source.
- Select the Work Data Source.
- Click Next.
- Select a Report Type from the available options.
- Create a report to show the Project Unique ID:
- Drag the required field(s) located under the Project View in the Columns .
- Click Preview.
- Click Set Permissions & Save.
- Enter the Report Name and select a Folder where it will reside.
- Set the Report Visibility.
- Click Save.