Filters can be used to narrow or focus your data and clarify findings. The Report Editor must first add fields to the filter drawer for the report or dashboard and then Report Viewers can apply filters to their view of the report or dashboard.
Note: If there are no filters available or you want to filter on data that is not available, contact the Report Editor.
This article details the filters that display in the All Filters section in the filter drawer, not Quick Filters.
This article details how to:
- Access the Filter Drawer
- Apply/Modify an On Page Filter on a Report or Dashboard
- View the Details of an Existing On Page Filter
Note: The AND logic applies to all filter types, including Report Filters, On Page Filters, Quick Filters, and Subscription Filters. All filter conditions must be met for data to be included in the results.
Access the Filter Drawer
To open the Filter drawer do one of the following:
- Click the Filter
 button to open the filter drawer.
OR - Click All Filters.
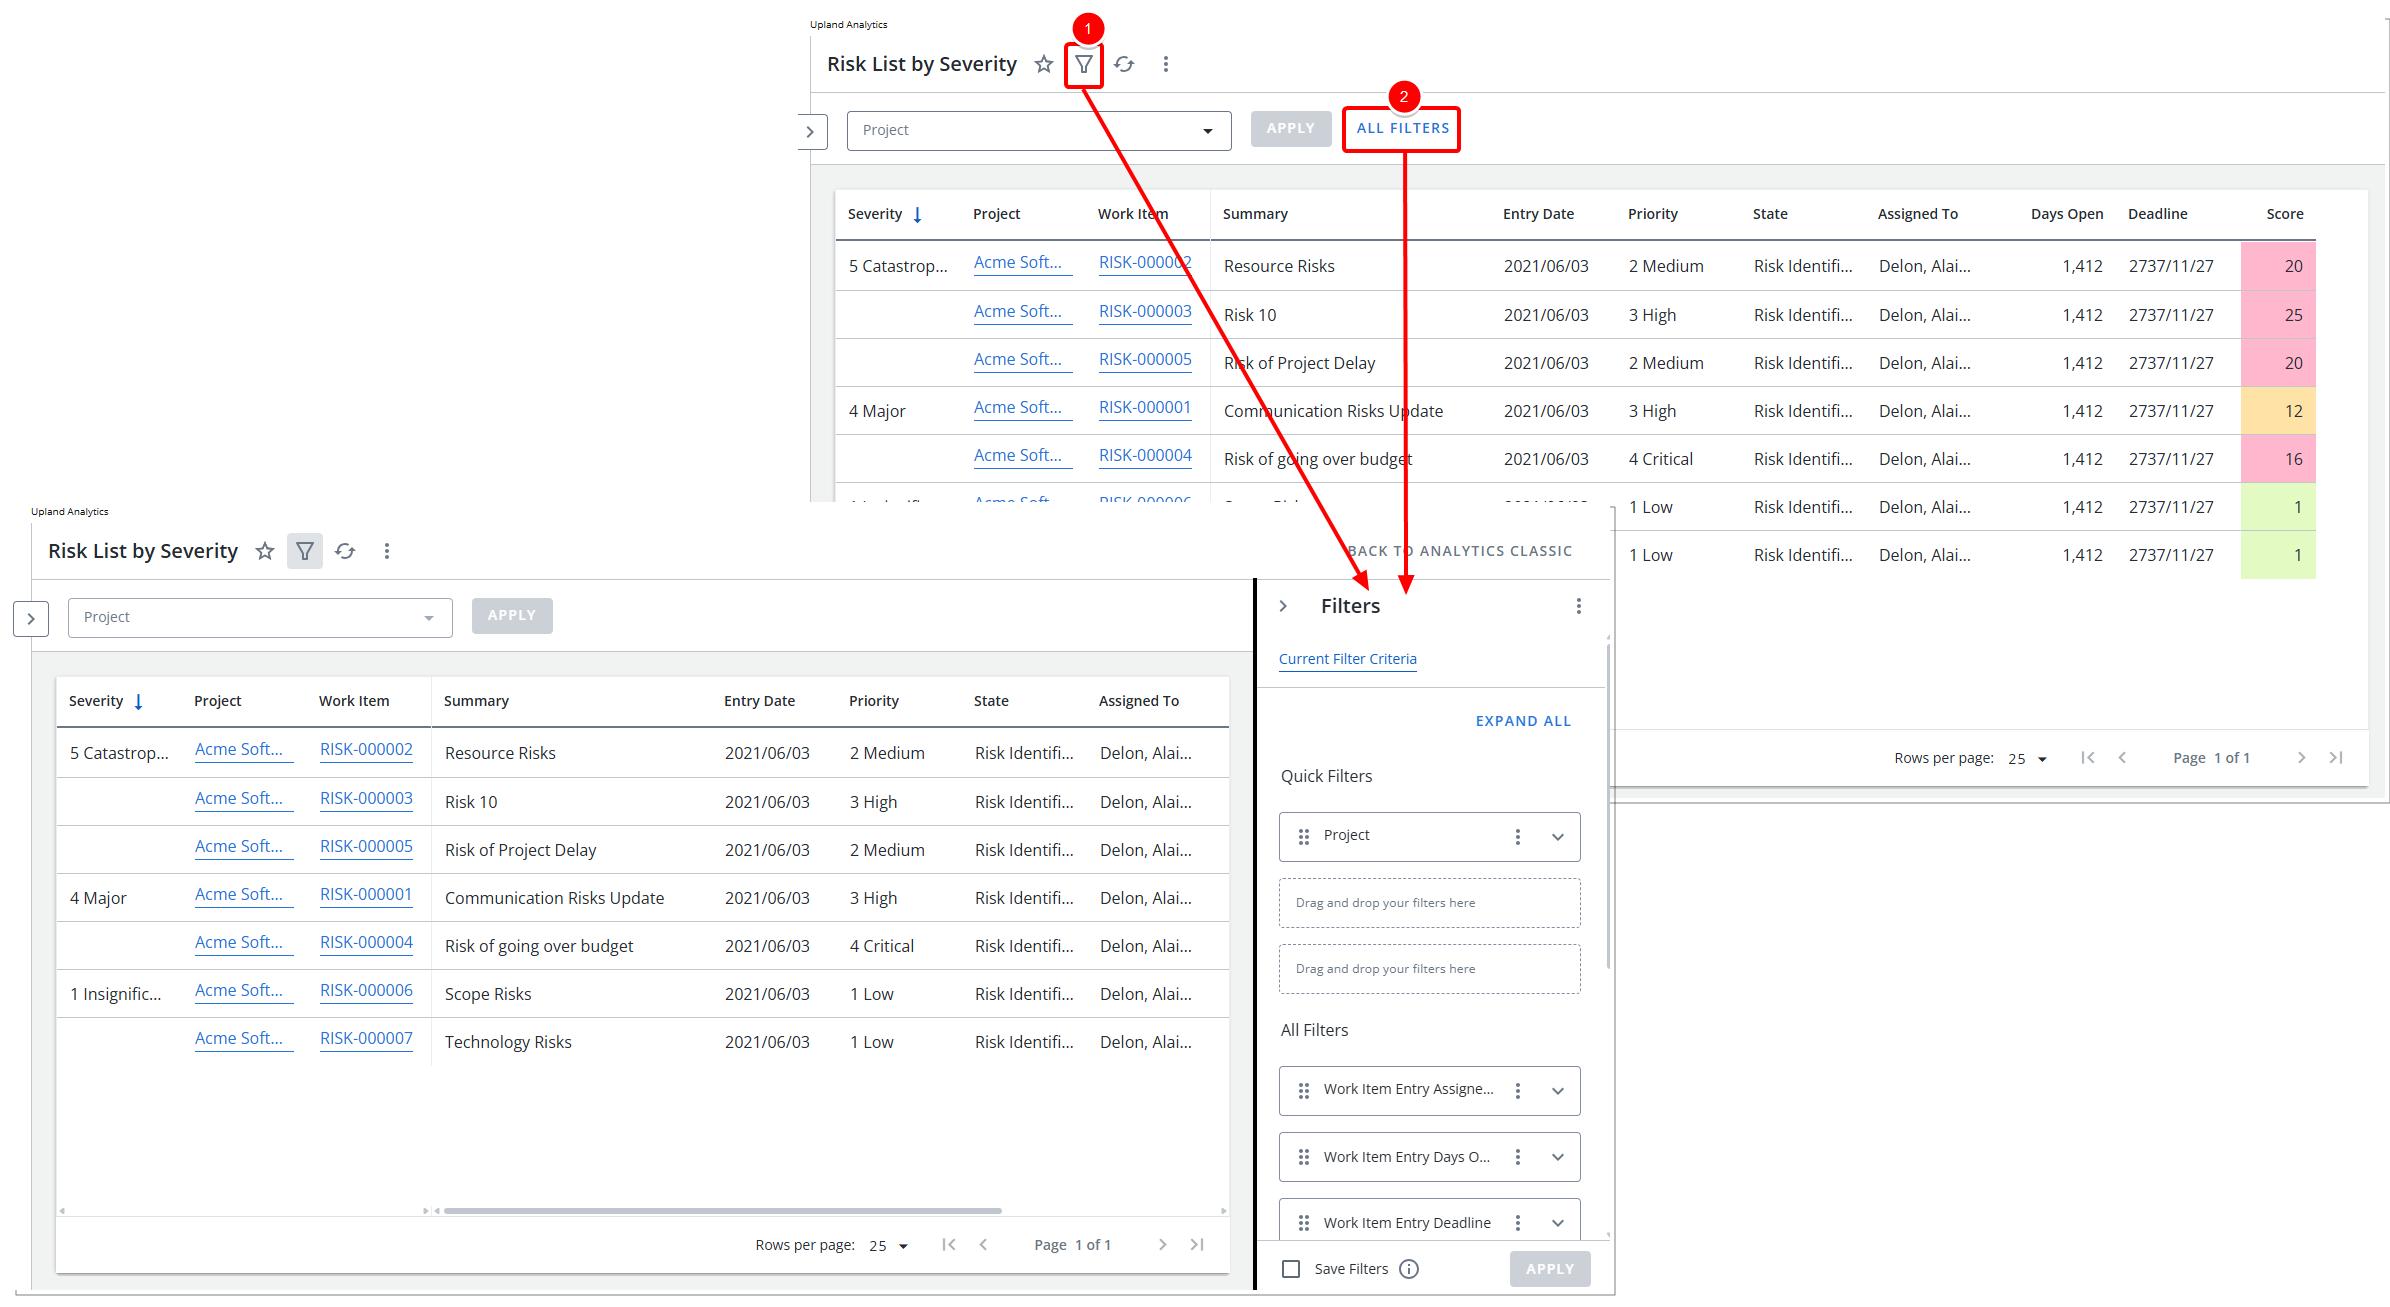
Note: The fields available for filtering are displayed in the Filter drawer. If the Report Editor has not added any fields to be used as filters, you won’t be able to apply filters to the report. In this case, please contact the Report Editor for assistance. Refer to On Page Filters.
Apply/Modify an On Page Filter on a Report or Dashboard
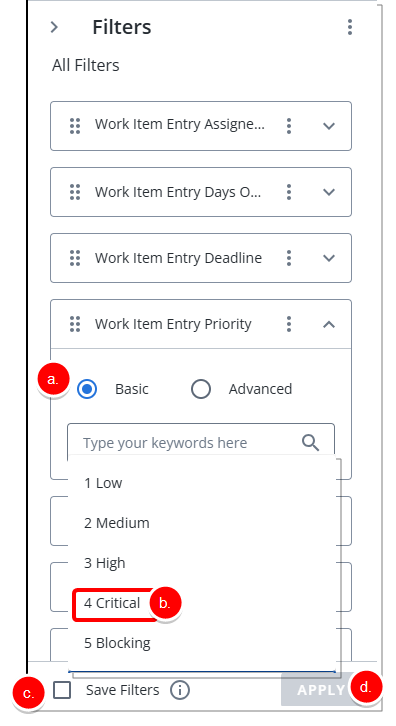
- Click the Expand
 button located against an available Filter field located within the Filter drawer.
 - Select either Basicor Advanced. The options available to you will vary depending on your selection. Once youhave made your choice, continue with either Step 2 (for Basic) or Step 3 (for Advanced).
- Basic to select a value(s).
In the Type your keywords here, field type the data value on which you want to filter. A dropdown menu displays all data values for the selected field in the report or dashboard.
- Select one or more values to add to the filter from the list.
- Optional: Click the Save Filters checkbox to save the filter to the report or dashboard.
- Click Apply.
- Advanced to add conditions.
- Click Add Condition.
- Click the Condition dropdown and select an operator. The following operators are available depending on the Field Type you select:
 Dimensions:
Operator Description Equals To Returns records if the field matches the target value. Not Equal To Returns records where the field does not match the target value. Contains Returns records if the field includes the target value. Not Contain Returns records where the field does not contain the target value. Starts With Returns records if the field starts with the target value. Not Start With Returns records where the field does not begin with the target value. Ends With Returns records if the field ends with the target value. Not End With Returns records where the field does not end with the target value. Pattern Returns records that match the specified set of characters in the exact order. Not In List Returns records where the field is not equal to the value(s). Is Null Returns all records where the field is null. Is Not Null Returns all records where the field is not null. Equals To Returns records if the field matches the target value. Not Equal To Returns records where the field does not match the target value. Contains Returns records if the field includes the target value. Not Contain Returns records where the field does not contain the target value. Starts With Returns records if the field starts with the target value. Not Start With Returns records where the field does not begin with the target value. Ends With Returns records if the field ends with the target value. Not End With Returns records where the field does not end with the target value. Pattern Returns records that match the specified set of characters in the exact order. Not In List Returns records where the field is not equal to the value(s). Is Null Returns all records where the field is null. Is Not Null Returns all records where the field is not null. - Measures:
Operator Description Equals To Returns records if the field matches the target value. Not Equal To Returns records where the field does not match the target value. Greater Than Returns records where the data in the column is less than the value in the filter. Equal or Greater Than Returns records where the data in the column is less than or the same as the value in the filter. Less Than Returns records where the data in the column is greater than the value in the filter. Equal or Less Than Returns records where the data in the column is greater than or the same as the value in the filter. Between Returns records where the data in the column is between the two values in the filter. Not Between Returns records where the data in the column is not between the two values in the filter. - Dates:
Operator Description Current Returns records for the current period specified. You can choose from Day, Week, Month, Quarter and Year. Previous Returns records from a previous time period that you specify. You can choose from Day, Week, Month, Quarter, or Year, and enter the number of periods you want to go back. For example, selecting Month and entering 2 will show records from the previous 2 months. Next Returns records for a time period that is upcoming, starting from today. You can choose from Day, Week, Month, Quarter, or Year, and enter how many future periods to include. For example, if today is July 9 and you select Week and enter 2, the filter will return records scheduled for the next two full weeks (e.g., July 10–July 23). Range Returns records within a specific date range that you define. You can choose from Day, Week, Month, Quarter and Year and enter the start and end of the range. All YTD Returns records from the beginning of the current year up to today. Null Returns all records where the start date is null. Not Null Returns all records where the start date is not null.
- One of the following fields displays depending on the operator you selected in step 3a:
- Type your keywords here: Type the data value on which you want to filter. A dropdown menu displays all data values for the selected field in the report or dashboard.
OR - Value: Type the value on which you want to filter.
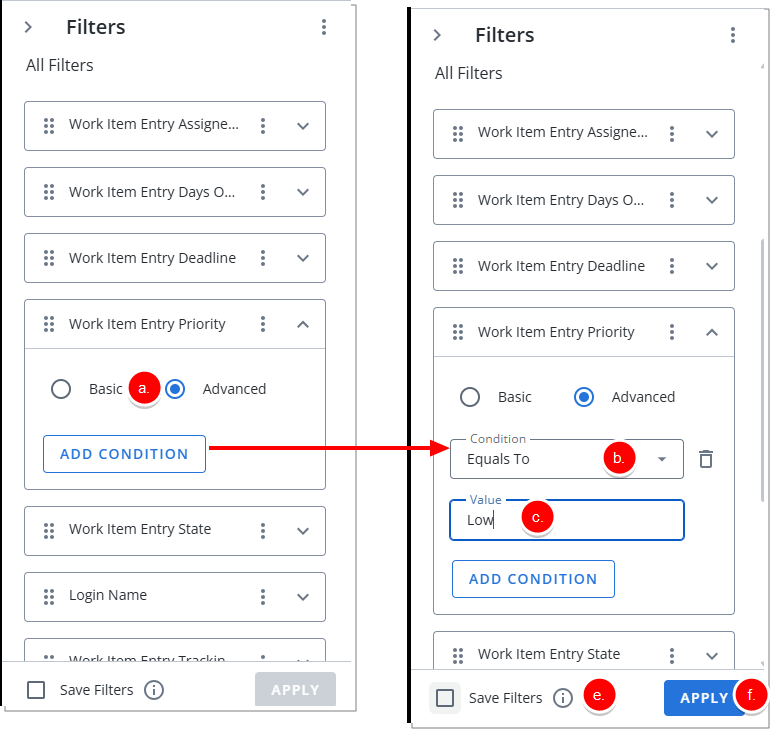
Tip: You can create multiple conditions. Click the Add Condition button again and repeat step 4.
- Type your keywords here: Type the data value on which you want to filter. A dropdown menu displays all data values for the selected field in the report or dashboard.
- Repeat steps 1, 2 or 3 as necessary.
- Optional: Click the Save Filters checkbox to save the filter.
- Click Apply. When you close the filter drawer, the Filter button will be blue.
Note: The Save Filters checkbox is not selected by default—even if filters have previously been saved—to prevent unintentionally overwriting existing saved filters. This ensures that any changes you make are applied only to your current view unless you explicitly choose to save them.
You can always check whether saved filters are applied by hovering over the info icon. If you want to update or save a new filter, simply select the Save Filters checkbox before running or saving the report.
- Close the Filter drawer.
- View the Details of an Existing On Page Filter.
View the Details of an Existing On Page Filter
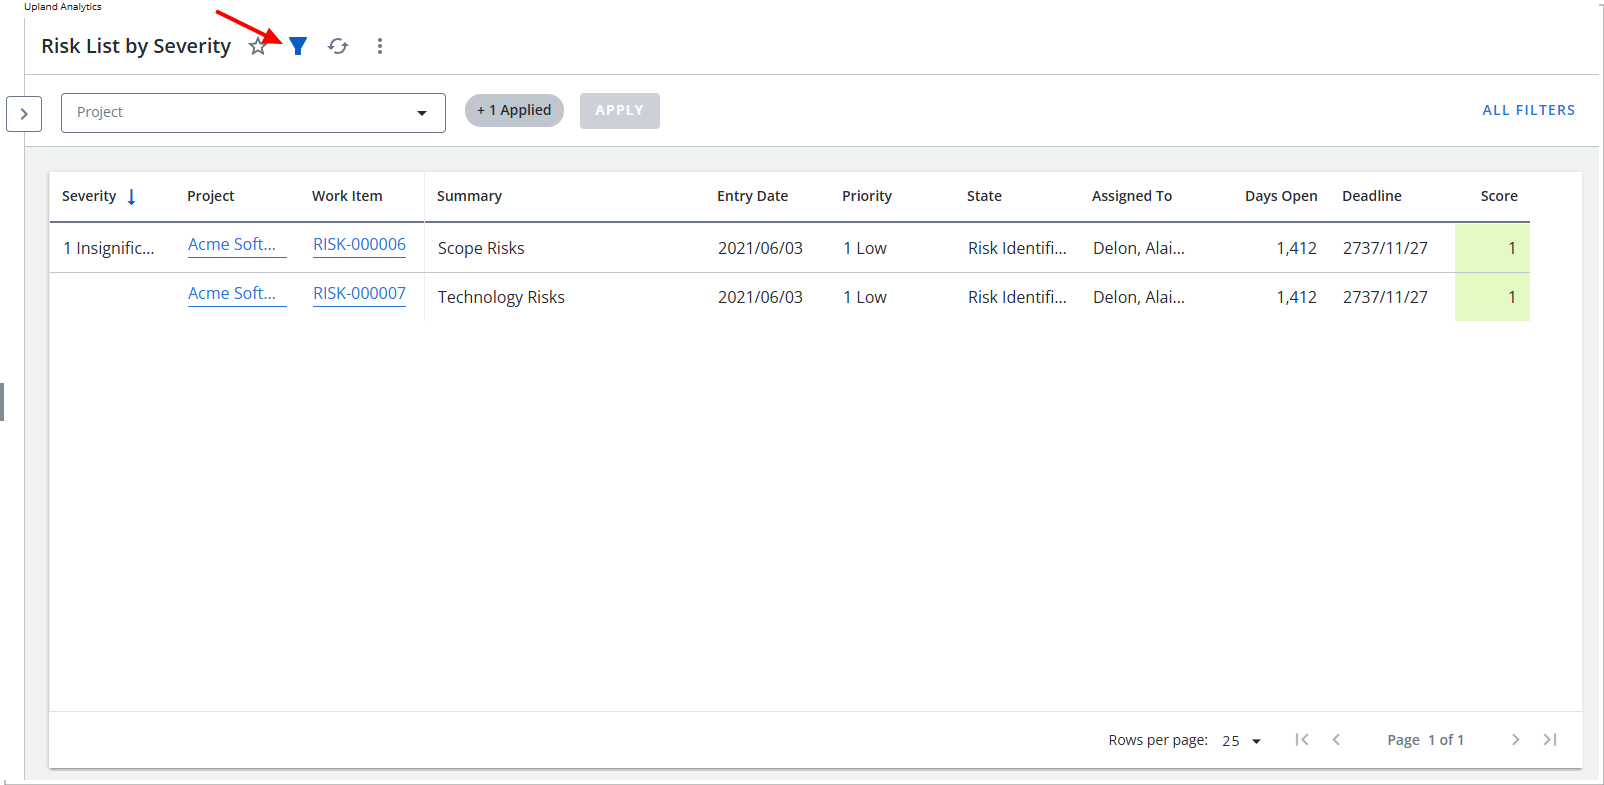
When a filter is applied, the filter icon displays in blue ![]() .
.
Note: If the Report Editor has selected fields for filtering but hasn’t applied any filters, the filter icon will remain unchanged in color. However, the selected fields will still appear in the Filter drawer. When you receive a new report or dashboard, it's a good idea to open the Filter drawer to check if any fields are available for filtering.
The Filter drawer displays all the fields the Report Editor has made available for filtering. You can edit these filters in the following ways:
- Click the Filter
 icon to open the filter drawer.
 - Edit the filter values on the fields. See Apply/Modify an On Page Filter on a Report or Dashboard for more information.
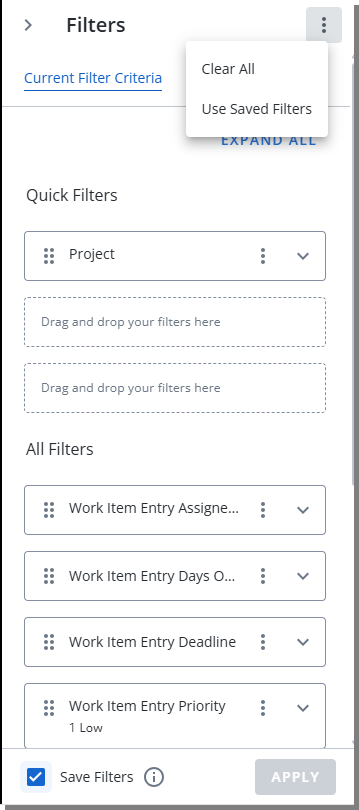
- Click See more
 next to Filters title and click one of the following:
- Clear All to remove all filters from the report. You can retrieve it only if it was saved.
- Use Saved Filters to revert back to the saved filter.
Note: Click the Info icon
 to display when the filter was last saved.
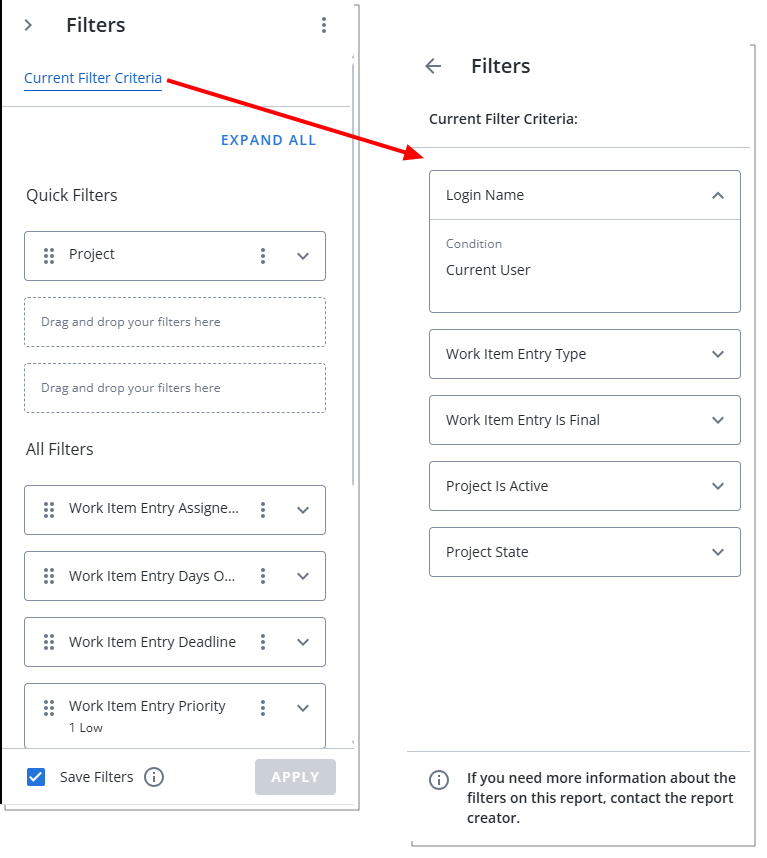
- Click Current Filter Criteria to view the current filter values by expanding each field.
-
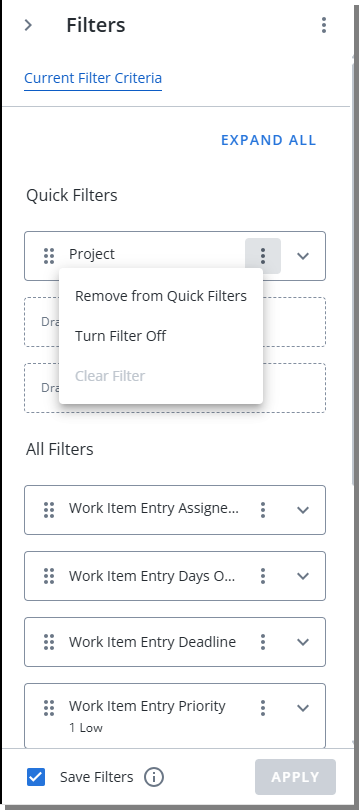
Click See more
on a Quick Filter field and then choose one of the following options:- Remove from Quick Filters to move the filter from the Quick Filters list to the All Filters list.
Note: Only available for filters in the Quick Filters list.
- Add to Quick Filters to move the filter from the All Filters list to the Quick Filters list.
Note: Only available for filters in the All Filters list when there are less than three filters in the Quick Filters list.
- Turn Filter Off to turn off the filter. To turn it back on, click on the field that you want to turn on, click Turn Filter On, and then click Apply.
- Clear Filter to remove the filter from the field. You can retrieve it only if it was saved.
- Remove from Quick Filters to move the filter from the Quick Filters list to the All Filters list.