The Associate User Defined Fields page can now be accessed from the User Defined Fields root Navigation menu option under Setup, therefore it is no longer available under each specific module.
This article details how to associate User Defined Fields.
Use Case: Todd, the Tenrox Administrator, has been tasked with adding several User Defined Fields to several modules. He can accomplish this task more efficiently through the Associate User Defined Fields page, which is accessible directly from under Setup.
Version Note: Consolidated User Defined Fields under Setup is available as of Tenrox 2018 R1 SP5.
1. Access Associate User Defined Fields page
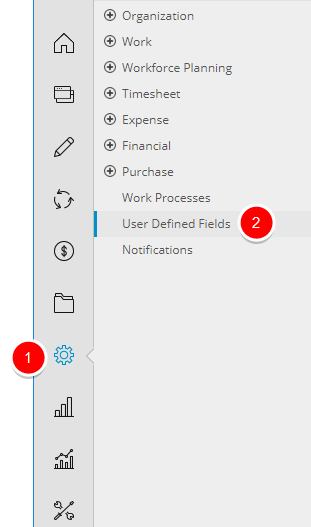
- Click Setup from the Icon Bar.
- Click User Defined Fields from the menu to access the Associate User Defined Fields page.
Note: The Menu will automatically hide (collapse or minimize), allowing for more space on the Associate User Defined Fields page. While the menu is minimized, click the blue Collapse/Expand arrow to turn it back on.
2. Select an Object
- Select an Object (module) from the list of available Associate to options.
Note: Users must have access rights to at least one of the modules, listed here, to have access to the Associate User Defined Fields page, otherwise the User Defined Fields menu option will not display.
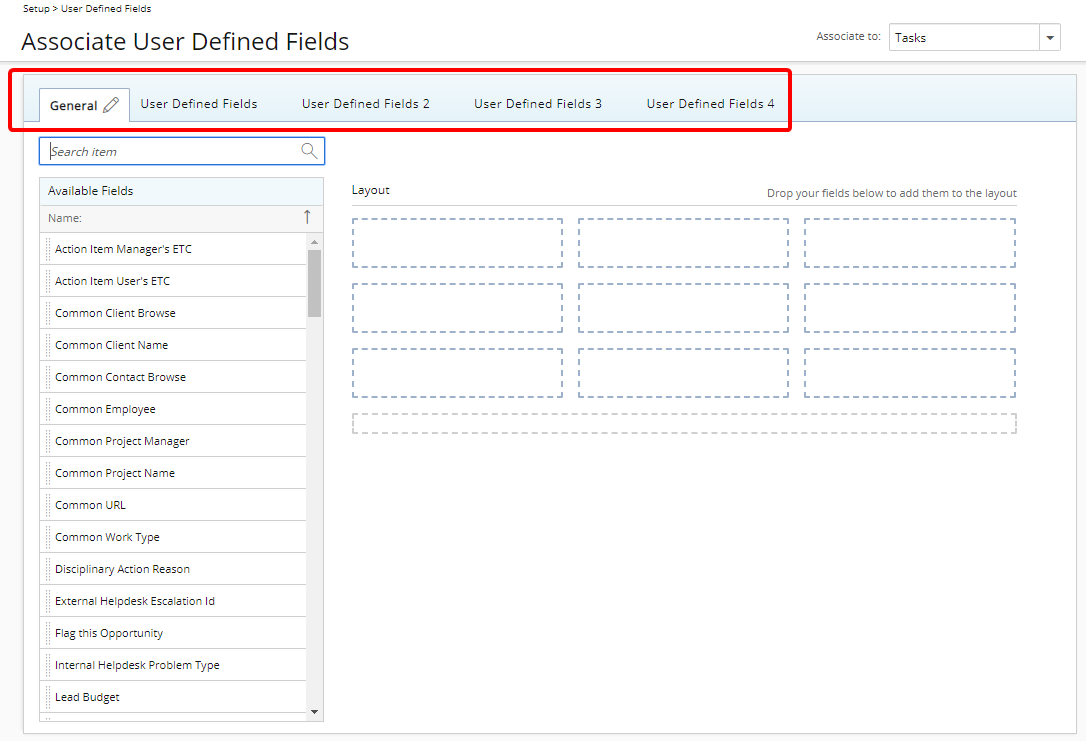
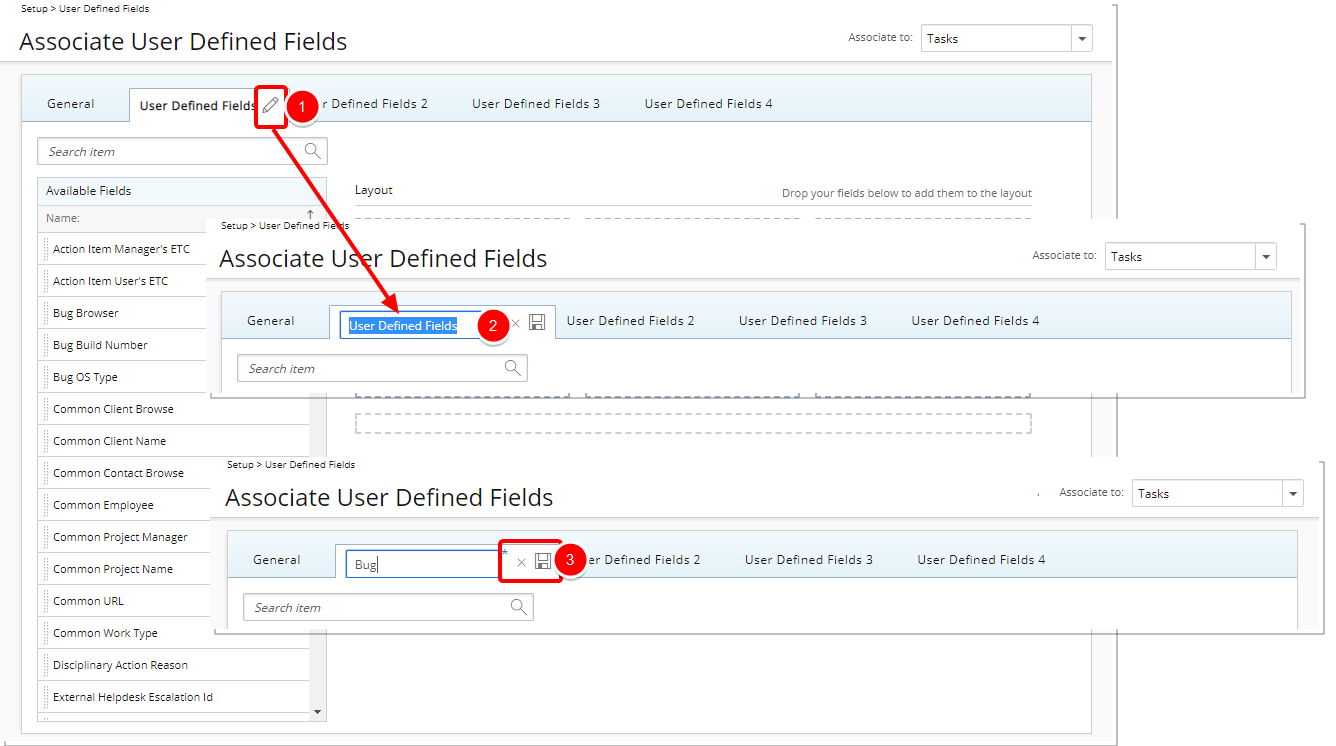
3. Select a Tab
- Select an Tab where you would like to add the UDF.
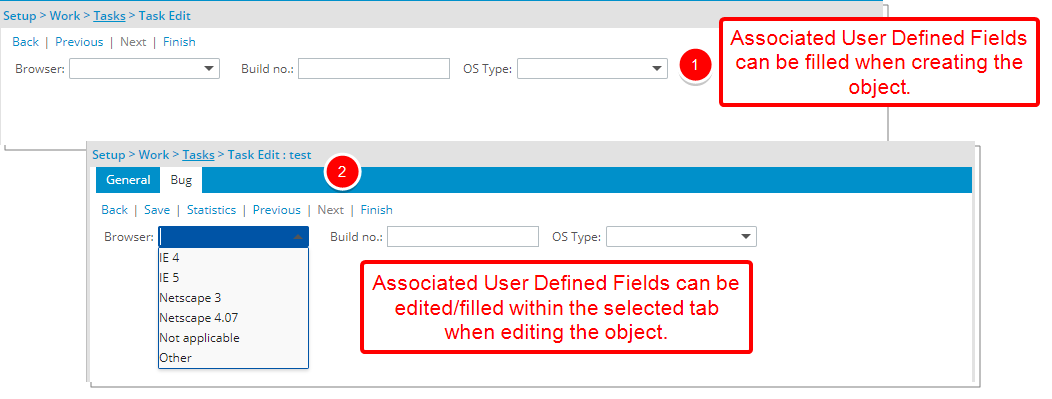
- Adding UDFs to the General tab will result in the addition of the UDF fields at the bottom of the General tab in the Client Edit page.
- Adding UDFs to any other tab than the General tab will result in the creation of new tabs in the Client Edit page.
Version Note: Available as of Tenrox 2019 R1 SP4: Addition of a fourth Layout column to the User Defined Fields layout for the Project.
4. Associate UDFs
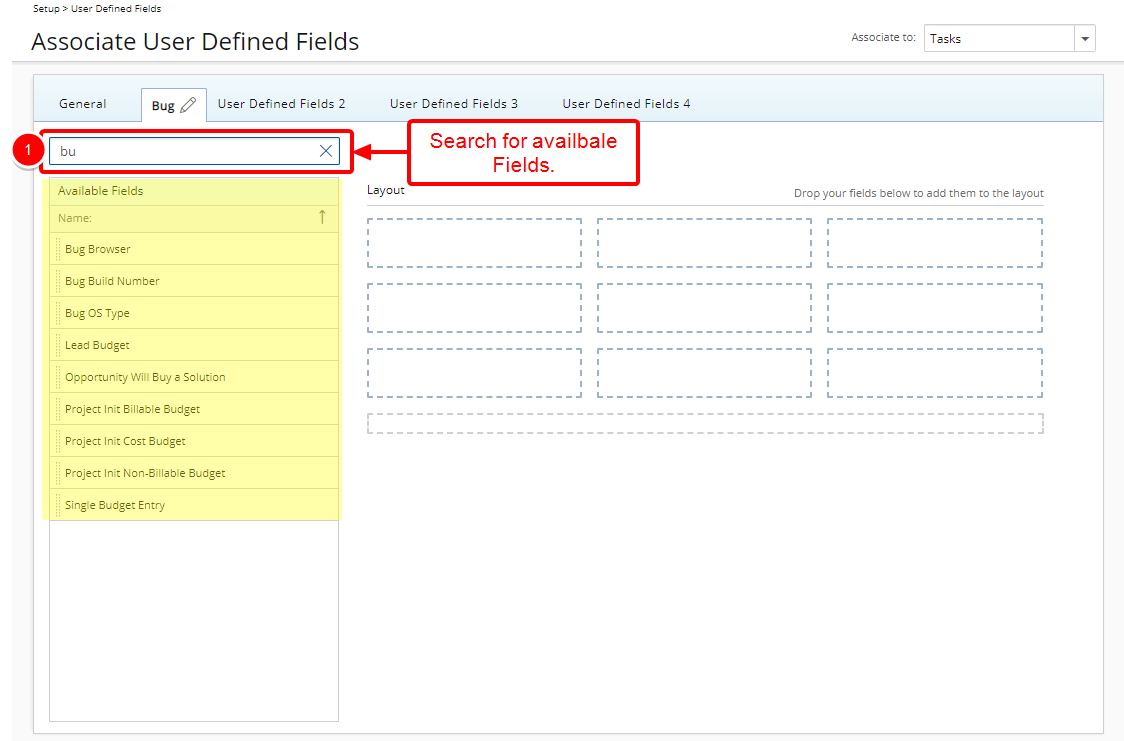
4.1 Search for Available Fields (optional)
4.2. Add Fields to Your Layout
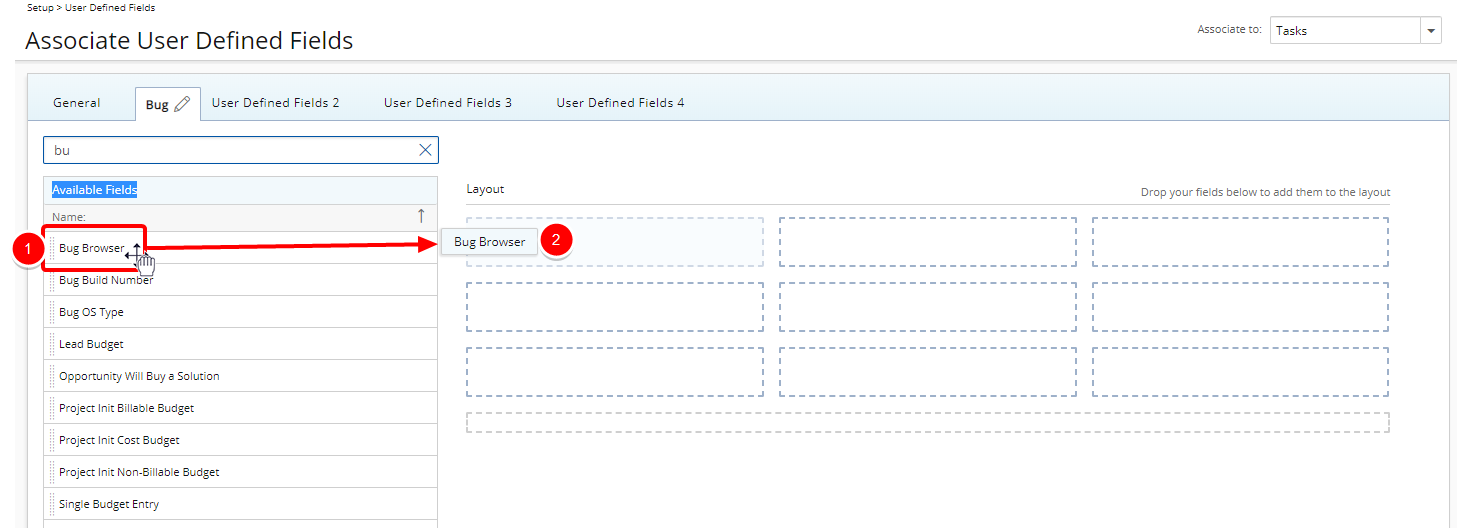
- From the Available Fields section select the desired field
- Drop the selected Field in the Layout section.
Version Note: Available as of Tenrox 2019 R1 SP4: Automatic synching of newly associated or deleted User Defined Fields to Upland Analytics Views. For more information click here.
Note: Repeat Steps 1-2 above to add as many UDFs as necessary.
Tip:
- You can simply double-click an available Field to add it to the Layout. The Layout will adjust automatically and your selected Field will be placed in the next available rectangle.
- To add more UDF layout areas, simply drag a Field into the gray doted rectangle. You will notice a new line with 3 dotted rectangles will appear above the gray dotted rectangle. you can ow add more UDFs in the available slots.
4.3. Edit UDF Properties (optional)
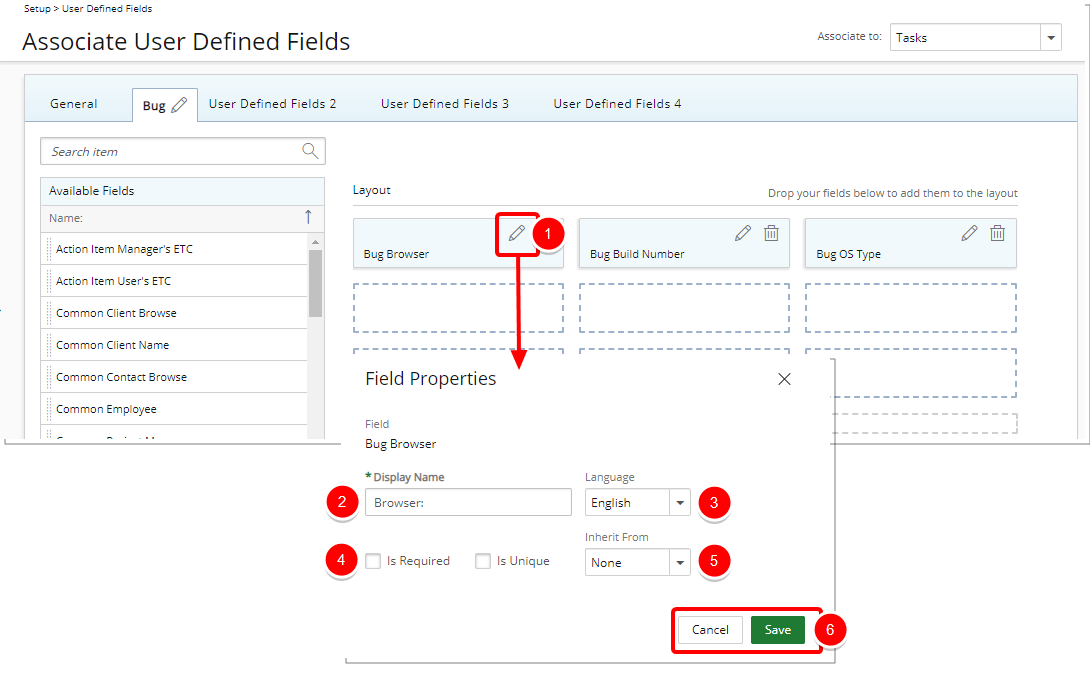
- Click the Edit button to open the Field Properties modal window.
- Display Name: Allows defining a display name for the field in the selected language. If left empty, the default field name will be used and system terminology will be applied.
- Language: Allows selecting the language for which the display name will be set.
- Select whether the Field is:
- Required
- Unique
- Select if the UDF is Inherited or not. Note: The Inherit From option is only available for UDFs of Type Selection. Project objects can inherit from Client UDFs and Task objects can inherit from Work type UDFs.
- Click Save to apply your changes or Cancel to return to Associate User Defined Fields page.
