Displaying the Quick Links Control Panel
Note: This article was authored in the former format, which includes functionality dating back to version 2013 R1 and earlier. The content will be converted to the current platform article format.
A Quick Links panel is available in the lower left menu allowing users to search for objects, access recently visited pages, create new objects, access their entry pages and store shortcuts to frequently visited pages. It offers a faster ‘jump off' point to get to some of the most frequently-used tasks.
The Quick Links menu can be expanded or collapsed, using the plus (+) and minus (-) signs in the lower right of the panel.
- Clicking the Create New… button opens a combo box with the list of objects (client/project/task/user) that the user can create and have added to their selection.
- Clicking the Go to My… button opens a combo box with the list of entry pages that the user has added to this combo, for example, expense reports, timesheet, work list and work plan.
- Clicking the Shortcuts… button opens a combo box with the list of pages the user has added to shortcuts, for example, to expense manager, project central and resource central.
- With all of the above options selecting an item opens that object's edit page in the right pane. If there are no items available in the combo-box, the option is grayed out, or hidden
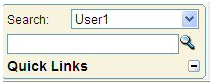
- The Search fields search by name for Clients, Projects, Tasks, Users, Groups and Sites. The results are displayed in a grid in the right pane. If there are no items available in the combo-box, the option is grayed-out, or hidden.
Creating a New Client, Task, Project or User Via Quick Links
- From the Quick Links menu, click Create new, and then select Client, Project, Task or User, depending on the desired action. In this example, we select Client.
- The Client Edit screen appears.
- Fill in all the text fields required for the new client, and click Next from the links under the navigational breadcrumbs.
- Some Create a New procedures, like Client, have up to five screens to fill in before you are asked to confirm the information you have entered. Others, like Task, have only one screen.
- When you have confirmed the correct entry of your information, click Finish.
- Click Save to retain the information and finalize the new information.