How do I generate a WIP accural batch?
Before a WIP accrual batch is generated, the projects are first included to the accrual batch. From the WIP Accrual Manager page, users can create, delete, post and export WIP accrual batches with transactions.
1. Navigate to the WIP Accrual Manager Page
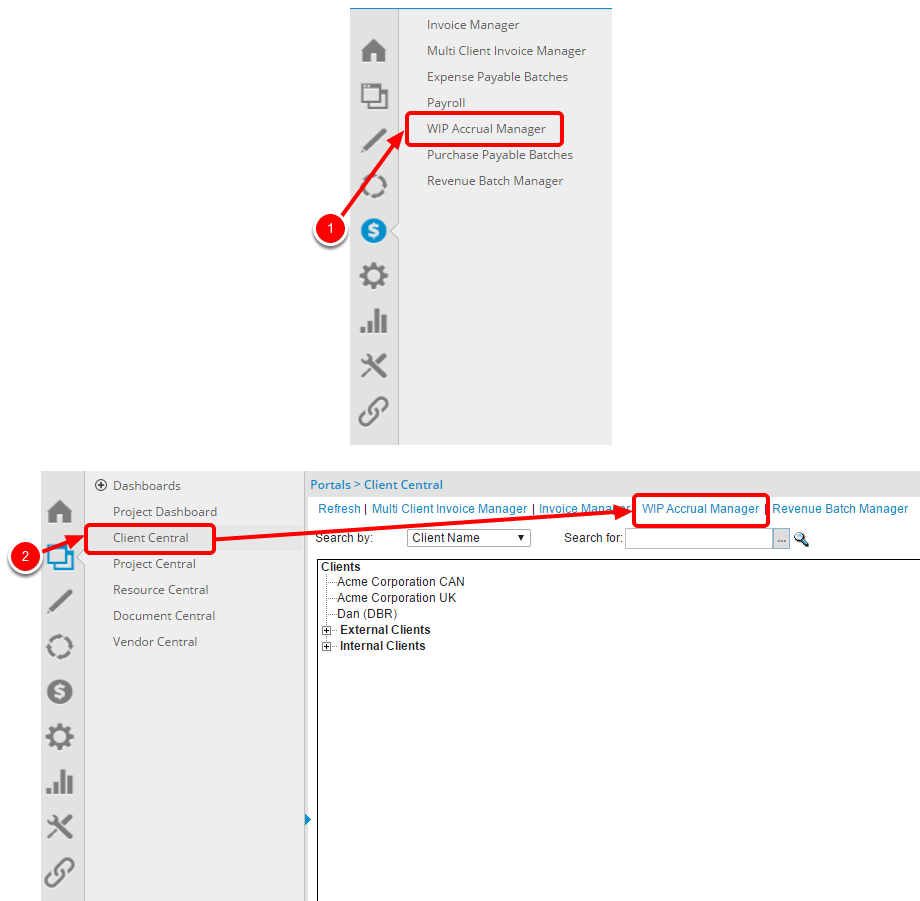
To navigate to the WIP Accrual Manager page, by either one of the following methods:
- Click Financial in the Icon Bar. The click the WIP Accrual Manager link in the Navigation Menu.
- Click Portal in the Icon Bar. The click the Client Central link in the Navigation Menu. Then select the WIP Accrual Manager tab within the Client Central page.
2. Click the New Link
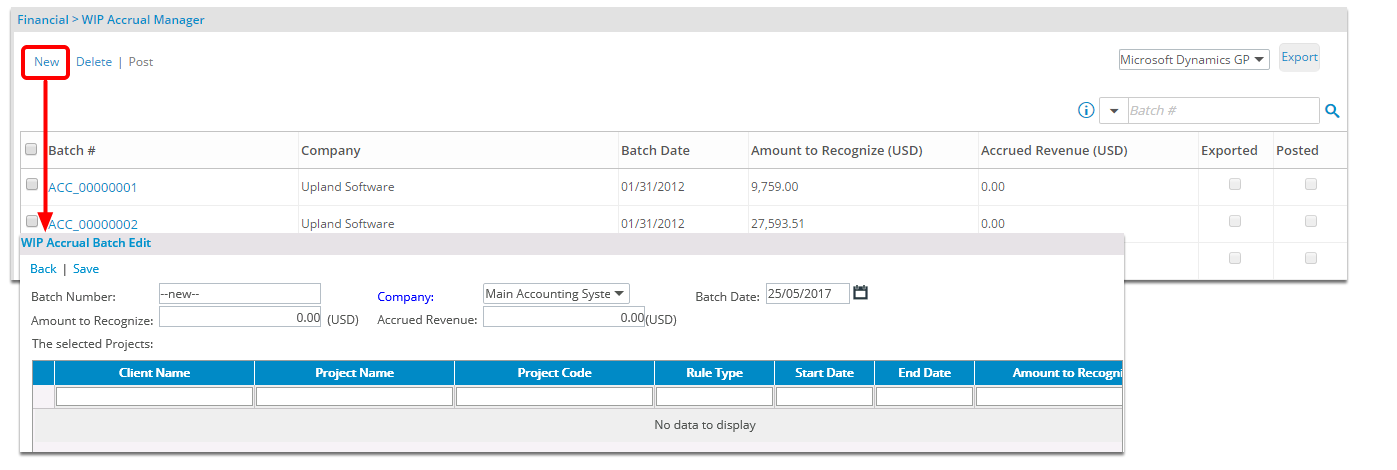
- Click the New link to create a new WIP accrual batch, and if required, edit the following:
2.2. Click the Calendar Icon
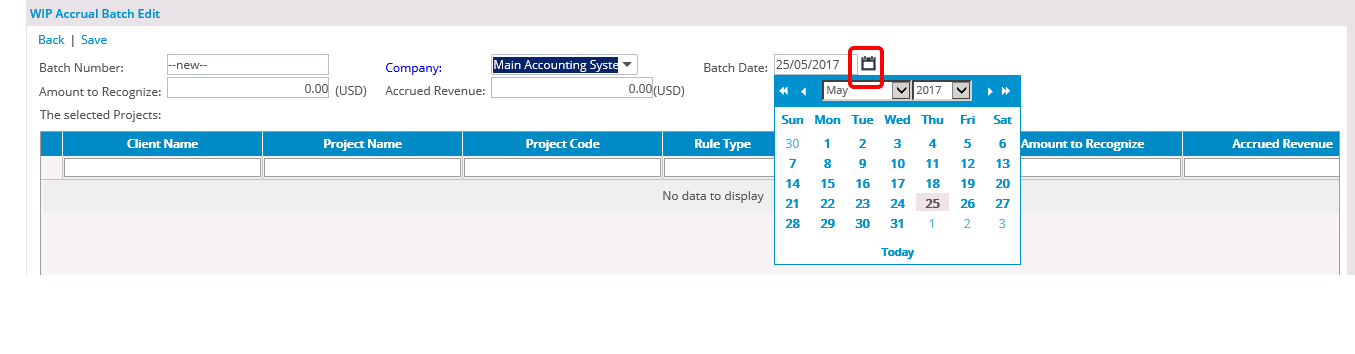
- Batch Date: Click the calendar icon to select a date.
Note: if different from the default, current date that automatically displays.
3. Click the Save Link
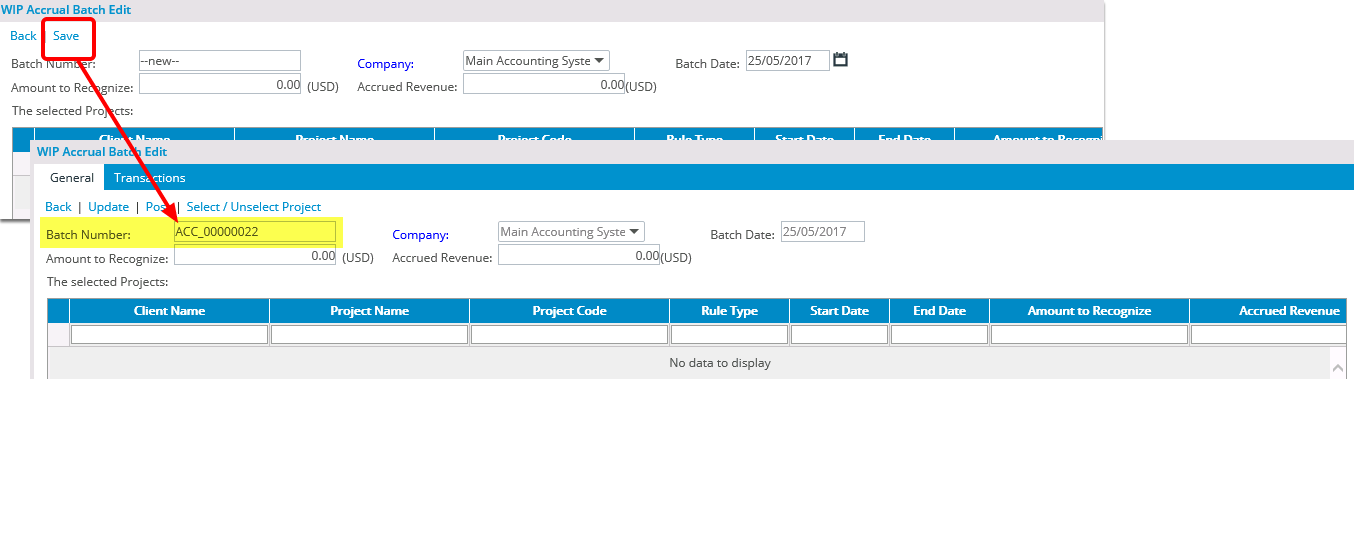
- Click the Save link to automatically generate the batch number using the defined accrual settings.
Note: Click here to view the how do I define a WIP Accural Batch Number article for more information. After a WIP accrual batch is saved, the General and Transactions tabs are displayed, the Company and Batch Date boxes are no longer editable, and as long as the Allow WIP Accrual number override option is selected, the batch number can be edited. When a batch number is changed, the system verifies that the number entered is unique; otherwise, the batch number cannot be saved.
4. View the information for the WIP Accrual Batches

- From the General tab, view the information for the WIP accrual batches and expand each entry to view the details for each project.
Note: Suspended projects are displayed in red.
5. Click the Select/Unselect Project Link
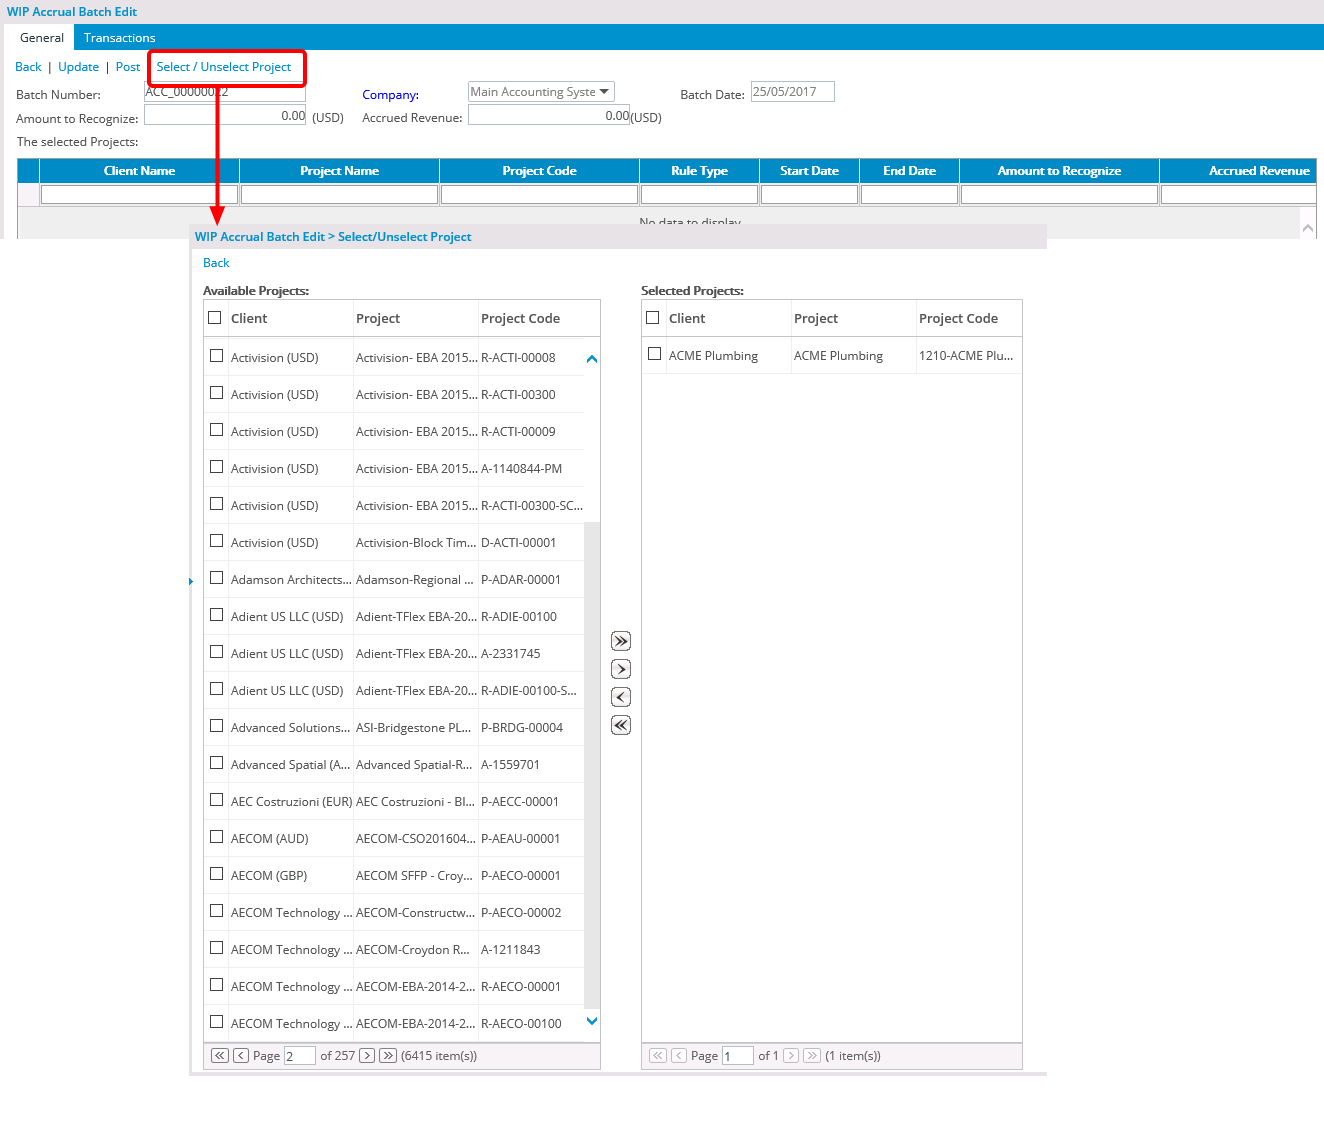
- Click the Select/Unselect Project link to add or remove projects from the WIP accrual batch.
8.1. Confirm the Export Displays
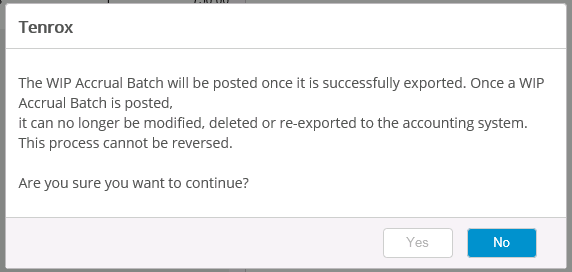
Upon the prompt to confirm the exporting displays, click either of the following:
- Yes to export the batch OR
- No to cancel the action
9.1. Confirm the posting displays
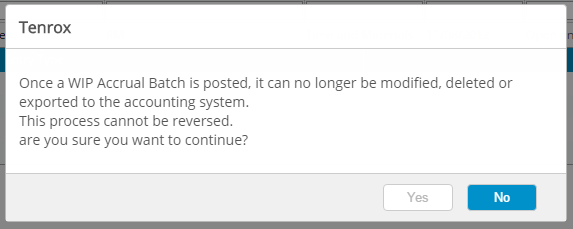
Upon the prompt to confirm the posting displays, click either of the following:
- Yes to post the batch OR
- No to cancel the action
Note: The Post link can also be accessed from the General tab.