How do I override segment code of a selected object?
The Segment Code option allows users to map the transactions of a selected object to a specific segment code without having to modify the global segmentation setup. This article covers overriding the segment code of a selected object.
1. Select a specific OBS or WBS Object
- Click Setup>Organization>Sites and then click a site from the list to open the Site Edit page
- Click Setup>Organization>Groups and then click a group from the list to open the Group Edit page
- Click Setup>Organization>Users and then click a user from the list to open the User Edit page and the Employment tab
- Click Setup>Work>Clients and then click a client from the list to open the Client Edit page
- Click Setup>Work>Projects and then click a project from the list to open the Project Edit page and the Options tab
- Click Setup>Work>Work Types and then click a work type from the list to open the Work Type Edit page
Note: The example screenshots below are taken from Setup>Organization>Sites>Site Edit page.
2. Click the Accounting button
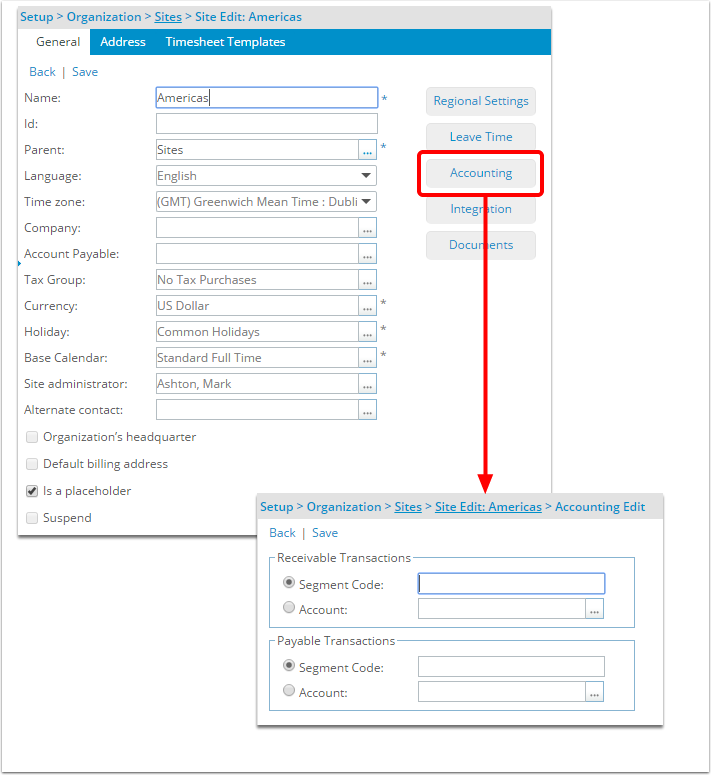
- Click the Accounting button to open the Accounting Edit page.
3. Select the Segment Code option
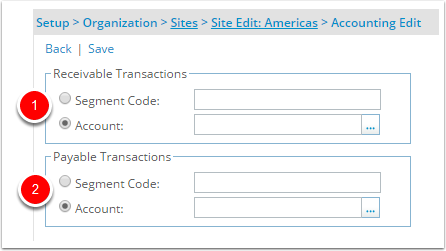
- Under Receivable Transactions or Payable Transactions, select the Segment Code option
- Enter a value to override the global segmentation setup for the selected object.
Example
If all invoices are mapped to the Sales, Accessories 4010-100-10 account in Great Plains, except for the invoices involving theTenrox group Administration that are mapped to Sales, Accessories 4010-200-10. The second segment of the segmentation code for the account Sales, Accessories represents the group: 4010-100-10; therefore, a change is required at the object level for the Administration group.
Note: In this example, if a value of 2 is entered instead of 200, the system pads the 2 with 0s until the maximum length is reached for the segment code, as long as the Padding character is set to 0 and the direction is set to right. Click here to view the article on setting up global segmentation for more information on lengths and padding.
4. Click the Save Link
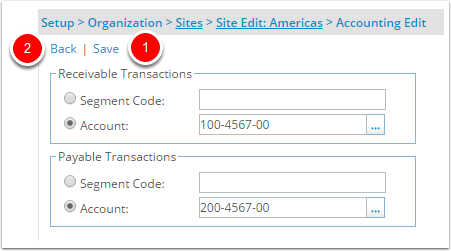
- Click the Save link.
- Click the Back link.