Create Page Filter(s) - Dashboard
The Page Filters allow users with access to the dashboard to be able to screen data in the data source to determine whether the data should be included in or excluded from the calculations of the widget results within the Dashboard.
A baseboard owner sets up the Page Filter from the Dashboard Settings dialog-box when editing a dashboard. The Page filters allow other dashboard users to use the filters provided to them by the dashboard creator to filter the results as they seem fit without the need to edit the dashboard.
1. Access the Page Filter Tab
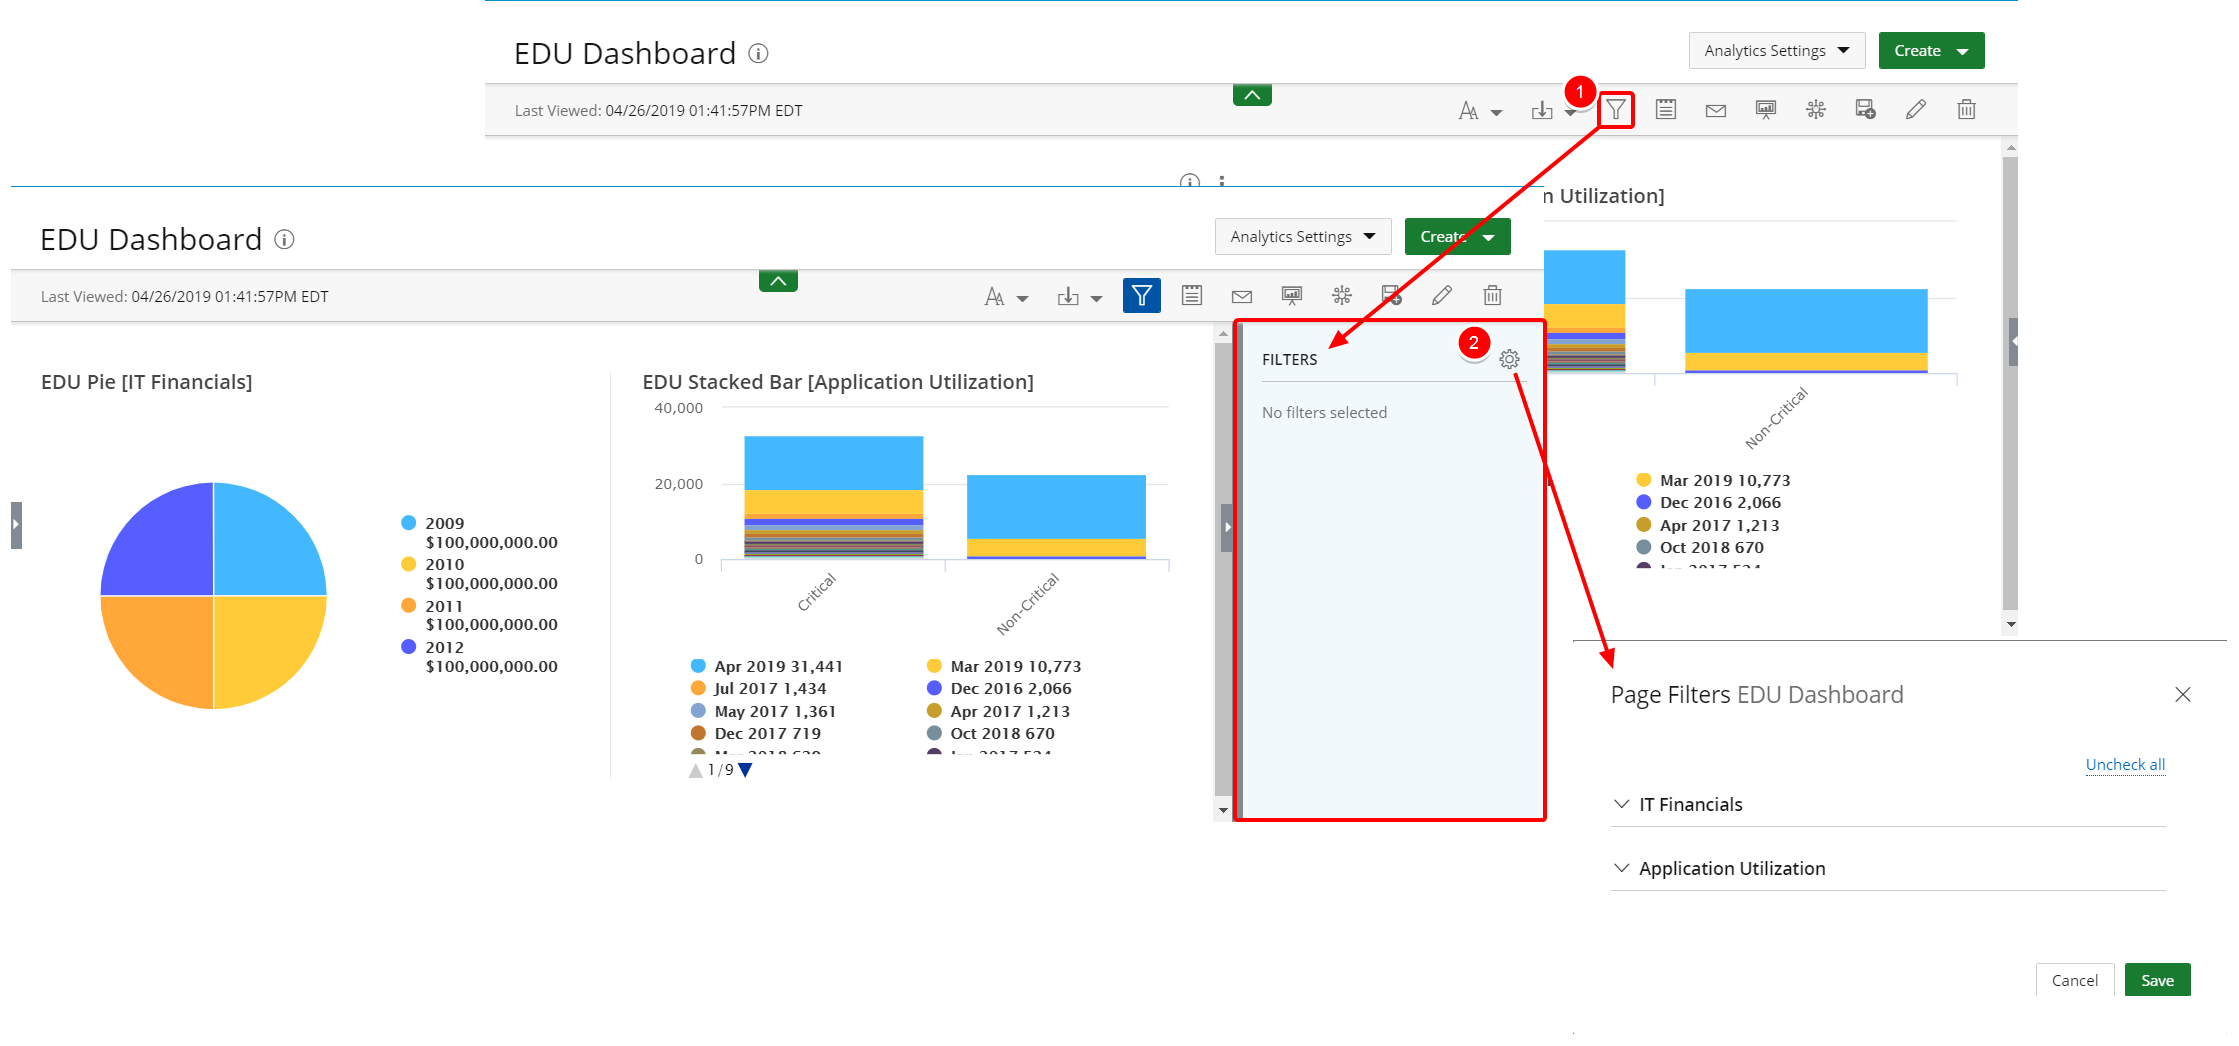
- Click the Filters button to open the Filter Drawer.
- Click the Settings button. The Page Filter tab displays.
2. Add Page Filter(s)
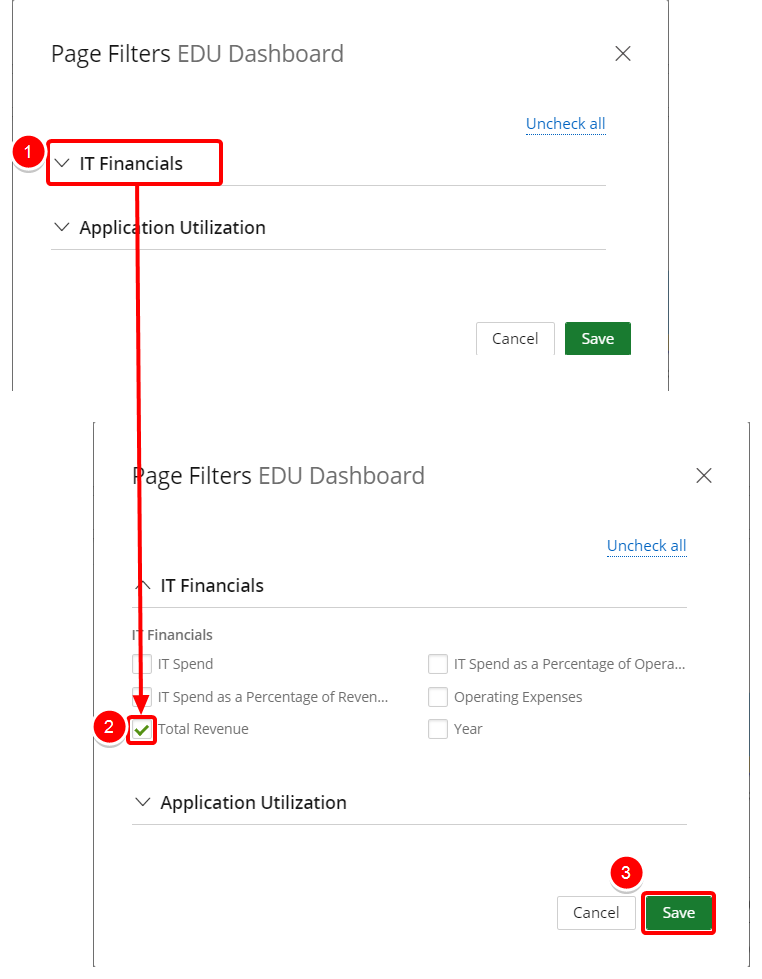
You will see a list of all available Views within your dashboard.
- Click the expand/collapse button to view all available Fields.
- Select the Filter(s) you wish to allow the users running the dashboard to have access to.
- Click Save or Cancel to return to the previous page. The Page Filter displays in the Filter Drawer.
3. Apply the Filter
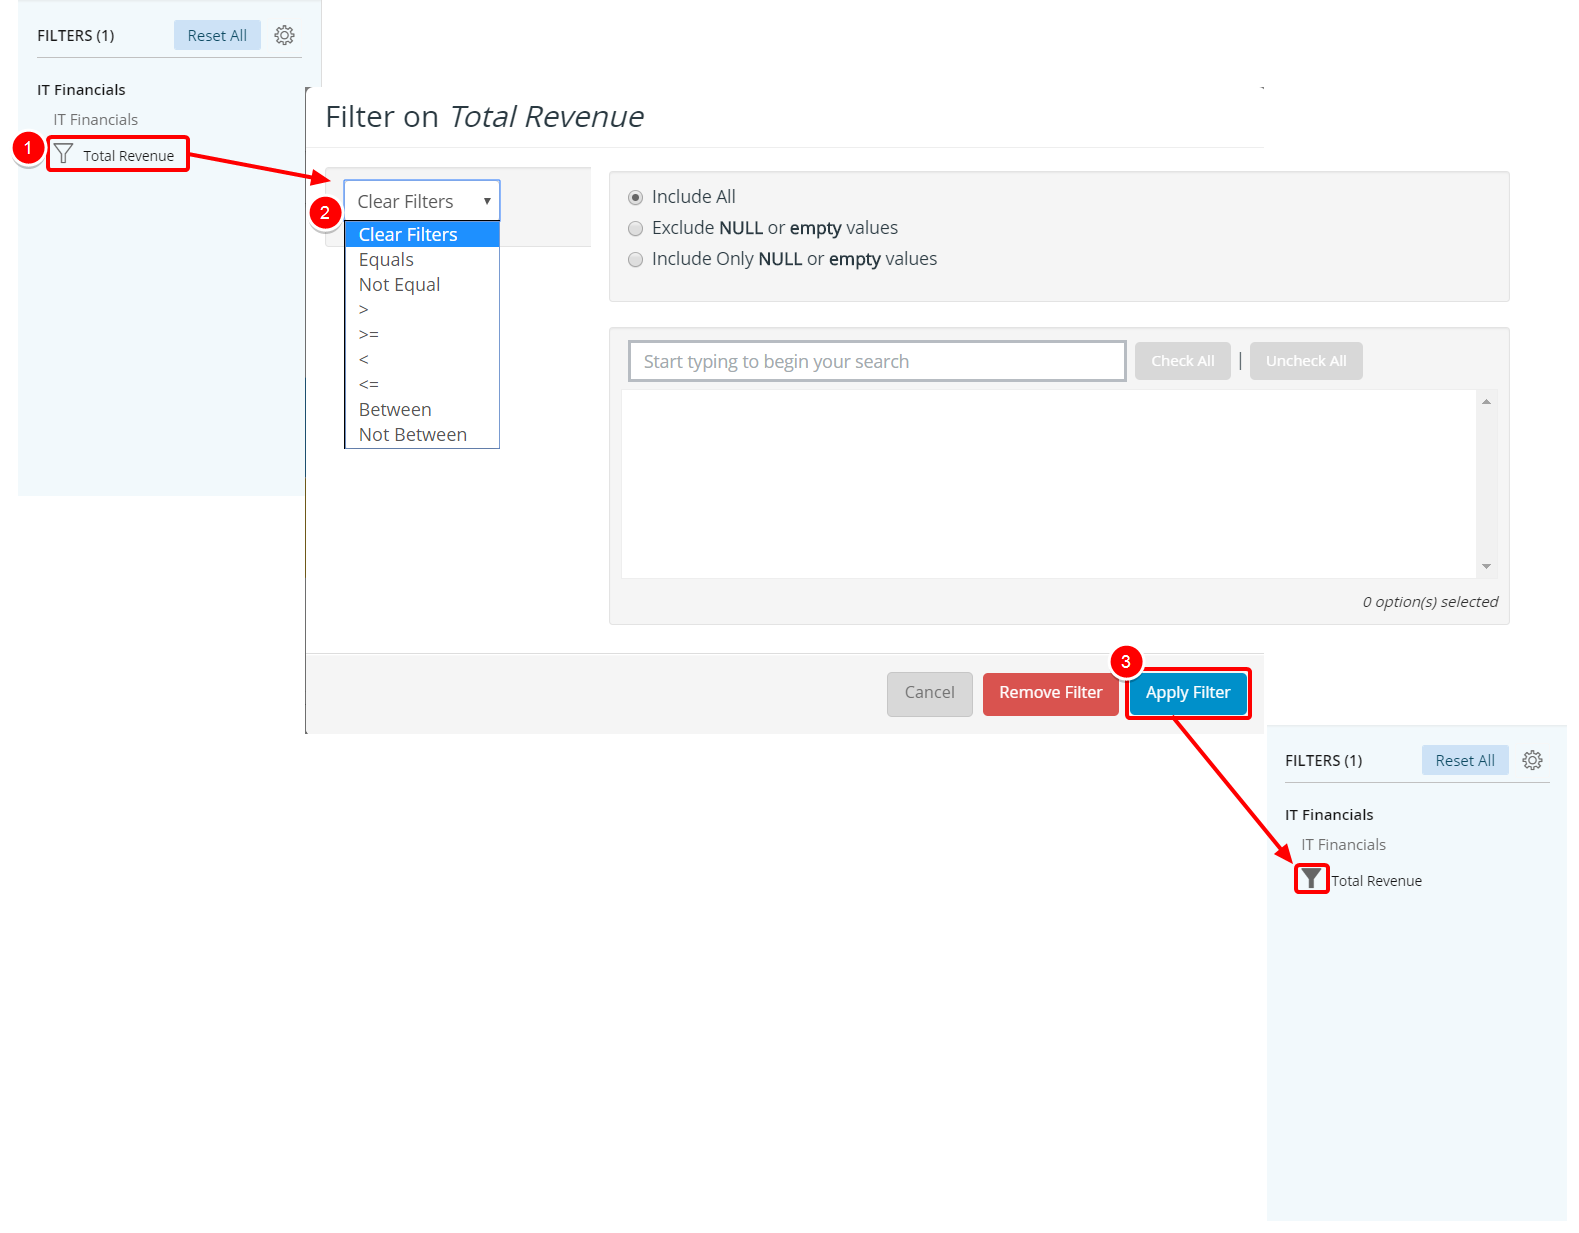
- In the Filter Drawer, select the field you wish to apply the filter on. The filters that are available to you depend on the data type of the field that you selected.
- Click Apply Filter. The filter icon changes to indicate that the filter is applied.
4. View Page Filters
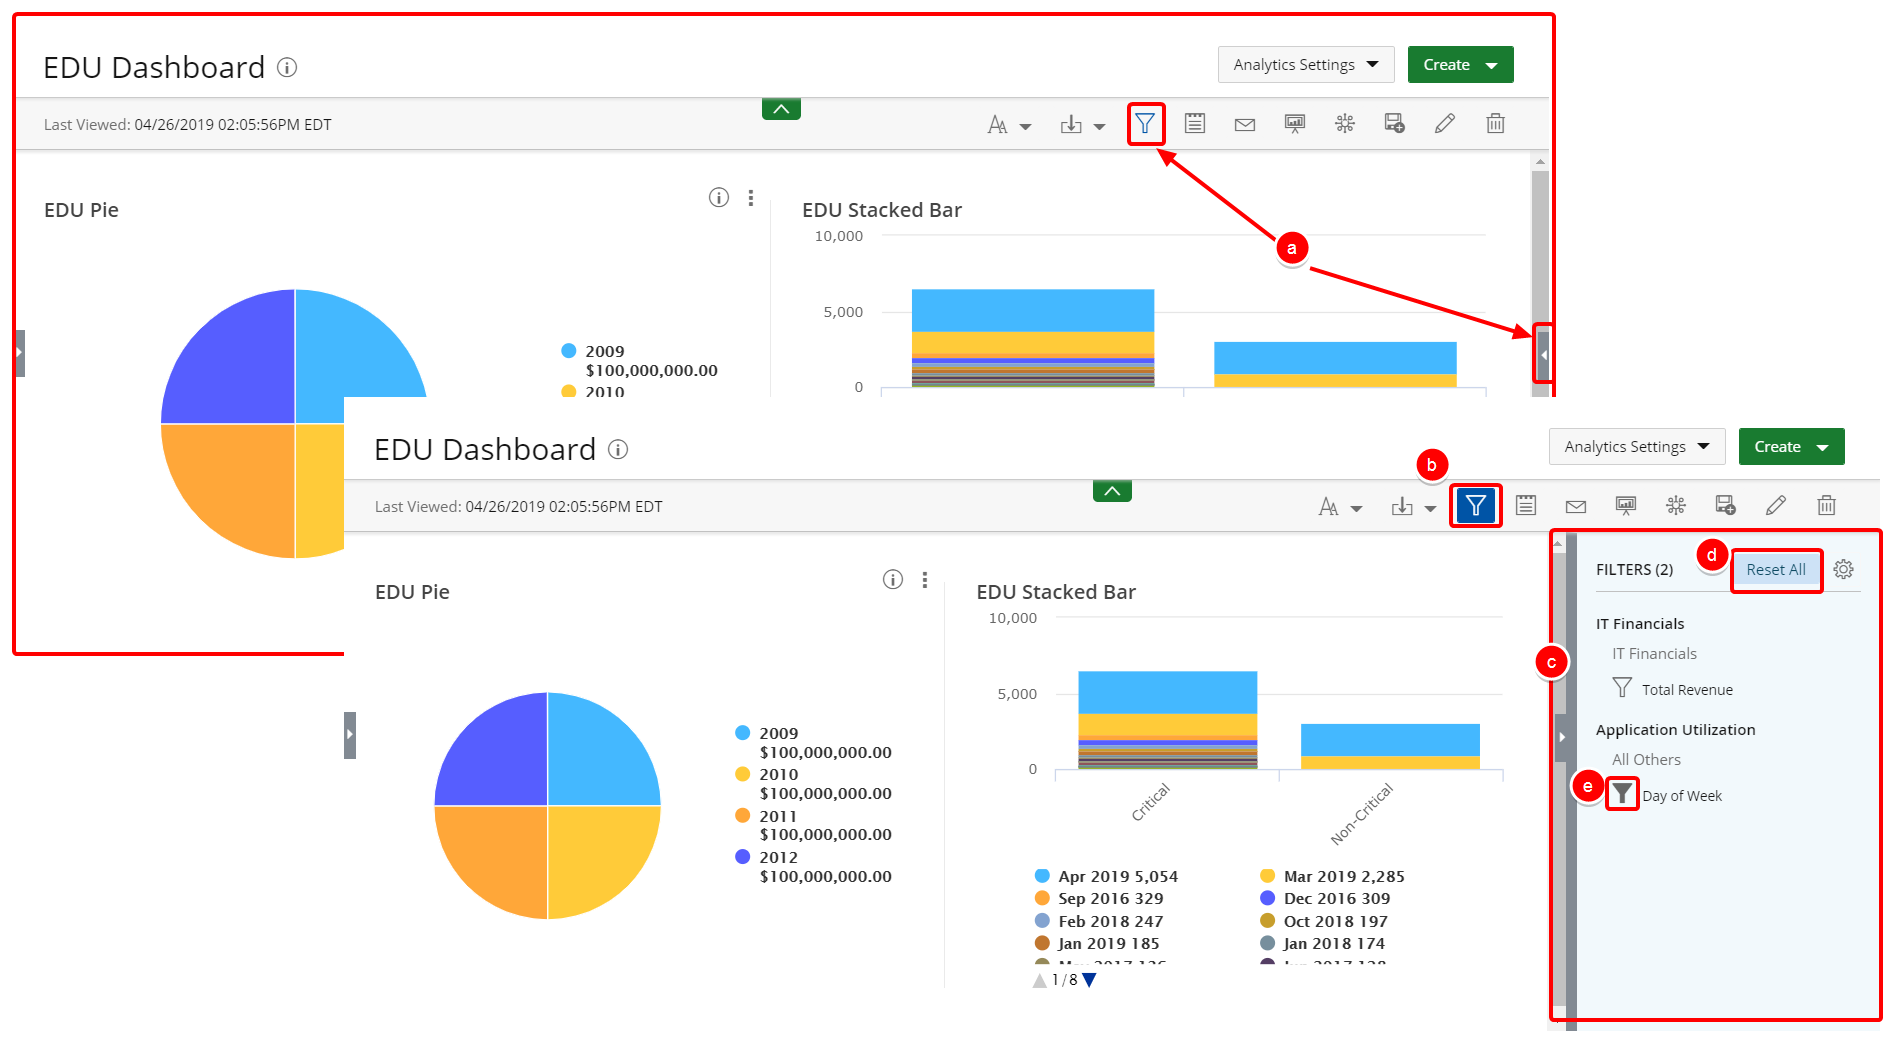
- The selected Page Filters are now available to the report Users to utilize as necessary.
- Click to open the Filter Drawer.
- Indicates that the Filter Drawer is open.
- Filter Drawer.
- Click to remove all applied filters.
- Indicates that the filter has been applied.
Menu