Create or Edit a Formula
A formula is something that the you define, such as (value of a + value of b)/100. Formulas can be as simple or as complex as the user wants. A formula can contain values, references to cells, defined names, and functions.
Note: The required steps to create a Custom Field are identical for any report type. For the purpose of this article a Report is shown as an example.
Note: Data sources and options in this article are provided for example only. Your data sources or options will depend on the product used, modules licensed and the permissions granted.
1. Open the Custom Fields tab

- Click the Custom Field tab where you can create formulas and/or apply functions that contain any type of calculation to create the required report.
- Click Create New.
Note: The Create New button is grayed out it and it's enabled only when a Data Dimension is selected and added to the Layout section.
2. Select Type and Format
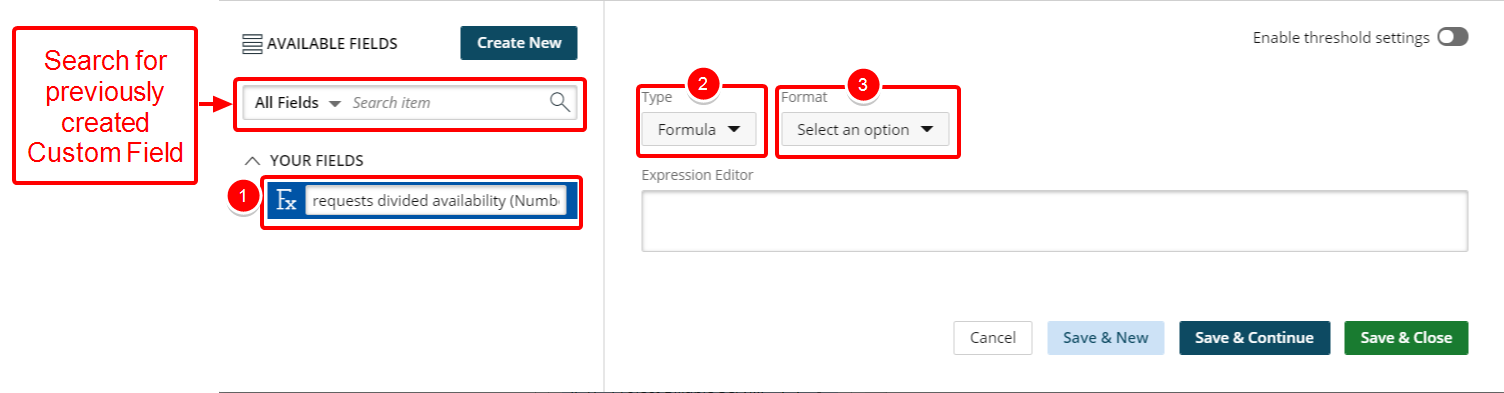
- Click the Custom Field Name box and type a name for your Custom Field.
- Select Formula from the list of available options for the Custom Field Type.
- Select a Format for your Custom Field.
Tip: You can easily search for any previously created Custom Fields using the Search box.
3. Create Formula
- Click the Expression Editor box.
- Start typing the name of the expression you would like to use.
- Select the available expression from list.
- Note that the selected expression is added to the Expression Editor box.
- Repeat steps 1-4 to create your Formula.
- Click one of the following:
- Cancel to return the previous page.
- Save & New to save the Custom Field and create a new one.
- Save & Continue to save the Custom Field and continue working on it. This is useful when working on a large formula or function.
- Save & Close to save the Custom Field and then close the Custom Field Builder. You will be redirected to the Report Editor screen where the newly created Custom Field(s) can be used in a report.
4. Use the Formula in your Report
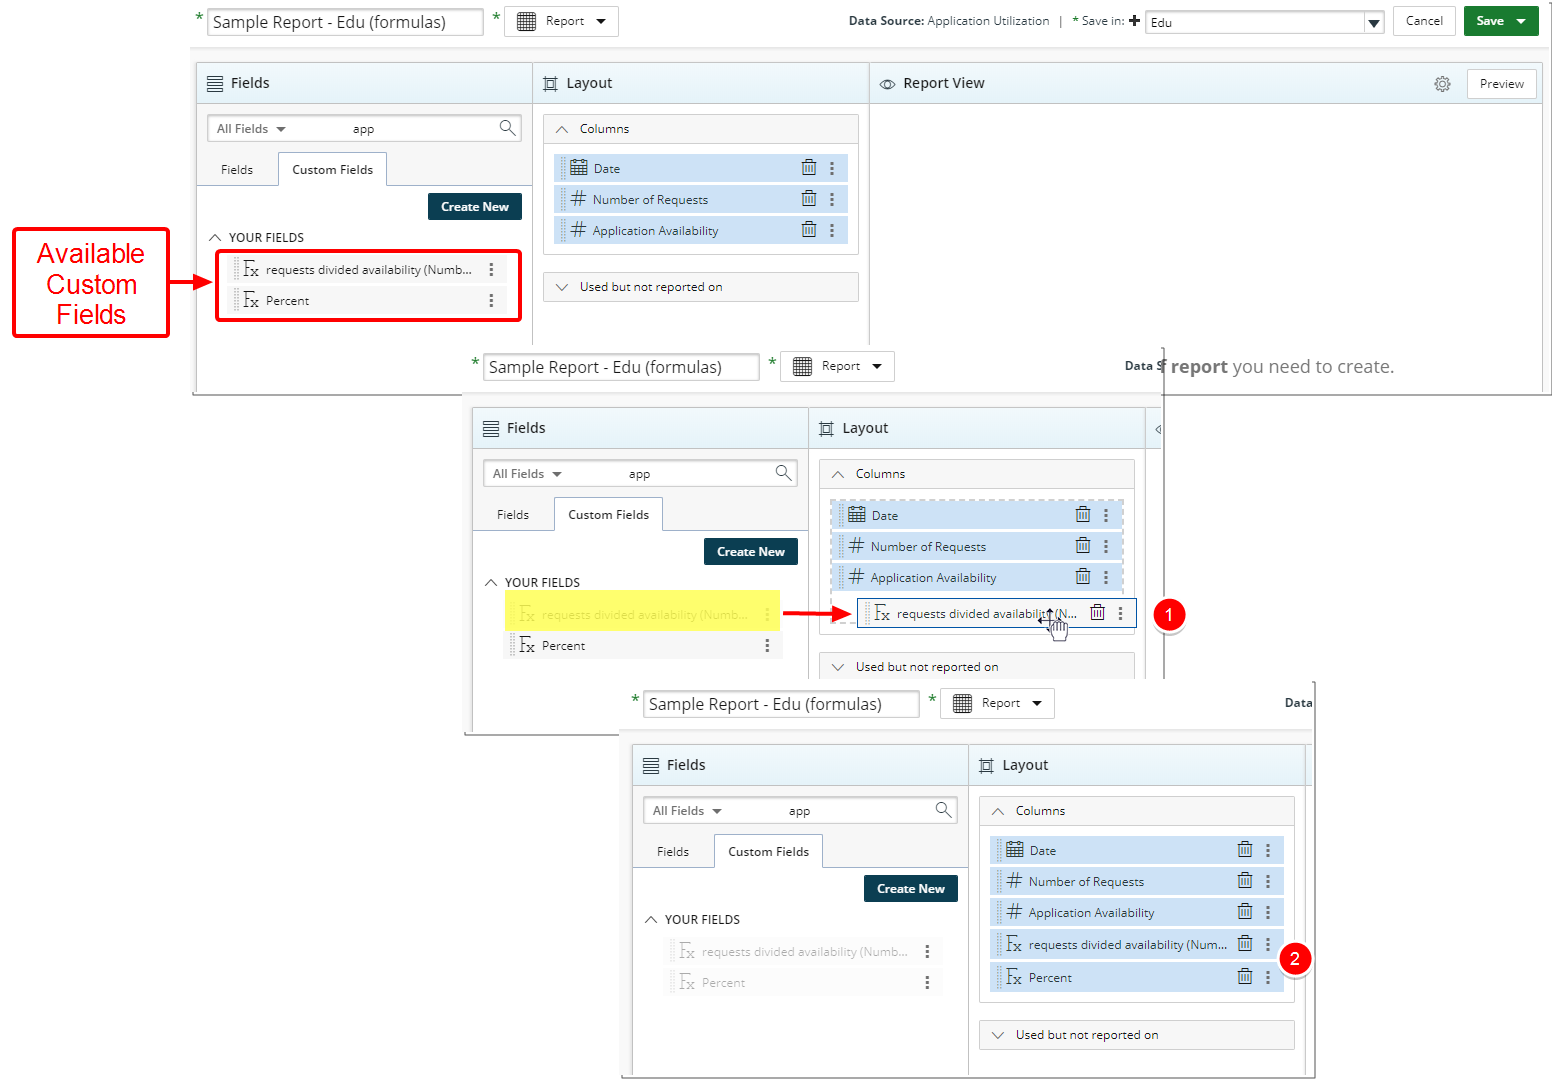
Upon saving and exiting the Custom Field Builder you will now see the newly created Formula within the Custom Fields tab.
- Select the Field and drop it in the Layout Columns section.
- Repeat Step 1 to add additional Custom Fields to your Report.
Note: The Create New button is grayed out and it's enabled only when a Data Dimension is selected and added to the Layout section.
5. Enable Threshold Settings (optional)
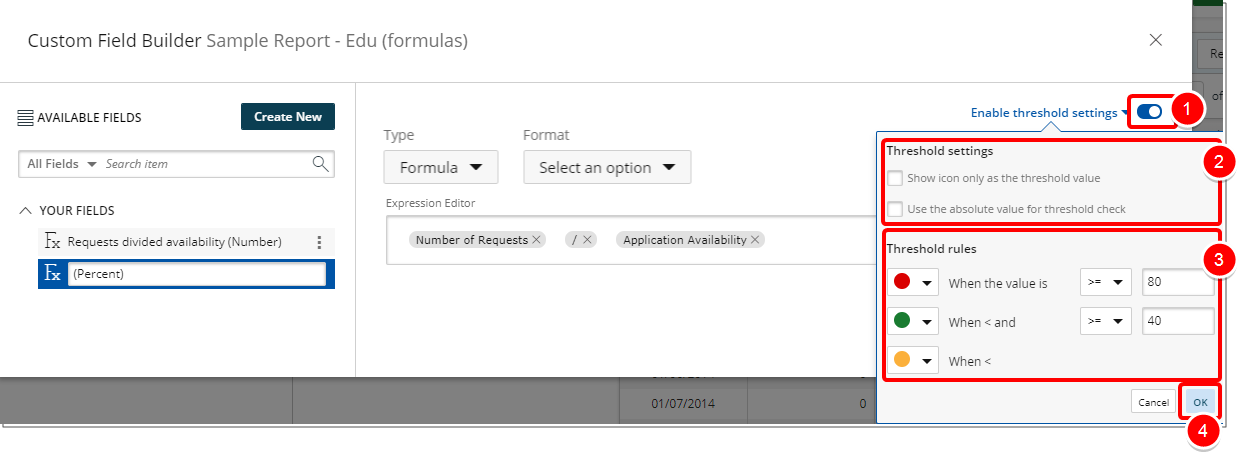
You may choose to enable Threshold settings by enabling the option.
- Toggle the option to enable it. Note that when enabled, the toggle icon is displayed in blue.
- Select the Threshold settings options:
- Select Show icon only as threshold value.
- Select Use the absolute value for threshold check.
- Select and set the Threshold rules.
- Click Ok to close the Enable threshold settings options or click Cancel to discard your changes.
6. Preview Report
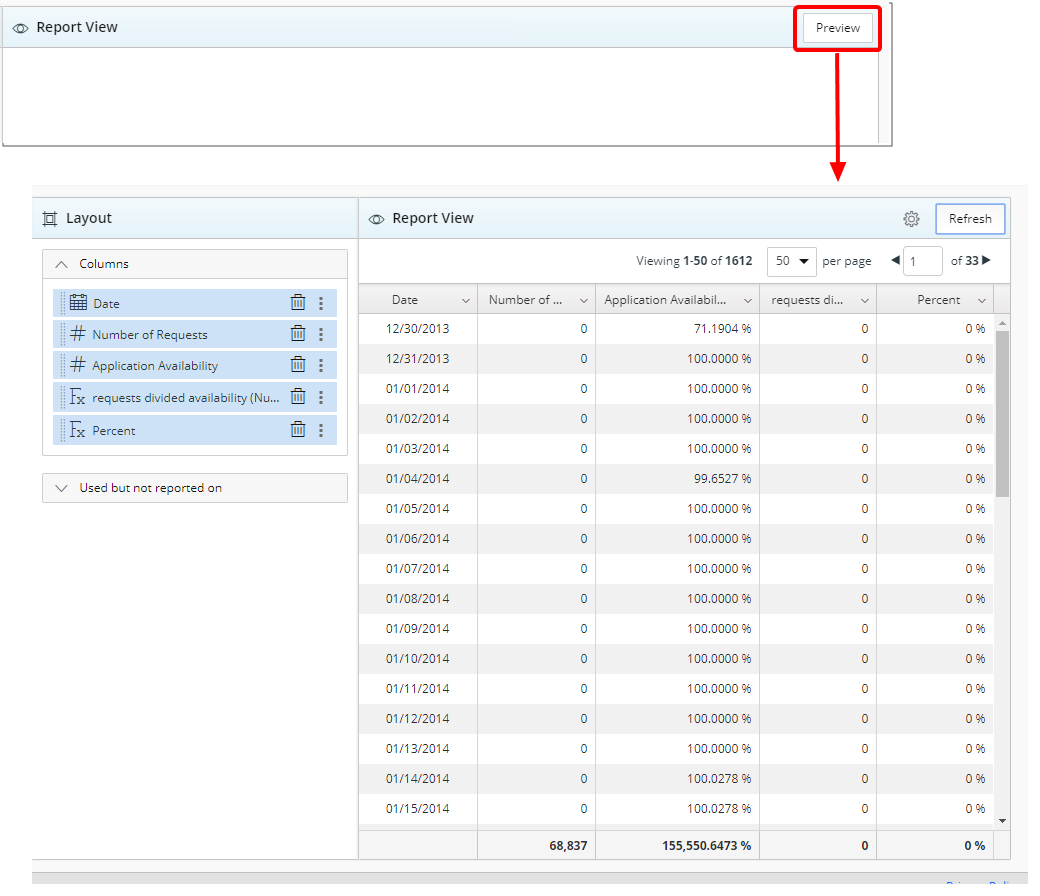
- Click the Preview button to preview your report.
Note: You can Preview your report at any time by clicking on the Preview button.
No Data Available displays when there is no data retrieved/found.
7. Save Report
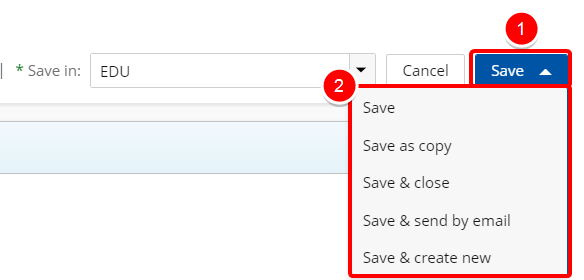
- Click Save to open the Save context menu
- Choose one of the available Save options:
- Save: Selecting this option will save the report without exiting the report edit page.
- Save as copy: Selecting this option will save a copy of the report. You will need to rename the report in the Navigation Menu.
- Save & Close: Selecting this option will save the report and close the report edit page. The report will then run.
- Save & send by email: Selecting this option will save the report and close the report edit page. A modal window will then give you the options to send the report. For more information refer to Email a Graph/Chart.
- Save & Create new: Selecting this option will save the report and close the report edit page giving you the option to create a new report.
Menu