Create a View
1. Access Upland Analytics Views

Access the Upland Analytics Views:
- Click the Analytics Settings from the Main Menu Bar.
- Then select Views from the menu.
2. Click New
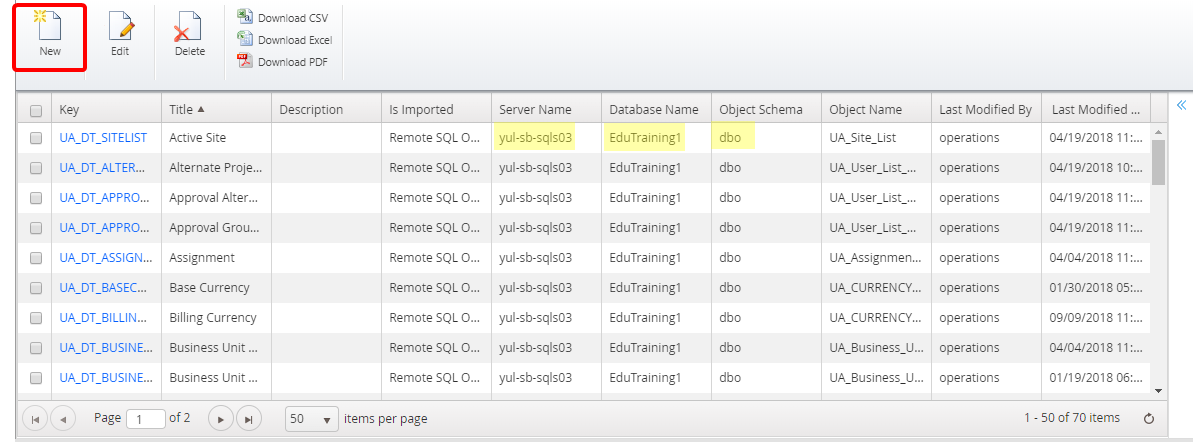
- Click New, upon accessing the Upland Analytics Viewslist page.
3. Create New View
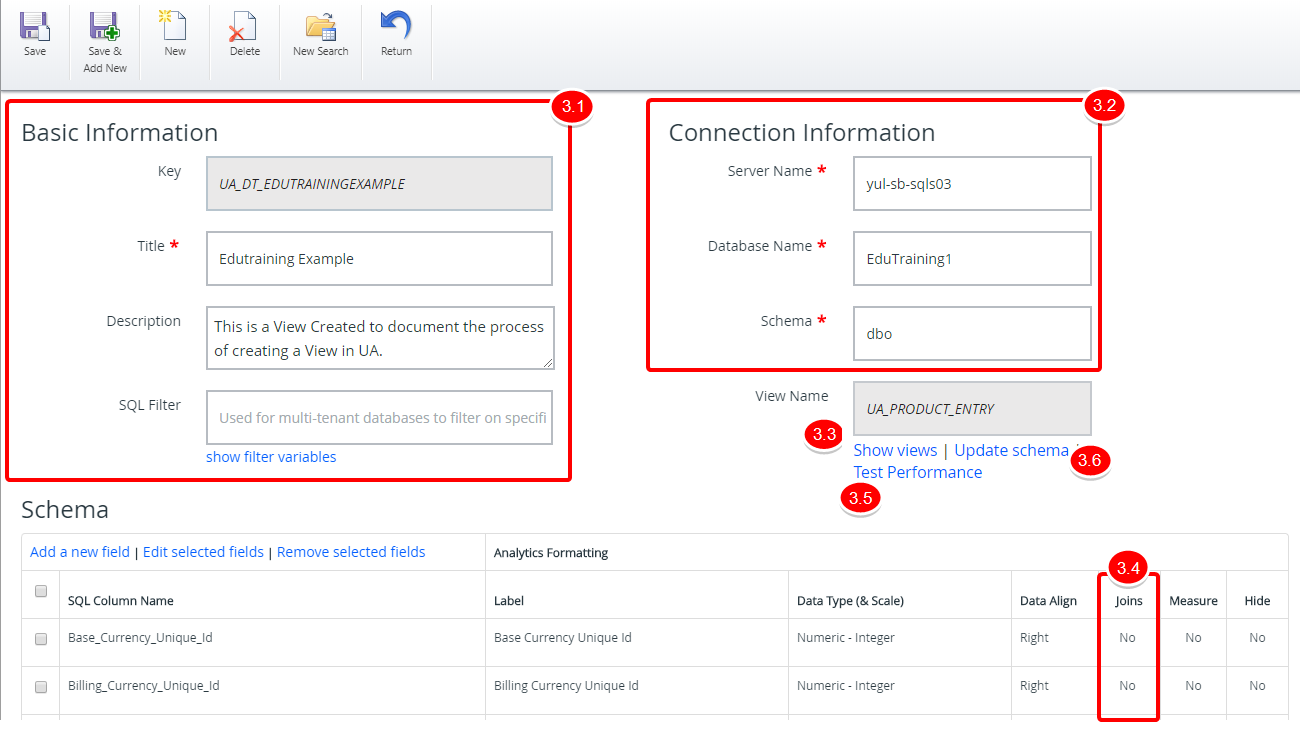
When creating a new View there are three mandatory fields: Title, Server Name, Database Name and Schema. Follow the steps described below to create your View.
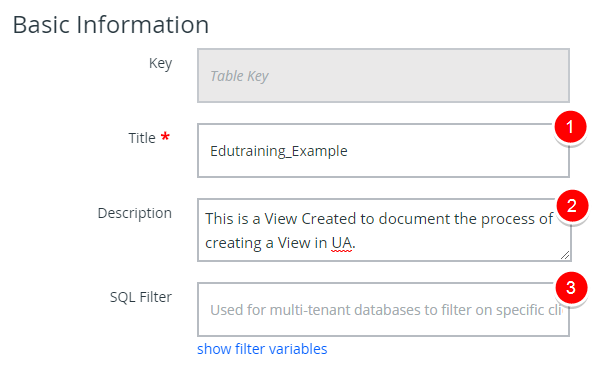
Enter the following information:
- Title: This is the name of the View, which is a required entry.
- Description: This field allows entering a description for the View.
- SQL Filter: Click Show Filter Variables to view a list of all available filter variables. You can then define variables and their respective values that can be used to apply a filter on the current data view. Useful for multi-tenant databases to filter the views data by client.
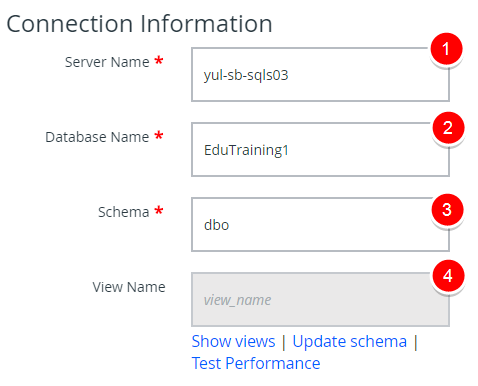
Enter the following information:
- Server Name: This is the database server name where the database resides. It is a required entry.
- Database Name: This is the database name, which is a required entry.
- Schema: This is the database schema, which is a required entry.
- View Name: This is the name of the View.
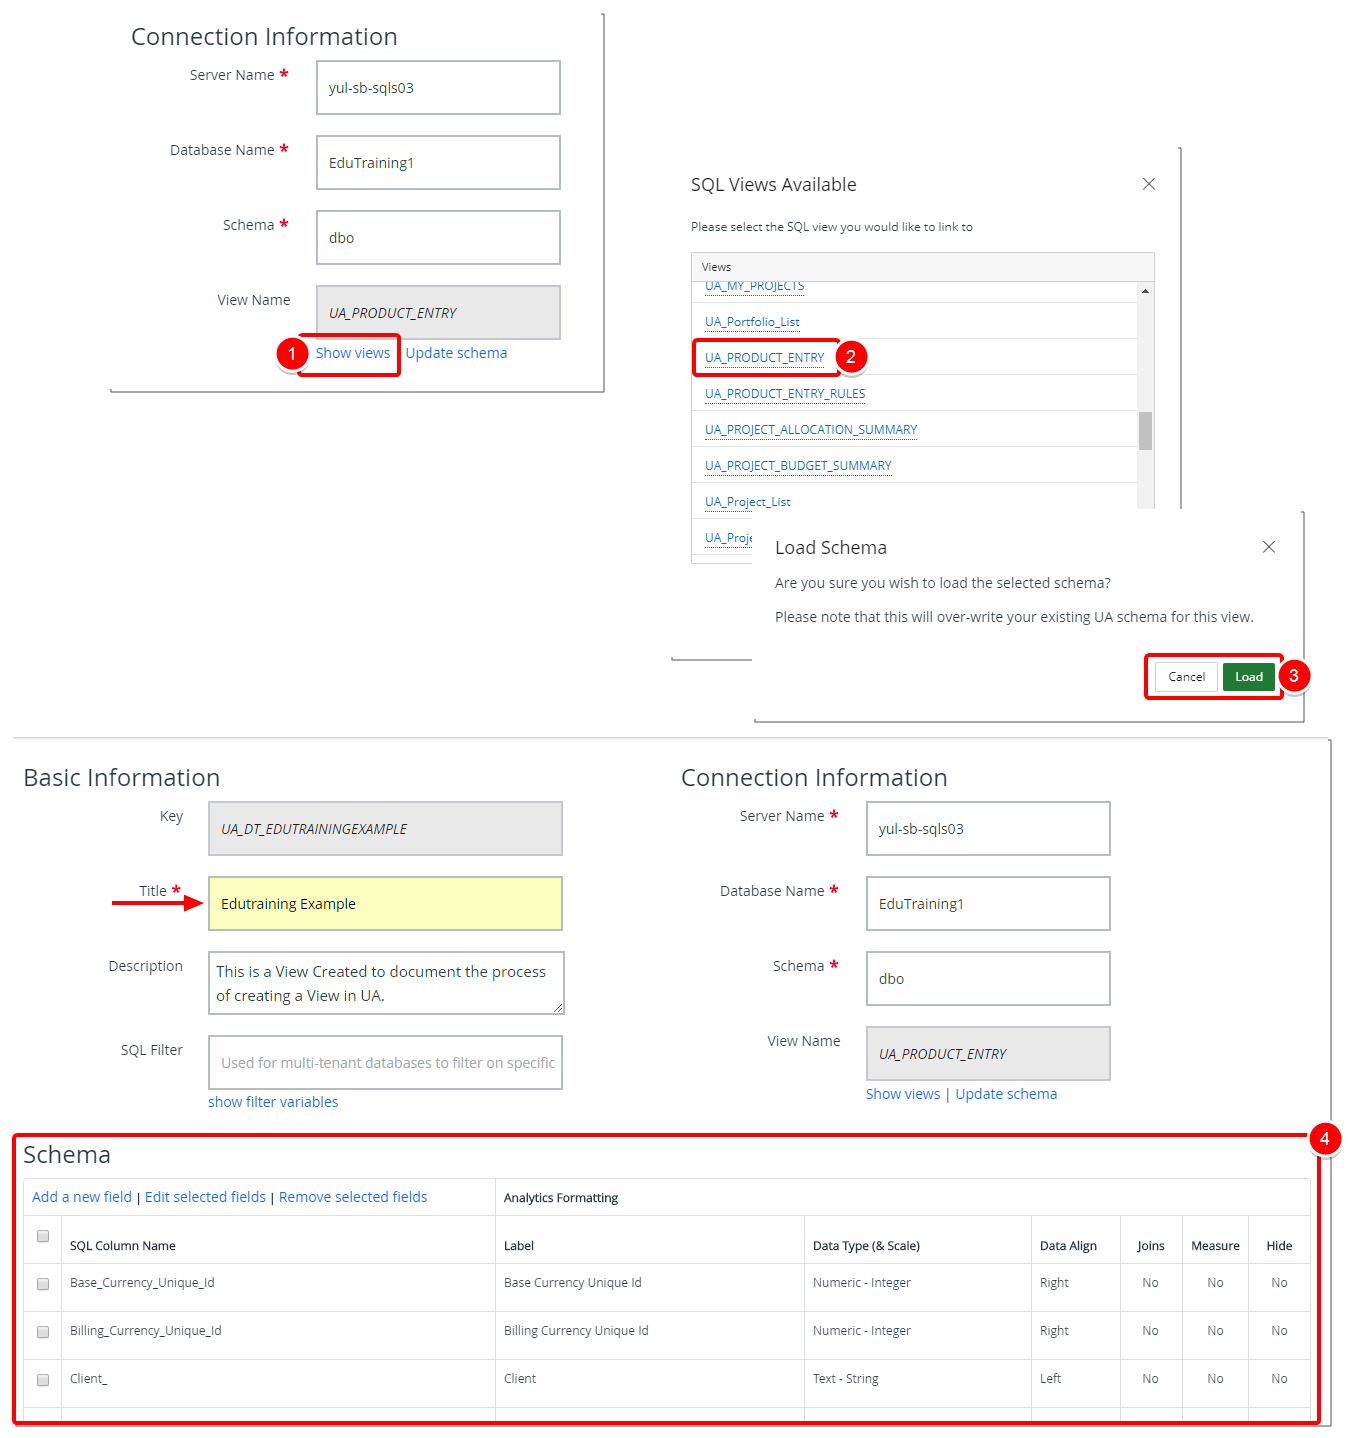
- Click Show Views to see a list of all Views.
- Select the necessary View from the list.
- Click Load to load the selected schema.
- The available Fields will be added to the Schema section.Note: After the addition of the Fields to the Schema, notice that the Title Within the Basic Information section will change. Re-enter the necessary Title before saving your changes.
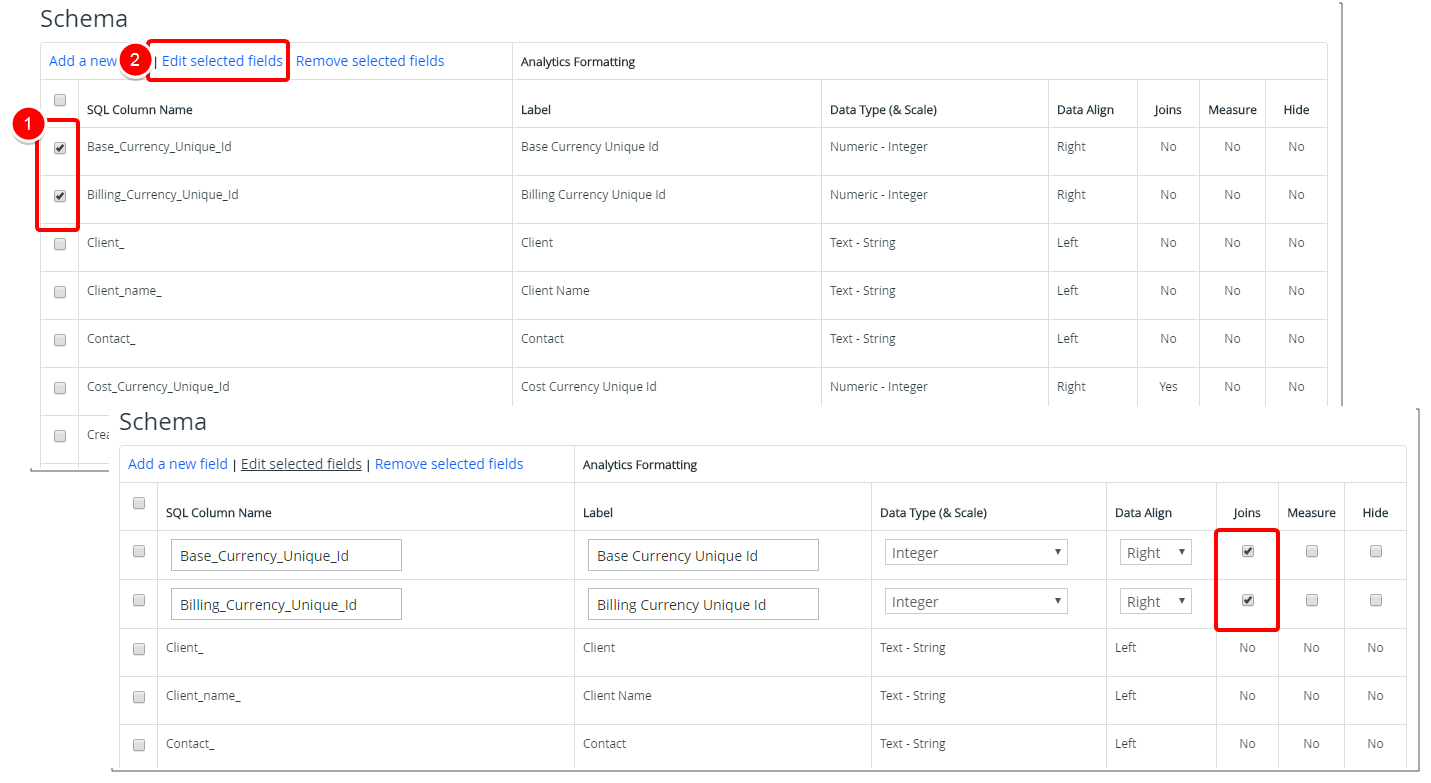
- Select the necessary fields to create joins.
- Click Edit selected fields. Inline editing will be enabled.
- Check the Joins box against the selected fields.
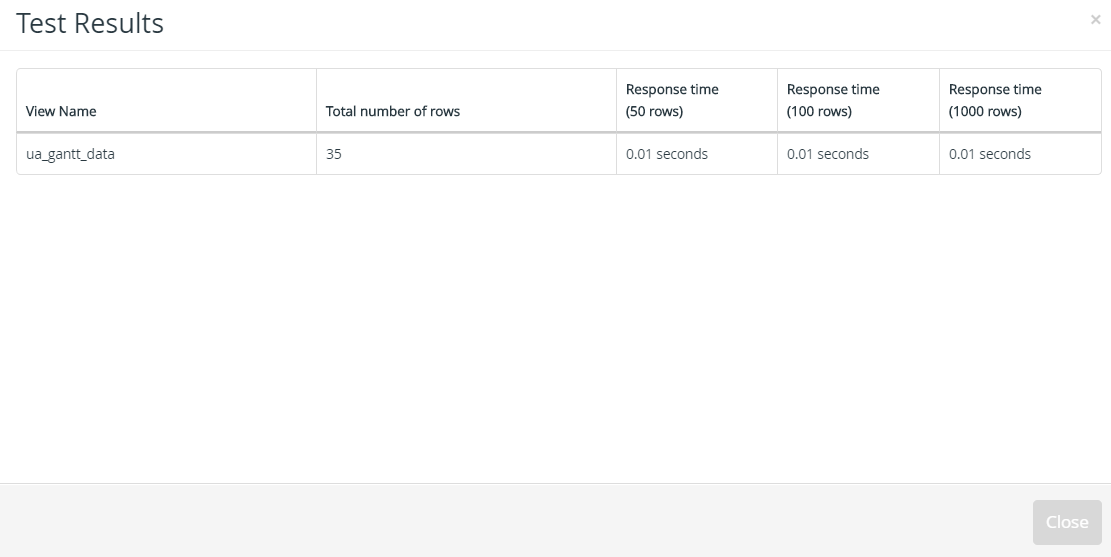
- Click Test Performance to test the view's performance in edit mode. The following results display:
- View Name
- Total number of rows
- Response time for 50, 100, and 1000 rows
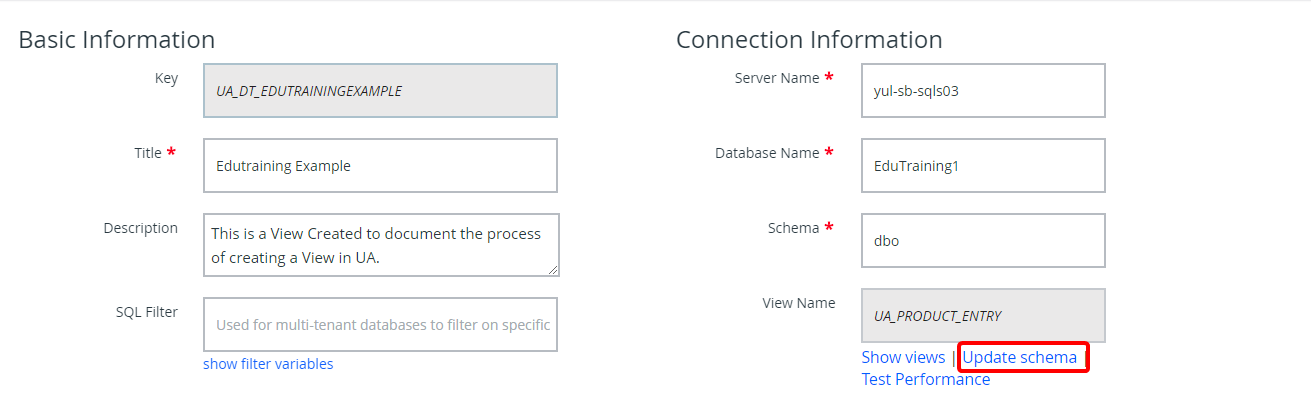
- Click Update schema to refresh the schema with your recent changes. Note: You must manually update the Schema when editing existing columns outside of Upland Analytics. When you add a new User Defined Field, the Upland Analytics View is automatically updated.
4. Click Save
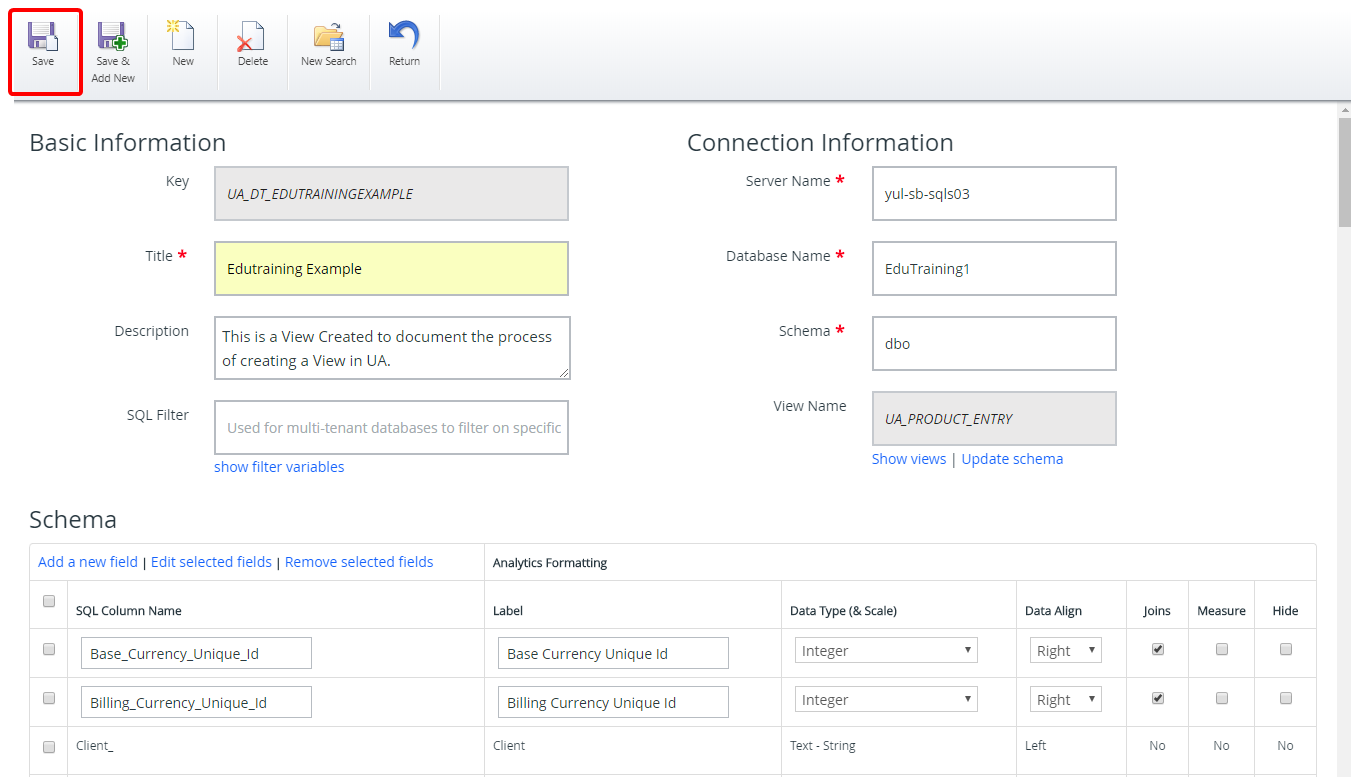
- Click Save to apply your changes.
Menu