WebApps Administration is a series of custom applications that can be assigned to designated
Before you begin
Administrators must complete the following tasks.
Setting a default document stamp
You can set a default document stamp for groups by using Configuration > Groups in the Server Administrator.
To set a default document stamp
-
Start the Server Administrator.
-
Expand Configuration.
-
Select Groups. The groups appear in the Details pane.
-
Select a group. The Group dialog box appears.
-
In the General pane, expand Features if necessary.
-
Select Document Stamps.
-
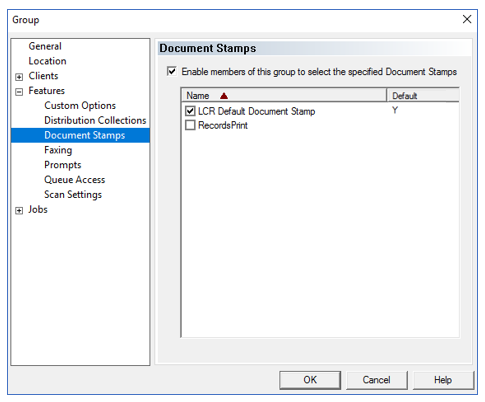
Ensure the Enable members of this group to select the specified Document Stamps check box is selected.
-
Select a document stamp to set as a default. The Make Default? dialog box appears.
-
Select Yes. A “Y” appears below the Default column heading that shows the document stamp has been set as a default.
-
Select OK.
Note: You can clear a default document stamp by selecting it and clicking Yes on the Clear Default? dialog box.
See the Group dialog box with a default document stamp example below.

Editing a default document stamp
You can have multiple document stamps, but only one can be designated a default. Setting a different document stamp as a default will automatically clear the default setting on any other document stamp previously selected as a default.
Choosing a document stamp
Routing users will see the default document stamp option on the Apply stamp drop-down list. The “None” option appears on the drop-down list when there are no default document stamps.
Routing users can select OK to choose the default document stamp or choose a different document stamp on the Apply stamp drop-down list.
See the Apply stamp drop-down list example below.
See also