Creating Email Editor Templates
The email editor gives you a template robust in its design but flexible in its content; however, for your template to work with the email editor you will need to make some changes to your HTML.
The changes are made in the HTML source of an email template, where you can add the amf: attributes alongside your HTML, to create an email editor template.
This topic describes the available template tags you can use. Additionally, there is a topic about the Region Types as well as how to use the Email Editor so you can see what the attributes below will render for the end user.
On this page:
- Field Naming
- Regions
- Textline
- Textbox
- HTML Box
- Tailor the HTML box
- Source Box
- Image
- Link
- Conditional Content
- Repeat
- Alternate
- Alternate with Repeat
- Containers and Customisations
- Switchable Style Sheets
- Class Switching
- FAQ
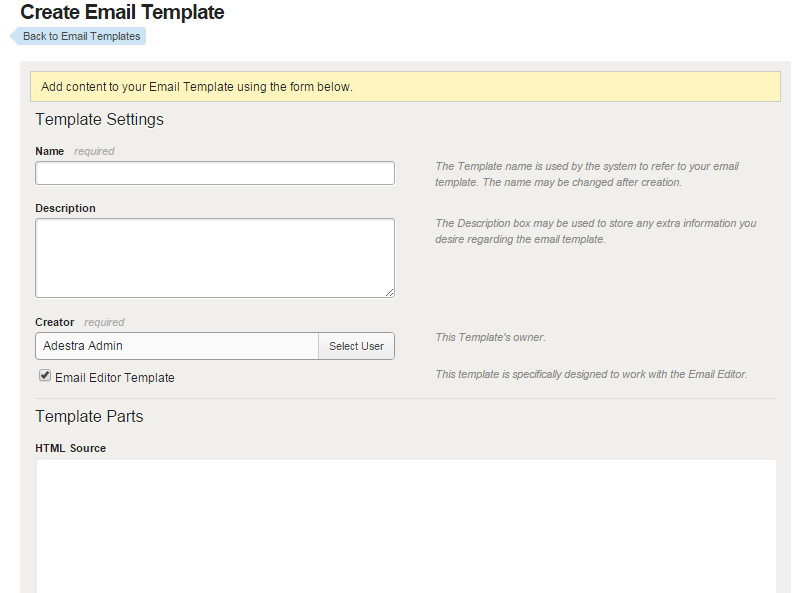
Templates are the basis of email campaigns in Adestra. They are what allow users to design quality campaigns, whilst keeping brand consistency. When creating your template in the Templates Manager, which is found at workspace level, you will need to tick the 'Email Editor Template' check box on the creation form, so that it can be recognised as an email editor template. This can be changed at any time from the settings tab.
Note: When creating the HTML source for your template, a doctype is required.
Field Naming
For the system to identify tag attributes the tags must be named, and the name must be unique.
There are two ways of doing this. This gives you the option to choose either clarity or conciseness.
The names used will also be displayed in the Editor for the user. This can help them identify the region's purpose and the context for it.
However, there are exceptions when you are using an Alternate.
Standard Form
This is the standard form of field naming. It clarifies explicitly the type of attribute being used and its name.
...
    <td amf:type="textbox" amf:name="Textbox_Region">[Insert Text]</td>
...
Note: Underscores will be replaced with a space and first letters capitalised.
Shortcut
The shortcut version, allows you to specify the attribute with its name.
...
    <td amf:textbox="Textbox_Region">[Insert Text]</td>
...
Note: The examples below use this shortcut form.
Regions
Regions are the building blocks of an email editor template. They are created using HTML and amf: attributes. For example, the following will create a textbox region, which is highlighted when selected. You are also able to create and edit other regions, which are described below.
...
  <tr>
    <td amf:textbox="article_copy">[Insert Text]</td>
  </tr>
...
Textline
The textline is the simplest of the editor tags and forms a single line of text.
When used within a table cell its syntax looks like:
...
    <td amf:textline="newsletter_title">[Textline text]</td>
...

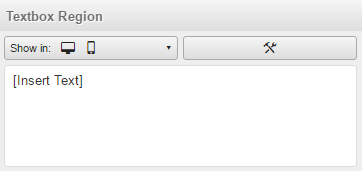
Textbox
If you require more lines of text you can use the textbox, which gives multi-line text content.
In situ it could look like this:
...
  <tr>
    <td amf:textbox="lead_article">[Insert Text]</td>
  </tr>
 ...
HTML Box
The HTML Box works like a textbox, as it gives multi-line content; however, it also allows you to make style changes to your text, such as: emboldening or italicisation, font, font size, text or highlight colour, alignment and more.
...
    <td amf:htmlbox="preview_article_1">Lorem ipsum dolor sit amet...</td>
...
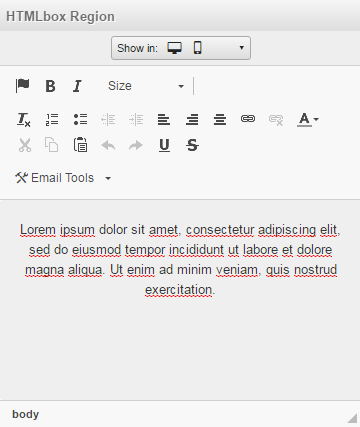
- The default enabled tools are: Bold, Italic, RemoveFormat, NumberedList, BulletedList, Outdent, Indent, JustifyLeft, JustifyRight, JustifyCenter, Link, Unlink, PasteText, PasteFromWord, Find, Replace, SelectAll, Blockquote, JustifyBlock, Image, HorizontalRule, SpecialChar, Format, FontSize, TextColor, BGColor, EmailTools
Tailor the HTML box
The HTML boxes are highly customisable, whether choosing preset groups of email tools, combining group sets and individual tools, or opting for complete customisation.
To have control of the tools available amf:htmltools is required. This can then be assigned a variety of tool groups or individual tools.
Tool List
Available tools: Bold, Italic, RemoveFormat, NumberedList, BulletedList, Outdent, Indent, JustifyLeft, JustifyRight, JustifyCenter, Link, Unlink, PasteText, PasteFromWord, Find, Replace, SelectAll, Blockquote, JustifyBlock, Image, HorizontalRule, SpecialChar, Table, Format, FontSize, TextColor, BGColor, Source, Cut, Copy, Paste, Undo, Redo, Underline, Strike, Subscript, Superscript, BidiLtr, BidiRtl, Language, Anchor, Styles, Font, Maximize, ShowBlocks, EmailTools
Tool Groups
| Group Name | Enabled Tools |
|---|---|
| basic | Bold, Italic, RemoveFormat, NumberedList, BulletedList, Outdent, Indent, JustifyLeft, JustifyRight, JustifyCenter, Link, Unlink, EmailTools |
| default | same as HTML box |
| full | all available tools, shown in tool list |
| grp_document | Source |
| grp_clipboard | Cut, Copy, Paste, PasteText, PasteFromWord, Undo, Redo |
| grp_editing | Find Replace SelectAll |
| grp_basicstyles | Bold Italic Underline Strike Subscript Superscript RemoveFormat |
| grp_paragraph | NumberedList BulletedList Outdent Indent Blockquote JustifyLeft JustifyCenter JustifyRight JustifyBlock BidiLtr BidRtl Language |
| grp_links | Link Unlink Anchor |
| grp_insert | Image HorizontalRule SpecialChar Table |
| grp_styles | Styles Format Font FontSize |
| grp_colors | TextColor BGColor |
| grp_tools | Maximize ShowBlocks |
Examples
Note: Case is important, and tools are to be separated by a space.
...
  <td amf:htmlbox="htmlenable" amf:htmltools="basic">Content</td>
...

...
  <td amf:htmlbox="htmlenable" amf:htmltools="grp_links grp_paragraph">Content</td>
...

...
  <td amf:htmlbox="htmlenable" amf:htmltools="JustifyLeft JustifyRight Cut Copy Paste Bold">Content</td>
...

...
  <td amf:htmlbox="htmlenable" amf:htmltools="bacis grp_styles Cut Copy Paste Bold">Content</td>
...
Color Restriction
Using the custom HTML box you are also able to restrict the user of the color palette. To do this you can add colors(#FFFF00...) to the amf:htmltools" " attribute, populating it with the colors you wish to restrict the user to.
Note: When applying colors, the source code must also specify what it is attributed to, whether BGColor or TextColor. This allows the editor to know which tool(s) to enable.
...
<td amf:htmlbox="htmlenable" amf:htmltools="colors(#FFFF00 #cc3300 #0033cc) BGColor">Content</td>
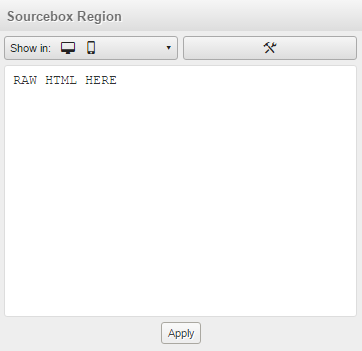
...Source Box
The source box allows you to paste and apply raw HTML into your campaign.
...
    <td amf:source="RAW HTML HERE"></td>
...
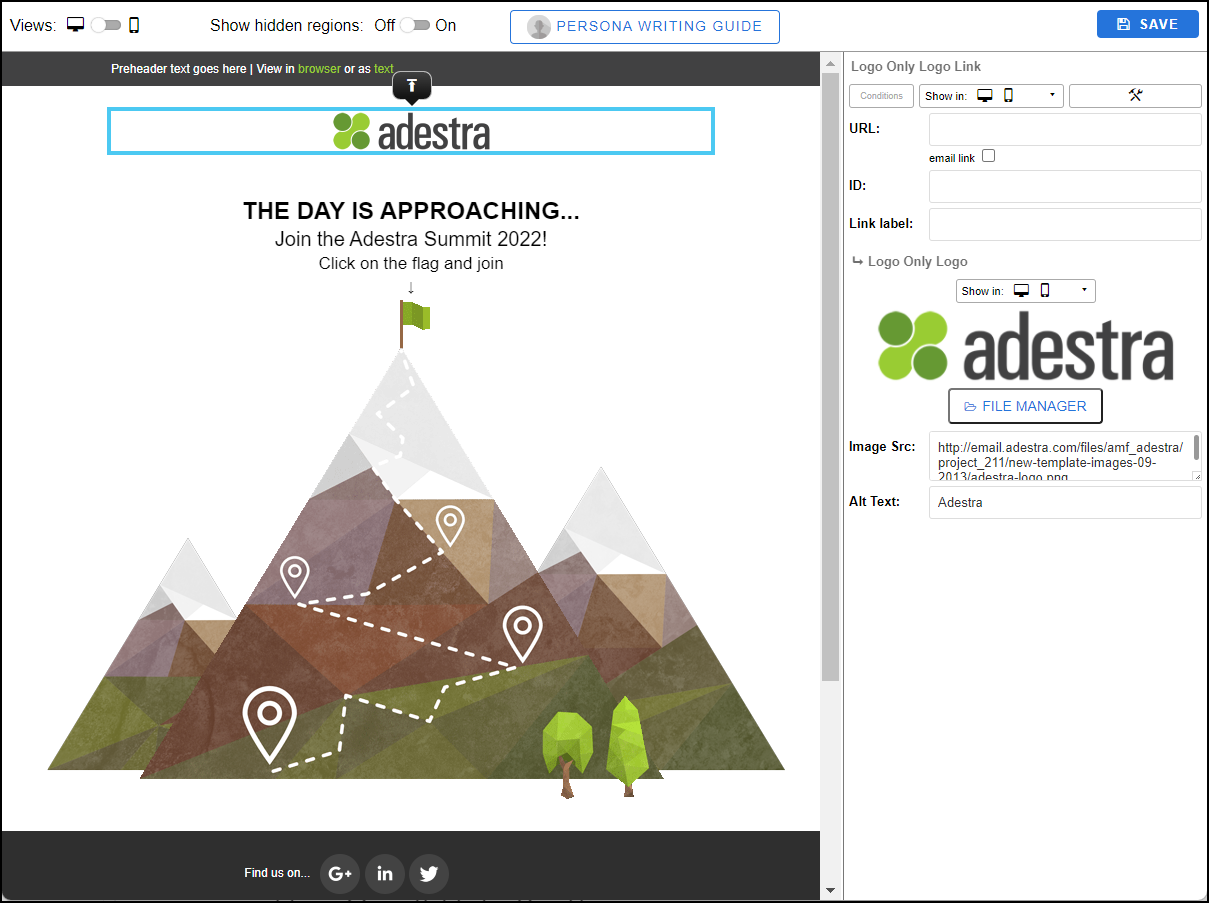
Image
amf:image enables images to be selected from the file manager to place within the campaign. An image will be served at the dimensions given by the template.
<img src="/files/amf_docs/project_id/file_name.png" alt="alternative text" amf:image="header_image"/>Note: If an image is larger than the template's dimensions, it will be resized automatically, keeping the image's aspect ratio.

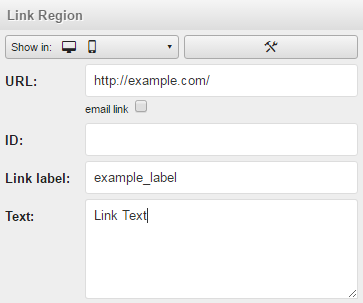
Link
The Link tag enables a URL to be added to a campaign, alongside being able to change the link title. The link attribute supports Link Labels used for reporting.
...
   <td><a href="http://example.com/" amf:link="home_link" linklabel="example_label">Link to Image</a></td>
...
Conditional Content
The conditional content tag enables users to apply basic IF/ELSE conditions. The conditions are based on either lists or table field data, and can be applied alongside other tags using: amf:conditional.
...
    <td amf:conditional amf:htmlbox="preview_article_1">Lorem ipsum dolor sit amet...</td>
...
Repeat
Repeats allow users to copy the tag it is applied to, allowing users to have multiple versions of it. This will show as the 'Plus' (and 'Bin') icons in the Content Panel.

An example of a repeat with textline and textboxes is shown below.
...
<table amf:repeat="other_articles">
  <tr>
    <td><h3><span amf:textline="Other_articles">Other Articles</span></h3></td>
  </tr>
  <tr>
    <td><p><span amf:textbox="article_info">Article blurb</span></p></td>
  </tr>
  <tr>
    <td><a href="http://example.com/" amf:link="artricle_link" linklabel="other_article_link">Link to article</a></td>
  </tr>
</table>
...
They can also be used 'inline', if you do this you must make sure that the two replacers are given the same name:
...
  <td amf:repeat="articlebody" amf:textbox="articlebody">Example Body Text</td>
...
Maximum repeats
You are able to regulate the maximum amount of repeats available to the user. You can do this by adding amf:repeat-max="5" to a repeat attibute (where 5 stands for the number of copies you will allow the template to have).
<table amf:repeat="other_articles" amf:repeat-max="5">
  <tr>
    <td><h3><span amf:textline="Other_articles">Other Articles</span></h3></td>
  </tr>
  <tr>
    <td><p><span amf:textbox="article_info">Article blurb</span></p></td>
  </tr>
  <tr>
    <td><a href="http://example.com/" amf:link="artricle_link" linklabel="other_article_link">Link to article</a></td>
  </tr>
</table>
Alternate
Using an Alternate allows you to provide different options to the specified region; this allows for multiple content layouts, of which the best can be chosen for any given campaign. These alternate layouts are created by using an amf:option attribute. You must have at least two options for an alternate to work within the editor.

Note: Should there be a link or image that is also an alternate, it must be an 'amf:link' or 'amf:image' tag—otherwise, the tag will not be created.
amf:option attributes require unique names, whilst the amf:alternate requires the same name for each option so they are grouped together.
In this example, the alternate (signatory) has two unique options (1_signatory and 2_signatory).
...
 <table amf:container="signatory" amf:alternate amf:option="1_signatory">
    <tr>
        <td><p>Please print name: <span amf:textline="first_signatory">FULL NAME</span></p></td>
    </tr>
</table>
<table amf:container="signatory" amf:alternate amf:option="2_signatory">
    <tr>
        <td><p>Please print names:</p></td>
    </tr>
    <tr>
        <td><p><span amf:textline="signatory_1">FULL NAME</span></p></td>
        <td><p><span amf:textline="signatory_2">FULL NAME</span></p></td>
    </tr>
    <tr>
        <td><p><span amf:textline="signatory_3">FULL NAME</span></p></td>
        <td><p><span amf:textline="signatory_4">FULL NAME</span></p></td>
    </tr>
</table>
...
amf:alternate can also be used in conjunction with the amf:repeat tool so that a whole region of options can be copied.
Alternate with Repeat
...
<table amf:container="signatory" amf:alternate amf:option="1_signatory" amf:repeat>
    <tr>
        <td><p>Please print name: <span amf:textline="first_signatory">FULL NAME</span></p></td>
    </tr>
</table>
<table amf:container="signatory" amf:alternate amf:option="2_signatory" amf:repeat>
    <tr>
        <td><p>Please print names:</p></td>
    </tr>
    <tr>
        <td><p><span amf:textline="signatory_1">FULL NAME</span></p></td>
        <td><p><span amf:textline="signatory_2">FULL NAME</span></p></td>
    </tr>
    <tr>
        <td><p><span amf:textline="signatory_3">FULL NAME</span></p></td>
        <td><p><span amf:textline="signatory_4">FULL NAME</span></p></td>
    </tr>
</table>
...
Note: Be sure to place an 'amf:repeat' with each alternate and give it the same repeat name as the alternate.
Nested Alternates
Alternates can also be nested.
The example below allows a one or two row table to be chosen, and then for an image or htmlbox to be chosen for each row.
...
<table amf:container="rows" amf:alternate amf:option="One Row">
    <tr amf:container="inner_rows" amf:alternate amf:option="Image">
        <td>
            <img src="http://placehold.it/350x150" amf:image="Image_Placeholder">
        </td>
    </tr>
    <tr amf:container="inner_rows" amf:alternate amf:option="HTMLBox">
        <td amf:htmlbox="HTML Box">
            Insert Text Here
        </td>
    </tr>
</table>
<table amf:container="rows" amf:alternate amf:option="Two Rows">
    <tr amf:container="inner_rows_2" amf:alternate amf:option="Image">
        <td>
            <img src="http://placehold.it/350x150" amf:image="Image_Placeholder">
        </td>
    </tr>
    <tr amf:container="inner_rows_2" amf:alternate amf:option="HTMLBox">
        <td amf:htmlbox="HTML Box">
            Insert Text Here
        </td>
    </tr>
    <tr amf:container="inner_rows_3" amf:alternate amf:option="Image">
        <td>
            <img src="http://placehold.it/350x150" amf:image="Image_Placeholder">
        </td>
    </tr>
    <tr amf:container="inner_rows_3" amf:alternate amf:option="HTMLBox">
        <td amf:htmlbox="HTML Box">
            Insert Text Here
        </td>
    </tr>
</table>
...
Note: Nested alternates can also be made repeatable.
Repeating Content Across Alternates
If you give the attributes within your alternate container, then your content will populate across all alternate options. This can be useful if you wish to choose between different styles of content, such as the type of header as shown here:
...
  <tr amf:alternate="alt_1" amf:option="Header 1">
    <td amf:textline="headerexample">New Section Header</td>
  </tr>
  <tr amf:alternate="alt_1" amf:option="Header 2">
    <td amf:textline="headerexample">New Section Header</td>
  </tr>
...
Background Colour
You can allow the user to choose the background colour of an attribute by using amf:bgcolor.
The colours can be restricted by providing hexadecimal or RGBA colour codes, that are space delimited. The value "transparent" is also acceptable, useful should you have global style sheets and tag class switching attributes.
...
  <td amf:textbox="tipsbox" amf:bgcolor="transparent #FFFF00 #FF0000 #0033cc">Top Tips Title</td>
...
Background Image
You can let the user add a background image to an attribute.
...
  <td amf:textline="banner_title" amf:bgimage="someimage.png">Banner Title text</td>
...
It is possible to add amf:background to a template, should you require safeguarding against rendering issues in certain email clients.
Switchable Style Sheets
You are able to create multiple style sheets so that users can change the styles of their campaigns. This is done by using <style type="text/css" amf:style="style_name"> for each separate style sheet.
...
<head>
        <title>Global Styles</title>
        <style type="text/css" amf:style="style-1" amf:inline>
                body { font-family:Verdana }
        h1 , h2, h3 { color:red }
        </style>

        <style type="text/css" amf:style="style-2" amf:inline>
                body { font family:Garamond }
        h1, h2, h3 { color:blue }
        </style>
</head>
...
Class Switching
By adding classes to the CSS and then stating them in a tag using amf:class="" (with the default set under the normal class=" ") a user will be able to choose between more granular style options.
For example:
...
    <style type="text/css" amf:style="style-2">
        body { font family:Garamond }
        h1, h2, h3 { color:blue }
         .area_1 {
            background-color: yellow;
        }
        .area_2 {
            background-color: green;
        }
        .area_3 {
            background-color: black;
            color: white;
        }
    </style>
...
And then placed on a tag:
...
<table amf:container="header" class="area_1" amf:class="area_1 area_2 area_3">
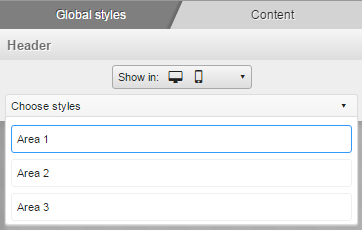
...The user will then be able to decide between the 3 stated classes on the tag, with the default being what is set under class=" ", in this instance "area_1".
Naming Classes
To improve the usability of the classes for the end-user you can also name classes. This may help to provide more relatable class names to end-users, while maintaining code integrity.
To name a class you need to use -amf-class-label:' '.
For example:
...
.area-1 {
-amf-class-label:'Oxford'
background-color: yellow;
}
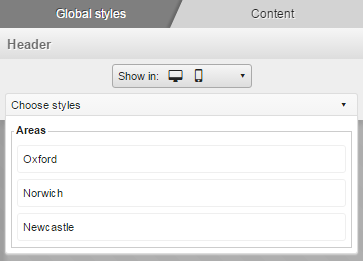
...Grouping Classes
It is possible to group classes too, with the different format of: .{group name}--{option name}; allowing you to better specify style modifications for the user.
By applying the naming example above as well, you can create a named group of classes that is easily identifiable in both the code and to the end-user. And to attribute to a tag, you can set the amf:class denominating the .group name block and prefixing '@'.
For example:
...
    <style type="text/css" amf:style="style-2" amf:inline>
        body { font family:Garamond }
        h1, h2, h3 { color:blue }
        .areas {
            -amf-class-label:'Areas';
        }
         .areas--area-1 {
            -amf-class-label:'Oxford';
            background-color: yellow;
        }
        .areas--area-2 {
            -amf-class-label:'Norwich';
            background-color: green;
        }
        .areas--area-3 {
            -amf-class-label:'Newcastle';
            background-color: black;
            color: white;
        }
    </style>
...
And on the tag:
...
    <table amf:container="header" class="areas--area-1" amf:class="@areas">
...
Note: To specify a group name, it must use the same identifier but have no modifying elements, as shown in the code above.
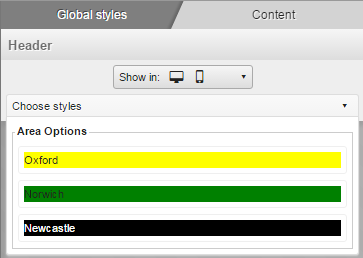
Previewing Class Styles
By providing a preview to the class, the end-user can see what style will be applied to their content.
To apply previews to the classes you need to use -amf-class-preview:, and by combining it with the grouping of classes above, you only need to specify it in one area.
For example:
...
    .areas {
        -amf-class-label:'Areas';
        -amf-class-preview: background-color color;
    }
    .areas--area-1 {
        -amf-class-label:'Oxford';
        background-color: yellow;
    }
    .areas--area-2 {
        -amf-class-label:'Norwich';
           background-color: green;
    }
    .areas--area-3 {
        -amf-class-label:'Newcastle';
           background-color: black;
        color: white;
    }
...
Note: The -amf-class-label can also be applied to individual classes, though there are exceptions.
Customising Preview
You can customise your preview, to make it easier for users to navigate the class styles.
To do this, use parentheses () around the attribute, prefixed with -amf-class-preview:. This will override the CSS for the preview only.
E.G. To force an overall custom preview, with specific class customisations too:
...
    .areas {
        -amf-class-label:'Areas';
        -amf-class-preview: background-color color border(1px solid white);
    }
    .areas--area-1 {
        -amf-class-label:'Oxford';
        background-color: yellow;
        -amf-class-preview: text-align(center);
    }
    .areas--area-2 {
        -amf-class-label:'Norwich';
           background-color: green;
        -amf-class-preview: text-align(right);
    }
    .areas--area-3 {
        -amf-class-label:'Newcastle';
           background-color: black;
        color: white;
        -amf-class-preview: border(1px dotted blue);
    }
...
FAQ
Can I order any restricted colours for the colour picker?
Yes! The order in which you code your colours is the order in which they will appear.
Are there any restrictions to what class styles can be previewed?
There are some restrictions applied, this is the list of styles which cannot be previewed by the Editor: width max-width min-width height max-height min-height line-height overflow overflow-x overflow-y display position top right bottom left