Using Email Editor Templates - Containers
The Email Editor is a content creation tool that uses robust and scalable modular templates.
Each section of your template is divided into:
-
Containers - structural blocks that allow you to define the overall layout of your email, e.g. two-column layout.
-
Regions - content blocks that allow you to tailor the look of the email content, e.g. image and text position.
Select a container to view the editable attributes in the side panel and begin structuring your email.
Tip: Adestra can provide you with a base template with several presets loaded to get you started with your mailings.
Note: you may find parts of your campaign that you cannot edit, this will be because they don't use an amf: attribute. This will be a choice made when creating the template.
You will need to contact the designer of the template in use to change these settings.
Structuring your email
On the compose step:
-
press the create HTML content button.
Tip: this button may not be displayed when opening an existing campaign. Instead, you may need to open your HTML draft.
-
Press the select template button.
-
Select a template from the list and press the okay button.
-
Press the email editor button to open the editor window.
You can use the template as loaded or modify the layout by:
Note: when making changes to your campaign message, ensure there have been no updates to the original template, otherwise, your changes will be lost.
Tip: when you edit a template, you may save your changes as a new template using the save as button (if enabled).
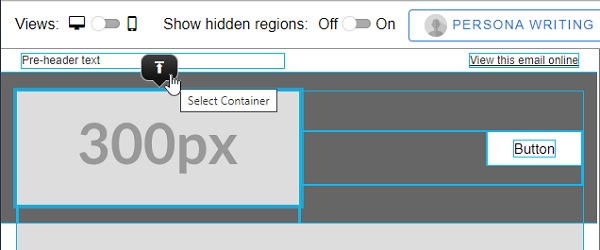
To select a container, select an empty space in the template. The selected area will be highlighted.
Tip: if you select a content block instead of a container, you can move to the container level using the up icon that displays above the selected block.

Nested containers
Some containers and content blocks are nested, i.e. they sit within another container. This is typically the case when you have grouped content blocks, e.g. an image plus a text block. When selecting a nested item, you can:
-
Choose to only display one of the grouped blocks by selecting it from the toolbar, e.g. only include an image for that container.
-
Edit the style options, e.g. button alignment, in the right-hand panel.
-
Choose if the container appears on desktop and mobile screens in the right-hand panel.
-
Move to the container that holds the nested container by pressing the up icon.
Changing container layouts
Selecting a container reveals the container tool bar. This tool bar displays available presets for the selected container, e.g. single column, if multiple presets are available.
Note: depending on the template design, the options may be presented as a selection of buttons or a dropdown list.
Select from the list of available container layouts to change your layout.
Each container may have a different layout, e.g. a two column design for your first container followed by a single column container.
Note: the options within the list will depend on your selected template options.
Adding or removing containers
To add a container:
-
Select the container you wish to add a container below.
-
In the container tool bar, press the plus icon.
A duplicate of the selected container will be added to the template.
To remove a container:
-
Select the container you wish to remove.
-
In the container tool bar, press the trashcan icon.
Note: you can only remove a container if you have more than one container in the body of the email.
Templates are designed with a maximum number of repeats set. If you think you require more, please talk to the designer of your template to discuss this.
Choosing container location and visibility
To change the order of your containers:
-
Select the container you wish to move.
-
In the container tool bar, use the drag icon to move the container above or below other containers.
If your email contains items that won't display as you intend on a mobile device, you may want to exclude it from mobile versions of the email.
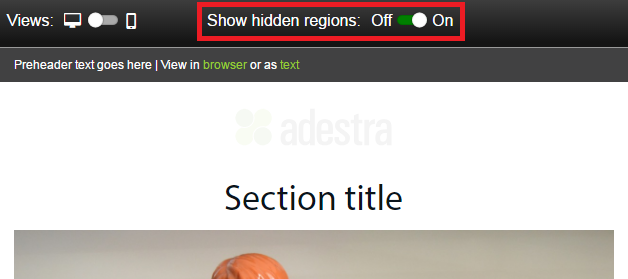
Tip: you can switch your view using the device toggle to see how your campaign content appears for both desktop and mobile devices. The functionality is the same, no matter which view you decide to edit on.
To see what regions you have hidden, use the hidden regions toggle (hidden regions will be faded).

To choose when an item displays:
-
Select the container you wish to hide.
-
Expand the 'show in' menu in the right-hand panel.
-
Uncheck the screen types you want to exclude, e.g. you may want to only have the box for large screens checked for a large image.
Tip: you can also hide individual content blocks.
Editing container styling
To edit container styles:
-
Select the container to edit.
-
In the right-hand panel menu, use the dropdown menu to select style options, e.g. add or remove padding for the container.
Changing container backgrounds
Some containers allow you to set a background image or change the background colour.
If there is no paintbrush or image icon in the right-hand panel, you cannot change the background of this container.
To change a container's background colour:
-
Select the container to edit.
-
In the right-hand panel menu, press the paintbrush button to open the color picker window.
-
Either:
-
Select a colour from the chart.
-
Enter the hex code for your desired colour, e.g. #FF0000 for red.
-
Enter the HSL/RGB values for your desired colour.
Tip: recently used colours are displayed below the hex code field for easy access.
-
-
Press the select button to save your changes and update the colour in the template.
To change a container's background image:
-
Select the container to edit.
-
In the right-hand panel menu, press the image button.
-
Select an image for your background using the file manager.