Preference Centres
Preference centres are a type of form that allow your contacts to modify their subscription preferences, which can help you send more targeted and relevant emails. They are primarily used to allow contacts to subscribe to and unsubscribe from mailing lists, however there are numerous ways preference centres can be utilised, and a single form can achieve multiple purposes.
On this page:
Example Use
A preference centre could contain an 'Update details' section, and a section for contacts to manage their subscriptions.
This means you can make sure all of the contact information you have is correct and up-to-date, as well as an opportunity to be sure of which mailings your contacts do and don’t want to receive, reducing the risk of unsubscribes or complaints.
Using the Form Builder
The Form Builder makes creating preference centres an easy process, by building up the form using different elements, and applying actions according to what you want it to achieve. For a preference centre, this is most likely to be adding or removing contacts from lists and unsub lists.
When linked to from within a campaign, and a contact clicks through to the form, it will be prefilled with their details from the core table associated with the form, and relevant data tables. This can be useful for example, for an 'Update details' form, allowing contacts to see what information is already held with you.
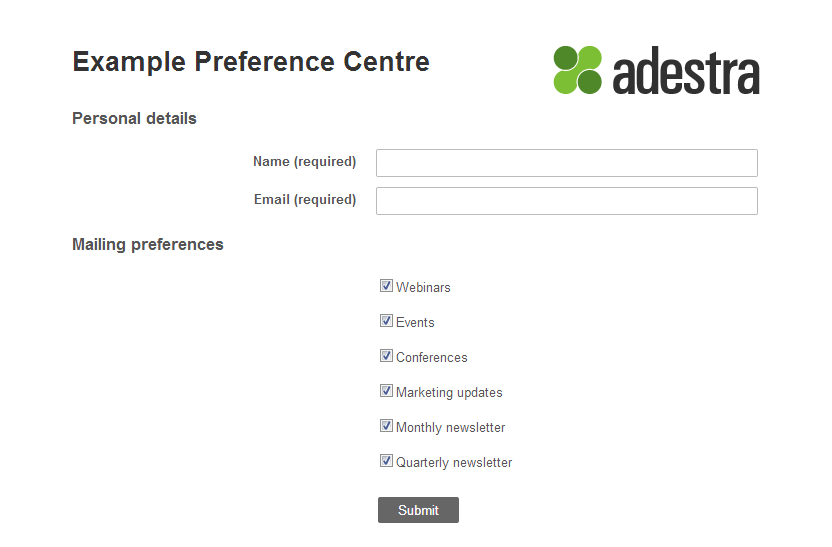
This section is an example of a sign-up form. It requires the new contact to enter personal details, and then to select which mailings they would be interested in. This is a step-by-step guide that describes how to set up an example of a preference centre. It will cover creating the form, then building up the elements and adding actions.
Create a Form
The first step is to create a new form. The interface can be accessed from workspace level, via the 'Forms' tab in the page tab bar at the top of the page.
To begin creating a new form, click the 'Create Form' link. You will need to complete a number of required fields as well as having a number of optional fields. For a detailed explanation of the creation process, refer to the Form Creation topic.
Once the settings have been saved, you will be directed to the form overview, however you can edit these settings later if you need to.
At this stage, all the form will contain is the optional title and logo.
Update Details
The next step is to add to the form by adding elements. A form's elements are the fields that the user will see when they open your form. In this guide, we will only use the elements relevant to this example.
Subheadings
This example will start with the subheadings of the form. To create a subheading element, click on the link in the 'Static Elements' section.
A subheading element requires an identifying label and the subheading text, which will be displayed on the form. This example will use a subheading for the personal details and mailing preferences sections of the form.
Once all of the elements have been saved they will be listed in the element list in the form 'Overview' tab.
You can see the progress of the form using the 'Preview' tab.
Information fields
The next step is to add information fields for the personal details section. This example will use a text box and email field element.
To create a text box element, click on the link.
This element requires association with a table element, and an identifying label. As a sign-up form, this example will also apply validation to each element, so that each field requires a value from new contacts. When the form is submitted, this information will then be fed back into Adestra.
The email element will be automatically associated with the email field in the associated core table.
Once the elements have been saved they will be listed in the 'Overview' tab, where they will need to be rearranged to the order that they will appear on the form.
You can see the progress of the form using the 'Preview' tab.
List Subscription Checkboxes
Giving your contacts control over what they receive from you helps makes sure what you are sending is relevant to them, which can help you maintain active and engaged lists. Providing a list of options not only gives your contacts a choice of what they want to sign up to, it can also make them aware of other mailings they could potentially be receiving.
The next step is to add checkbox options. When checked, we want each option to add the new contact to the relevant list.
To create a list checkbox, click on the link. This element requires a list to be selected, so if the checkbox is selected when the user submits the form, they will be added to the list.
Once the elements have been saved, they will be listed in the 'Overview' tab.
Now all of the elements have been added, you can see how the final form will look using the 'Preview' tab.
Unsub Lists
It is possible that when a contact updates their email preferences, they may be signing up to a list they had previously unsubscribed from, in which case in order for them to now receive mailings they will need to be removed from any unsub lists they may have previously been on.
If this is something you want to include in your preference centre, it is possible to add an action to the checkbox, to remove contacts from an unsub list simultaneously.
To do this, click on the relevant checkbox label from the list in the 'Overview', and you will be able to select the 'Actions' tab. The 'Remove from unsub' action will remove the contact from the selected unsub list when the option is checked in the form.
Now, if the contact selects the checkbox, when they submit the form they will be added to the selected list and removed from the selected unsub list.
Send A Campaign
When the contact clicks the 'Submit' button, the form will be submitted and they will be directed to a thank you page. In this example there is also a Send Campaign action, which has been applied at form level, so that when they submit, the contact will receive a welcome campaign. This can be a good way to introduce new contacts to their subscription, and to help set their expectations for future mailings from you.
In order for this to work, you will need to have the campaign you wish to automatically send set up and it will need to have been published.
To add the action to the form, click the 'Actions' tab which you can access from the form overview page, then select the 'Send campaign' link in the Add Actions list. This action requires you to choose the relevant campaign, which you can do using the 'Select Campaign' button.
Once the action has been set up, when the contact submits the form, they will be sent the selected campaign automatically.
Note: For more information on form templates and our custom production service, contact your customer success manager.
FAQ
Can a preference centre be prefilled with a contact's existing mailing preferences?
Yes, when linked to in a campaign using a form link, a form will be a prefilled form containing the contact's details from the core table associated with the form and relevant data tables.
However, if you want to create a preference centre for example on your website for new contacts, you can link to it using the form URL, and it will essentially be a blank form to be completed, unless it contains any default values.