The Manage Contacts menu in the top right of your relationship map enables you to:
- Import Contacts: add existing Salesforce contacts to the map.
- Create New Contact: Add someone to the map who doesn't already have a Salesforce contact record, creating that record at the same time.
- Assign to Division: assign multiple contacts to a division of the relevant account. This option is only available in Altify Account Manager and when you are viewing the account view of the relationship map (see Viewing Division Contacts), and divisions are created for the relevant account.
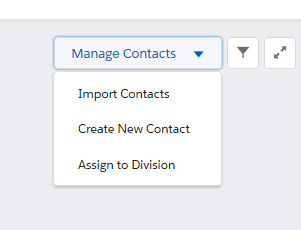
When you select Manage Contacts > Import Contacts, the Import Contacts window opens. On the Search tab, you can search for and select the contacts you want to add to the map.
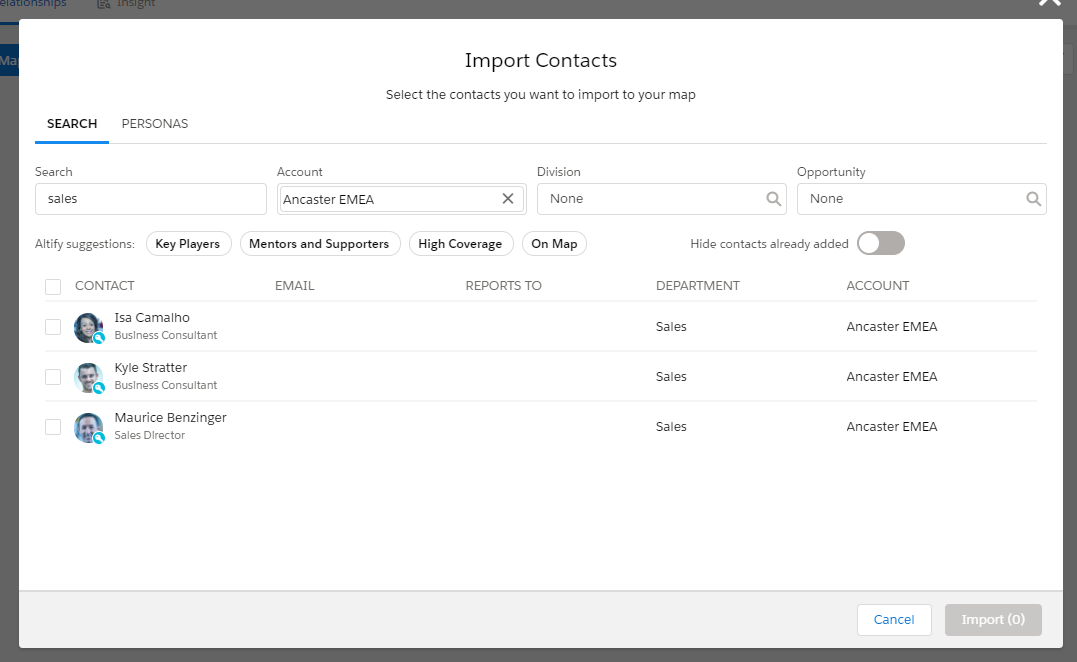
The toggle Hide contacts already added allows you to tidy up your search results by hiding contacts who already appear on your map.
The search options can be used individually or in combination:
- Search - name, title, or email
- Account
- Opportunity
-
When an account is selected, you can view the contacts in a specific division belonging to the account.
- Altify Suggestions
- Key Players on the map of the selected account or opportunity.
- Mentors and Supporters on the map of the selected account or opportunity.
- Contacts with High Coverage (high level of contact with your company) on the map of the selected account or opportunity.
- All contacts on the map of the selected account (On Map). If an account is selected, this pill narrows your search to contacts who have been added to the account map and excludes all other contacts who are associated with the account.
The contacts matching the characters you type in the field are listed.
If you're working on an account relationship map, the account the map belongs to is specified automatically.
If you're working on an opportunity relationship map, the account the opportunity belongs to is specified automatically.
You can change the account selection if necessary. When no account is specified, the search is conducted across all accounts.
Tip: Key players are not necessarily associated with the customer account so make sure to import any external customer consultants and partners who have influence.
When you specify an opportunity, the contacts on its relationship map are listed.
This search option can be removed from the Import Contacts dialog by an administrator.
You can use the filter 'pills' to refine your search of contacts:
A maximum of 50 matching contacts are listed. If your search returns more than 50 contacts, you may need to refine your search further.
Note: If you are working in Altify Account Manager and you are currently viewing a specific division in the relationship map, imported contacts are automatically assigned to the relevant division.
A contact can be assigned a persona. Common personas include CEO and COO.
This gives you a way of quickly finding contacts with the types of roles that are important to include on your relationship map.
When you select Manage Contacts > Import Contacts, the Import Contacts dialog's Personas tab enables you to search for contacts by persona.
Select the persona you're interested in to get a list of contacts who have that persona. In this example, the Biz Finance persona is selected, and you can see that two contacts have that persona.
You can select one or more of these matching contacts to select them for inclusion on your map.
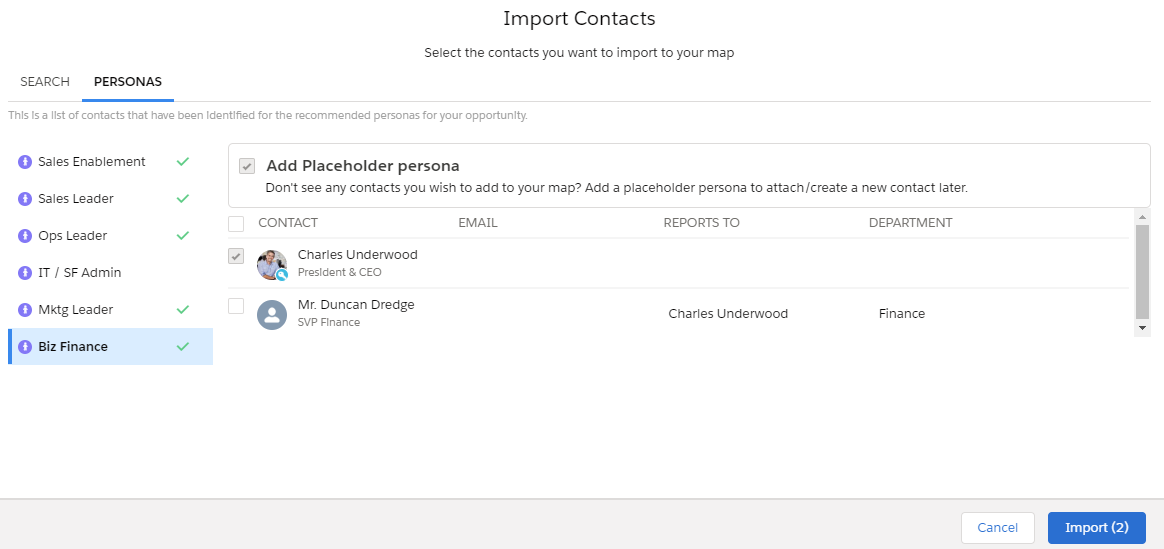
Note: Altify comes with several personas already set up, but your company can have its own specific set of personas, as is the case in the example shown here.
If you can't find the right contact for a persona that you know is important to include on your map, you can add a placeholder persona card to the map. You can easily replace this later when you know who the right contact is.
With the persona selected on the left, select the Add Placeholder Persona checkbox.
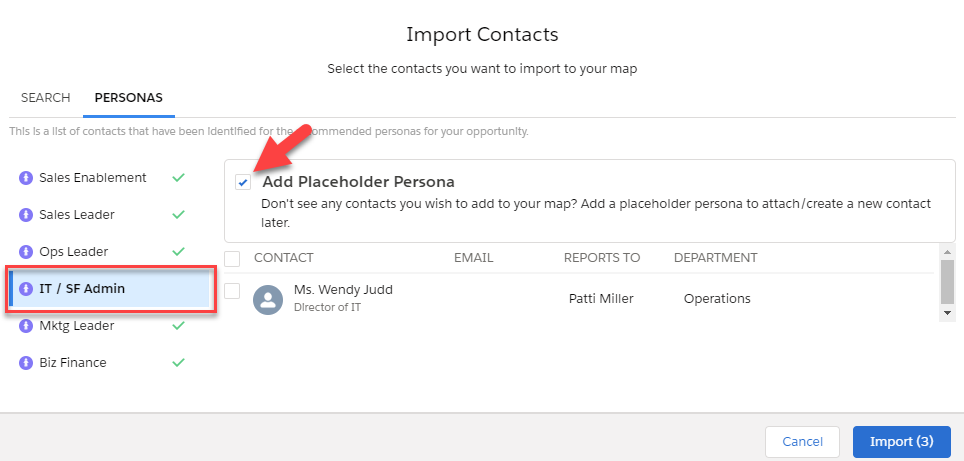
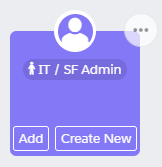
The placeholder persona card is purple to distinguish it from the contacts on the map. It has two buttons: Add and Create New.
- Add is a quick way to replace the card with an existing contact.
- Create New is a quick way to replace the card with a contact who doesn't already exist in Salesforce, creating their Salesforce record at the same time.
To add or remove the persona of a contact who already exists on your map, see Panel heading.
When you select Manage Contacts > Create New Contact, a dialog opens where you specify the basic details of the new contact.
When you click Save, their Salesforce contact record is created, and a card is added to the map for them.
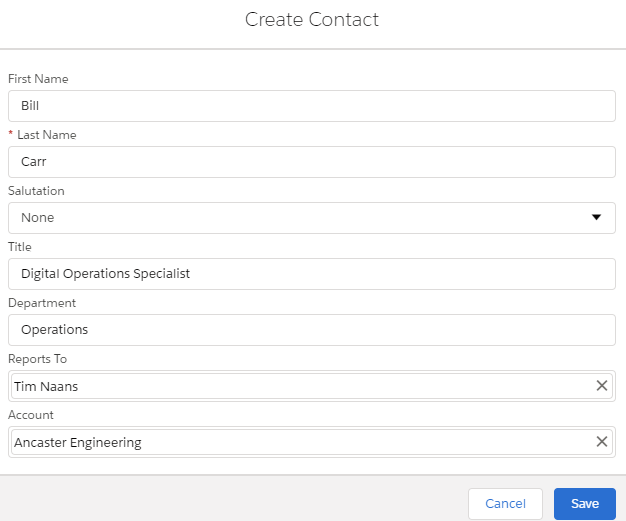
Note: If you are working in Altify Account Manager and you are currently viewing a specific division in the relationship map, newly created contacts are automatically assigned to the relevant division.
If divisions are created for your account, you can view contacts associated with a particular division, or all contacts who are added to the map (see Viewing Division Contacts).
When you are viewing the account view of the map, you can assign multiple contacts to a division. To do this, select Manage Contacts > Assign to Division: a dialog opens where you can assign contacts to the selected division.
You cannot select contacts who are already assigned to the currently selected division. Click the toggle Hide contacts already assigned to hide those grayed out contacts.
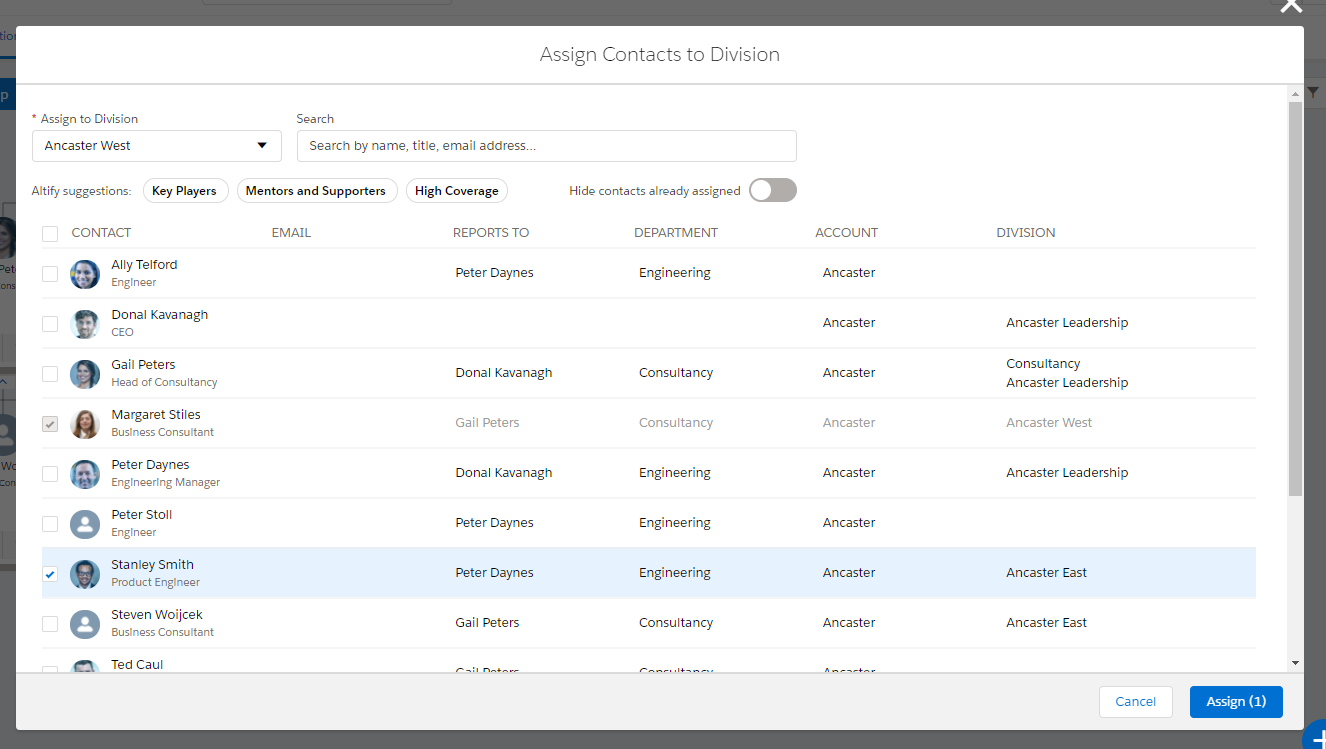
When you click Assign, the contacts you selected are added to the division view of the relationship map.