When you click a contact card on a relationship map, the contact information panel opens on the right.
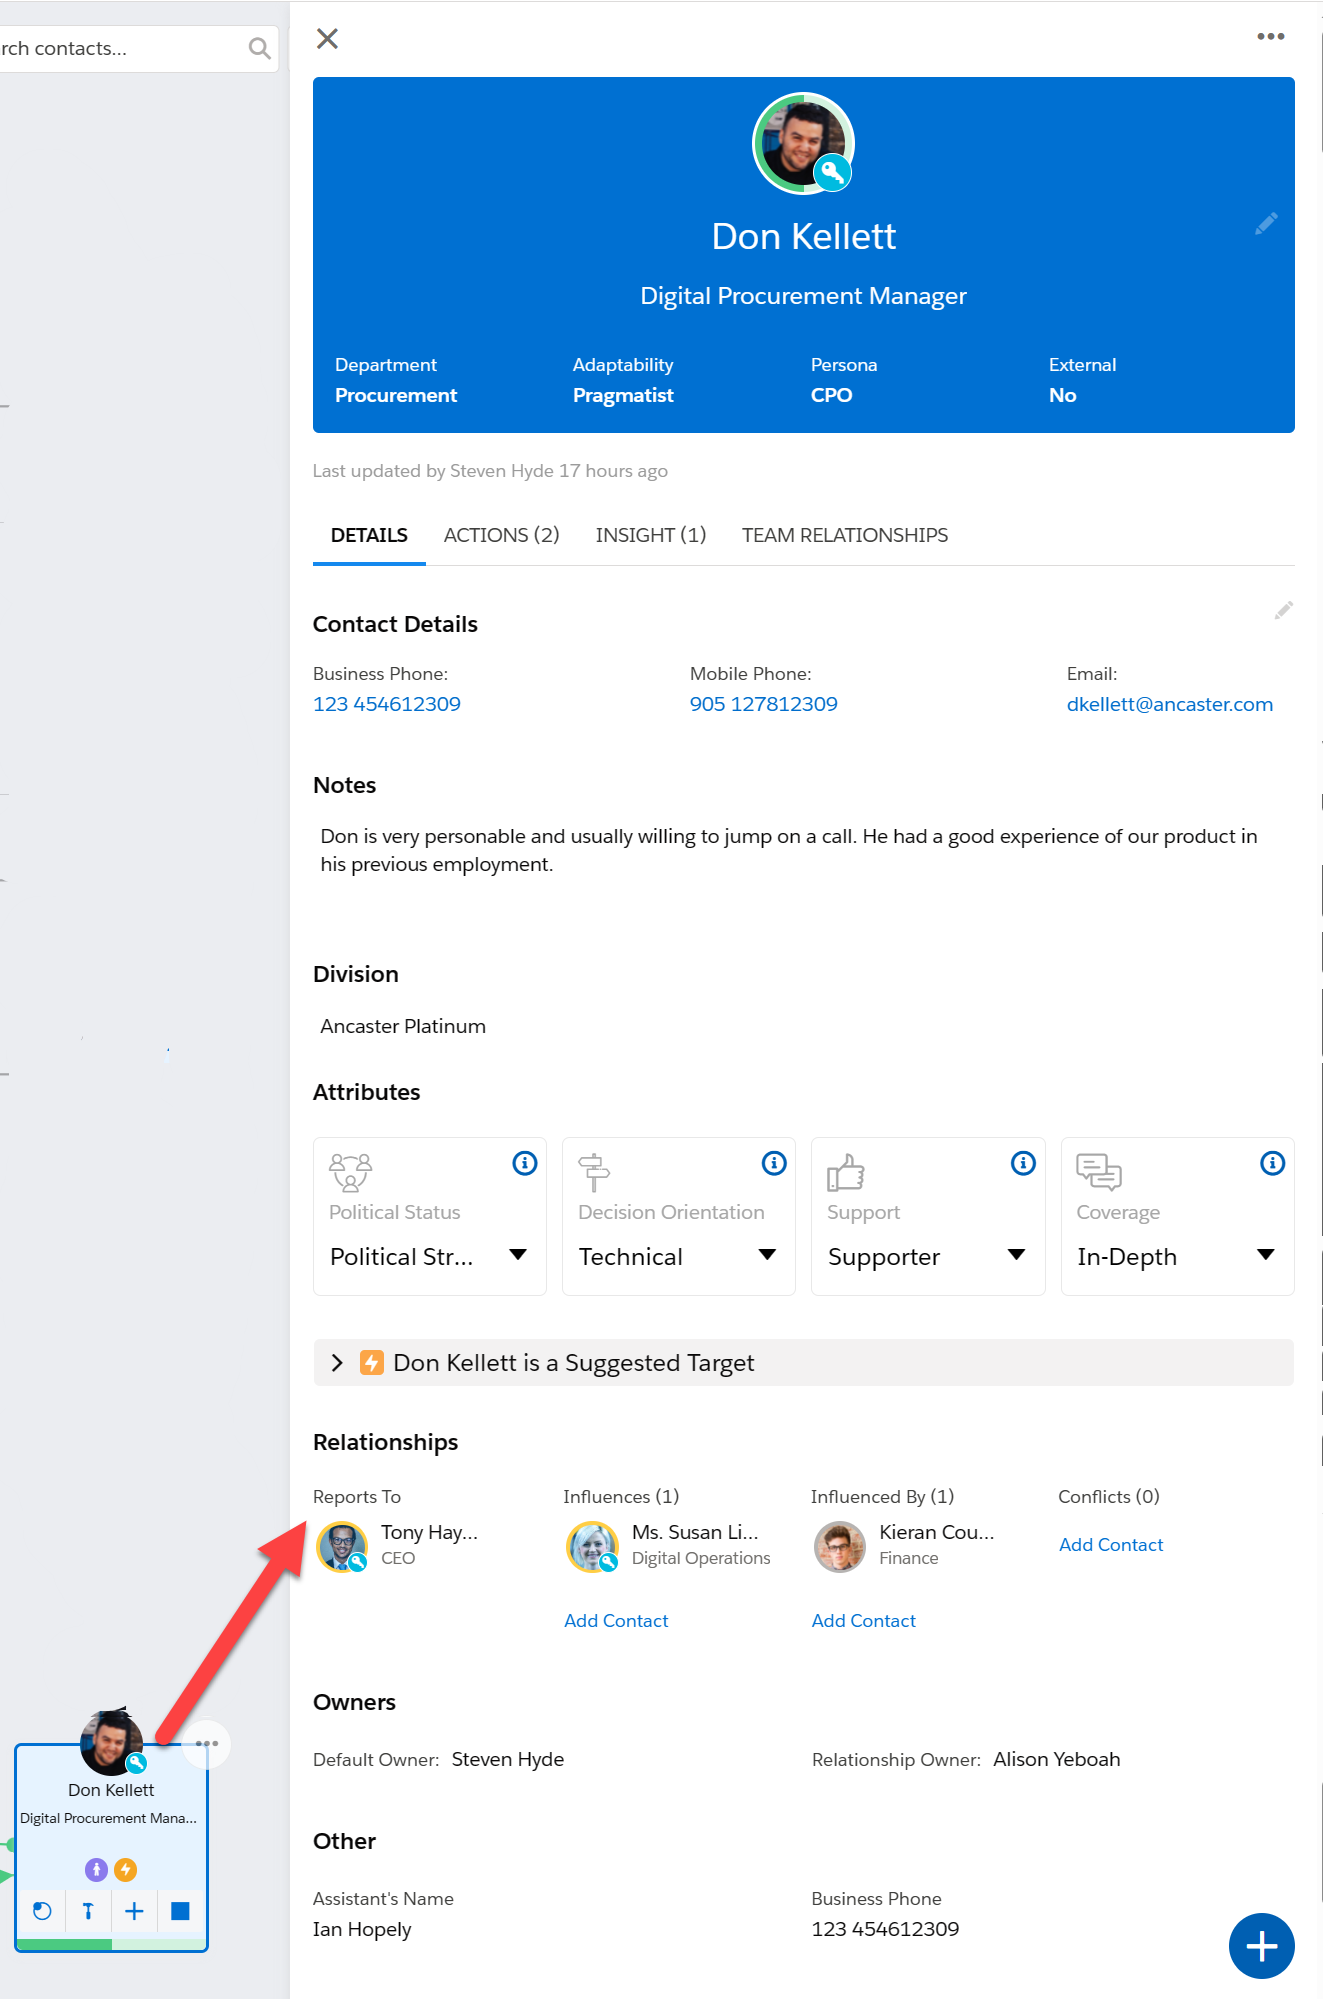
The information panel gives you the contact's full relationship details, and provides a link to their contact record in Salesforce.
An additional tab, Decision Criteria, is not shown in the above image and is only displayed in Opportunity Manager.
The Division area is only displayed in Altify Account Manager.
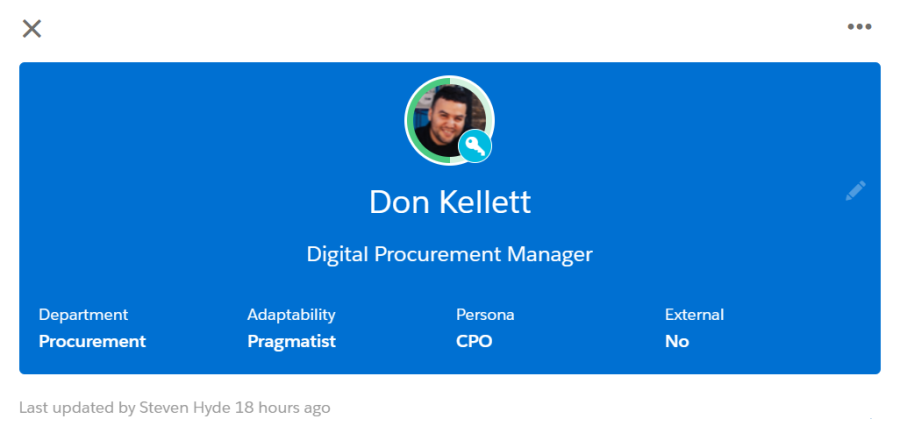
The blue section at the top of the panel includes primary information about the contact (name, title, etc.).
All the information in the heading – apart from the 'Last updated' information – can be edited inline. Click on the relevant detail to do this (in the case of the contact's name, click the pencil icon on the right to edit).
If your administrator has integrated relationship maps with LinkedIn or Twitter, you see icons in the top right that give you access to the relevant accounts - for more information, see Integration with Social Media.
The heading information is common to all relationship maps where the contact appears, so if you update them on your current map, the changes will be reflected on all maps that include the contact. The exception is the External value, which is explained below.
External
This value indicates whether the contact belongs to the account directly associated with the map. (Set it to 'Yes' if the contact belongs to another account).
If you update this detail on a particular relationship map, the change is reflected on every relationship map that includes the contact and is associated with the same account. This can include the account relationship map and all related opportunity relationship maps. However, the value can be different on maps related to other accounts.
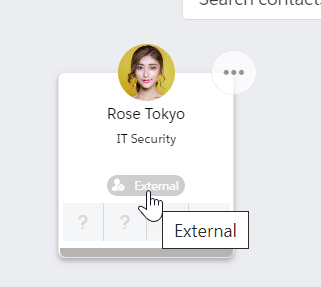
When a contact is external, they are flagged as follows on the relationship map:
Adaptability
The following adaptability options are available.
| Laggard |
A person who will only buy when there are no other alternatives. They are risk-averse. They prefer to invest in a product only when it is ubiquitous in the market. |
| Conservative |
A person who wants ‘plug and play’ solutions; does not like lengthy implementations in either cost or time. |
| Pragmatist |
A person who tends to be in-charge of mission-critical-systems; generally relies on incumbent for upgrades and fix the broken system. |
| Visionary |
A person who is looking for a competitive advantage; will ask supplier to make changes to standard offering to give customer a competitive advantage. |
| Innovator |
A person that loves to be the first to try new ideas and solutions. They are not afraid to be disruptive or make changes in something established. They may be willing to sign up for beta programs. |
Persona
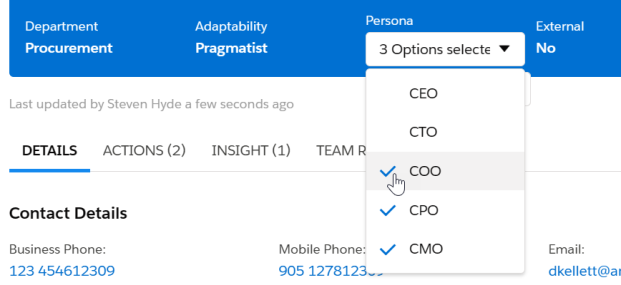
Personas are roles that are useful to include in your relationship map, such as CEO or COO. You can assign multiple personas to a contact, as shown in the example below:
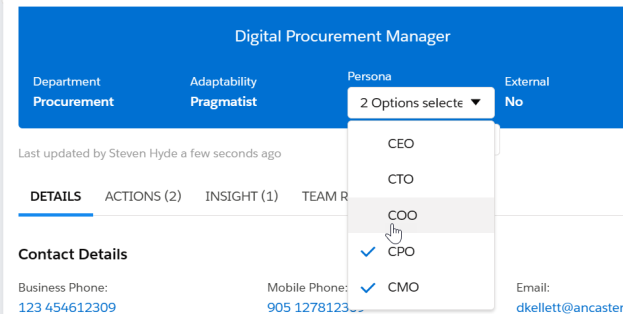
To deselect a persona, expand the drop-down menu and click the relevant option so that it becomes unchecked - as shown in the example below.
You can also search by persona when adding contacts to your map, and add person placeholders until such time as you identify the relevant contact - as explained here: Searching by Persona.
'Last updated' data
Directly under the blue panel, you can see when this contact was last updated and by whom. This value is updated when data in the heading panel, Details tab (apart from Quicklinks, Division, Suggested Target and custom-added fields in the Others section), or Team Relationships tab is changed.
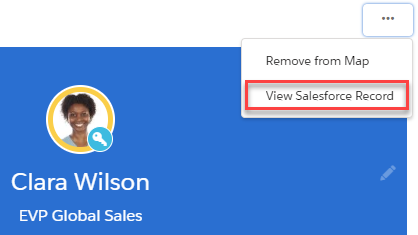
If you need to view or edit contact details that aren't shown on the relationship map, you can open the contact's Salesforce record by selecting the View Salesforce Record option in the top right of the information panel.
Don't worry about losing your working context – the contact record opens in a new browser tab.
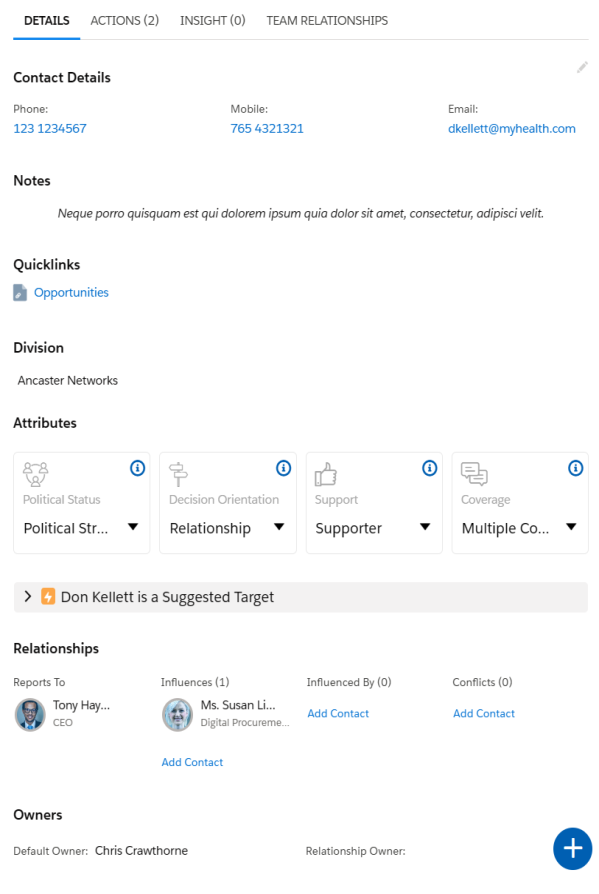
The Details tab shows the contact's key relationship details.
Contact Details
The contact's phone and mobile numbers, and email address. This information is automatically pulled from the Salesforce Contact record.
To edit the contact details, click the pencil icon to the right of the three fields.
If any of the fields are mandatory on your org's Salesforce Contact records, the same will apply here.
Notes area
Here you can add research notes about the contact. You can include links to other information.
Quicklinks
This area contains links to useful resources. These links are created by your organization and can include custom pages that reference data associated with the currently selected contact. For more information, talk to your administrator.
Division [Altify Account Manager only]
The Division area allows you to assign the contact to one or more divisions of the buying structure. Once assigned, the contact becomes visible in the relevant view (or views) of the relationship map (see Viewing Division Contacts). The drop-down menu also allows you to remove the contact from an assigned division.
Attributes
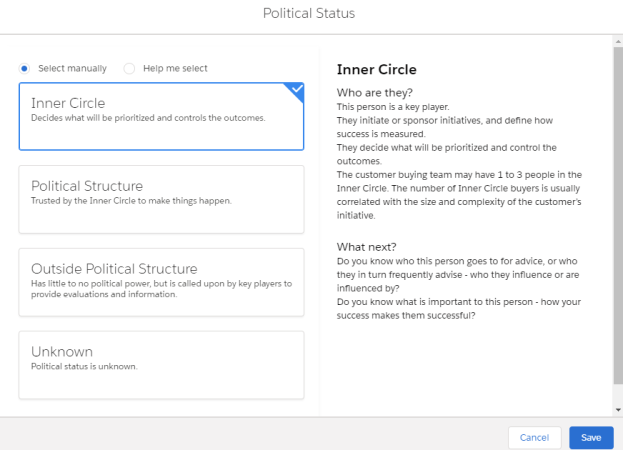
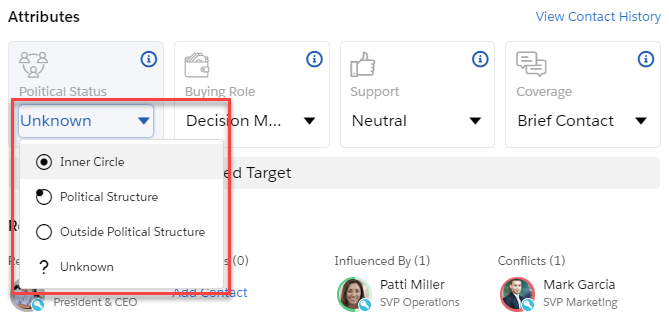
The Attributes area gives you two ways to set the contact's relationship attributes for this map.
If you're new to relationship maps, you may prefer this to setting relationship attributes directly on contact cards.
-
Use the drop-down menu to select an option.
-
Click the tile to get guidance from the software on what option to choose.
You can review full definitions of each available option. Or, if you want even more guidance, use the Help me select radio button. You're then guided through a series of questions about that contact that will give you the software's assessment of the most appropriate option.
View Contact History
The View Contact History link gives you relationship details about the contact from other relationship maps related to the same account (this can include the account relationship map itself and opportunity relationship maps related to that account).
Suggested Target
The software automatically identifies contacts that the sellers need to move the needle with. If the contact currently selected on the map is one of those, they're flagged as a suggested target, and you get coaching in the information panel on how to elevate your relationship with them.
If a contact is a suggested target, an orange icon is shown on their contact card in the map.
Relationships section
The Relationships section summarizes the reports-to, influence, and conflict relationships the contact has on the map.
You can add or remove relationships from this location.
-
Click Add Contact to add a relationship of the relevant type.
-
Hover over a relationship and click the trashcan icon that is displayed to remove a relationship.

Owners
This section shows you the owner specified in the Salesforce contact record – the "default owner".
You can also click Relationship Owner to specify the user who owns the relationship with this contact (in the context of this particular account or opportunity).

Other
Your administrator can configure relationship maps so that additional fields are shown in the Other section.
So if there are contact details that are particularly important to your company's relationship map users, the administrator can add them to this section.
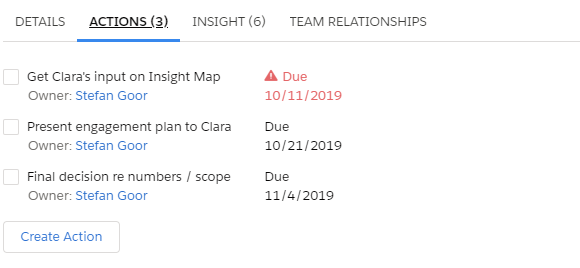
The Actions tab shows the actions assigned to you that are associated with this contact, if any.
Overdue actions are shown at the top of the list.
To mark an action as complete, click the accompanying check box.
A Create Action button is a quick way of creating a new action associated with the contact.
Tip: Actions should be created for all key players on your map (including enemies) in order to develop and maintain relationships and minimize the impact of non-supporters.
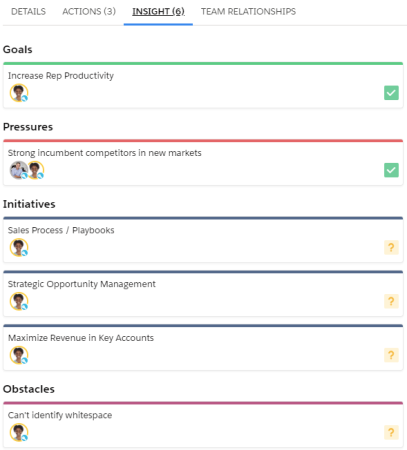
The Insight tab shows the insights on this account or opportunity’s insight map that are associated with the contact.
Click an insight to see its details in a pop-up window.
Note: In Altify Account Manager, the insights displayed on the Insight tab reflect the context in which you are viewing the Relationship Map. If you are viewing the relationship map for the 'Sales' division, for example, you will only see insights from the 'Sales' insight map.
Each contact on the relationship map is important to the work you're doing to build, expand, and elevate relationships at the customer business.
You want to elevate your relationship with each contact to the right level. Altify defines four levels.
Vendor is the lowest level, and indicates that the contact recognizes that you're a supplier of solutions that may be relevant to their business.
Trusted Advisor is the highest level, and indicates that you have a close working relationship with the contact where they trust you to give them expert and honest advice on the solutions that would be best for them.
You and members of your revenue team won't necessarily want to attain the highest level with every contact. What you need is a way to visually represent your current level of relationship with each contact on the map, and the level you want to attain with them.
The Team Relationships tab gives you a way to do this.
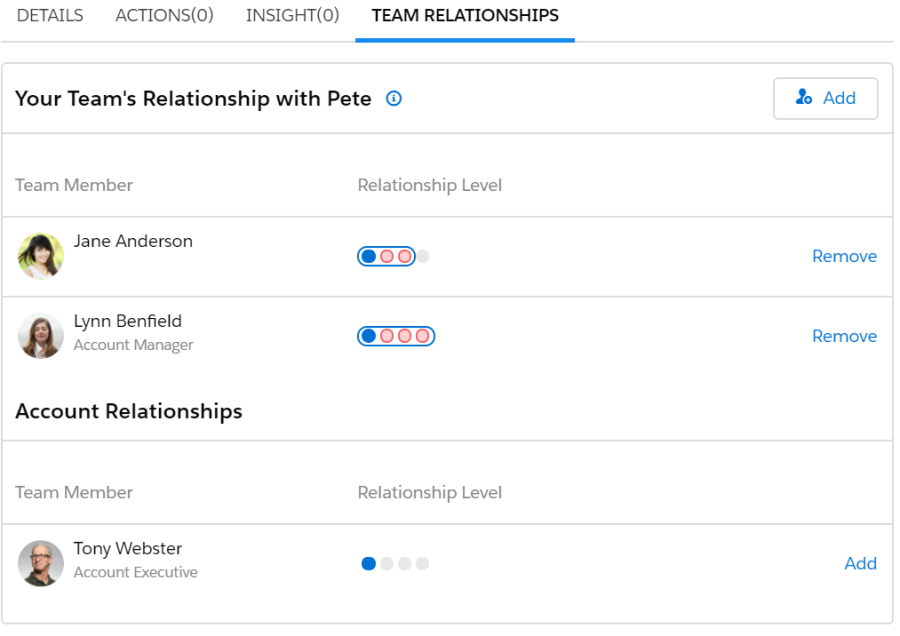
In the example below, Lynn Benfield and Jane Anderson – two members of the revenue team – have current and desired levels of relationship with Pete Morant.
The blue circle represents the current level of relationship.
And the highest red circle represents the desired level of relationship.
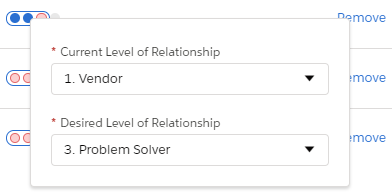
So in the example below, Jane Anderson is considered a Vendor by Pete, and she needs to elevate that relationship to Problem Solver.
To update the current and desired level of relationship of any team member with Pete. click the indicator beside their name.
This opens the dialog where these levels can be set.
To add another team member to the Team Relationships list, click Add User and select them.
Note: Changes you make on the Team Relationships tab apply to all other relationship maps where the contact appears.
In the Account Relationships section, the software also helps you to track people who might need to elevate their level of relationship with Pete, or who might be a source of useful information about the contact. In this example, the software has a record that Tony Webster already had a relationship with Pete Morant which you may wish to leverage. You can add him to the Team Relationships list by clicking Add or setting a Desired Level of Relationship for him.
Note: The Account Relationships section lists all users who are removed from the Team Relationships section. The Desired Level of Relationship is automatically set to 'None' when you remove a user from the Team Relationships list.
The Decision Criteria tab shows the criteria that are important to the contact when they are making their buying decision.
Note: This tab is only displayed in Opportunity Manager. Decision criteria functionality can be disabled by an administrator.
The icon indicated below means that the criterion is mandatory, i.e. the deal cannot progress if the criterion is not met by your organization’s solution.
Add a decision criterion for the contact by entering a new criterion or selecting a criterion that is already created for the opportunity. If you create a new criterion, you must set it to Formal or Informal. Formal decision criteria are tangible, objective and measurable, e.g. 24/7 support. Informal decision criteria are intangible and subjective, e.g. user-friendly.
To remove a decision criterion from a contact, simply click the relevant unlink icon ![]() , as highlighted in the example below.
, as highlighted in the example below.
To edit a decision criterion and, for example, link it to more contacts or mark it as mandatory, click the name of the criterion. The Edit Decision Criteria dialog is displayed, where you can edit the criterion as follows:
- Rename the criterion or set it to Mandatory.
-
Enter a Milestone for the criterion, or associate it with a Milestone that has already been created on the opportunity. Milestones are stages in the customer's buying process for the current opportunity. By doing this, you are indicating that the criterion needs to be met at a particular stage, such as an initial RFI.
Milestones are specific to an opportunity and are limited to 80 characters.
- Under Competitors, record how well your organization’s solution, and your competitors’ solutions, fit the decision criterion.
- Under Contacts, add or remove contacts for whom the criterion is of importance. When you are adding a contact, the system automatically suggests contacts who are on the relationship map for the associated account.
-
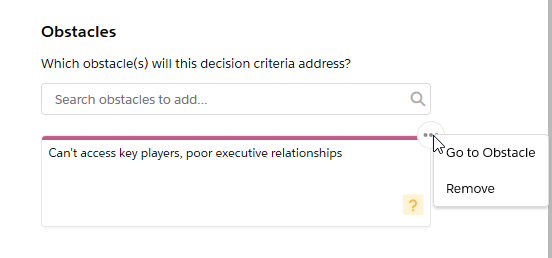
The Obstacles section allows you to link a decision criterion with an obstacle from the opportunity's insight map. In this way you can map how challenges faced by the customer directly impact upon their buying decision. Click the ellipsis icon in the upper right-hand corner of an obstacle card, as shown below, to remove it from the decision criterion or go the insight map.
Click the Save button to close the dialog and return to the Decision Criteria tab.
To view and edit the criterion on the Assessment tab, click the Navigate to Assessment icon - as shown below.

The Assessment tab allows you to view the criterion in the context of a ranked list of all formal/informal decision criteria that are created on the opportunity.
Note: Editing a decision criterion on the Assessment tab includes the additional abilities to delete the criterion or change it to formal/informal.
For more information on viewing, creating and editing decision criteria on the Assessment tab, see Assessing Decision Criteria.
