Removing Contacts from the Relationship Map
Removing a contact simply removes them from your relationship map. Their Salesforce Contact record is unaffected and the contact can be readded to your map at any time.
This topic covers the following:
Remove a single contact
You can remove an individual contact by selecting the Remove from Map option in the following locations:
-
via the power menu
 on the contact's card - as shown below:
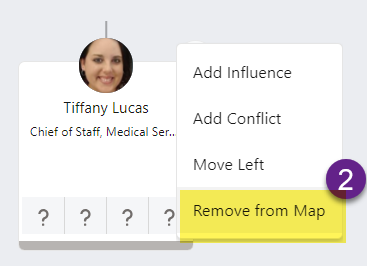
-
via the options menu
in the header of the contact's information panel - as shown below.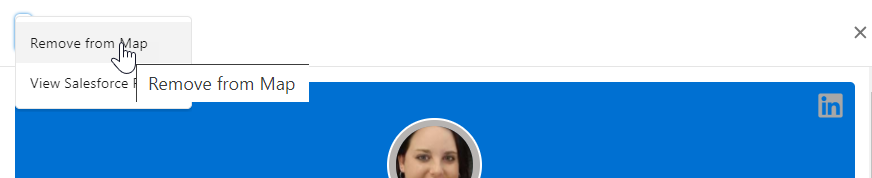
-
via the options menu
on the relationship map list view - as highlighted below.

When you remove a contact in any of these ways, you can simultaneously remove all contacts who report to the contact you are removing by selecting the option Remove all the contacts that report to this contact (as highlighted in the example below).
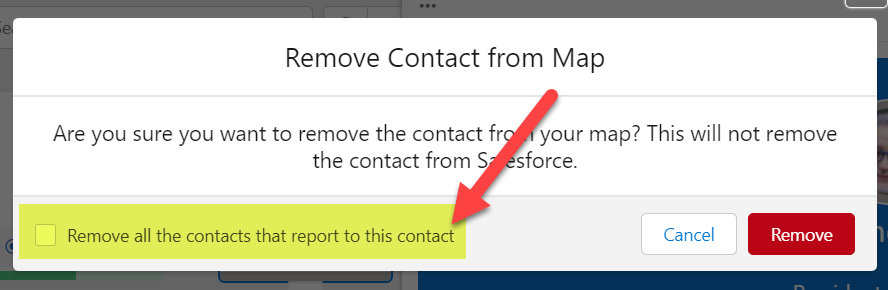
Note: This setting only applies to the layer of contacts immediately below the contact you are removing.
To remove an individual contacts from the division view of an account relationship map, see Removing a Contact from a Division View.
Remove multiple contacts
To remove multiple contacts from a map, do the following (this option also accommodates the removal of specific contacts):
-
Click the Manage Contacts button and select the Remove tab on the Manage Contacts panel.
Note: If you are removing contacts from the division view of an account relationship (and wish the contacts to remain visible at the account level), you should ensure that the relevant division is selected before proceeding.
-
On the Remove Contacts dialog, all the contacts on the map are listed. You can find the contacts you want to remove by using the search box or by scrolling down.
-
Select any contacts that you want to remove.
-
Click Remove.
When contacts are removed in this manner, any contacts who report to them remain on the relationship map.