Create the Content Source
A Content source determines the data that can be retrieved using an SQL connection.
For this reason, you must configure your SQL connection before you add a content source.
This section explains the configurations that are available when you perform one of the following:
- Create a connection to a new content source
- Edit an existing content source.
The content repository connection information is available within the Content Info tab on the SQL Content page.
Other tabs on the SQL Content page let you refine some of this information.
When you set up your content source, there are multiple components, displayed as pages, to configure:
- Content Source
- Item Enumeration
- Item Definition
- Security Mappings
- Dataset Mappings
- Advanced Settings
Set Up the Content Source
Use the following steps to set up the SQL content source:
- Open BA Insight Connectivity Hub.
- Select Content Sources from the top menu.
- Click New -> SQL content.
- The SQL Content Page appears.
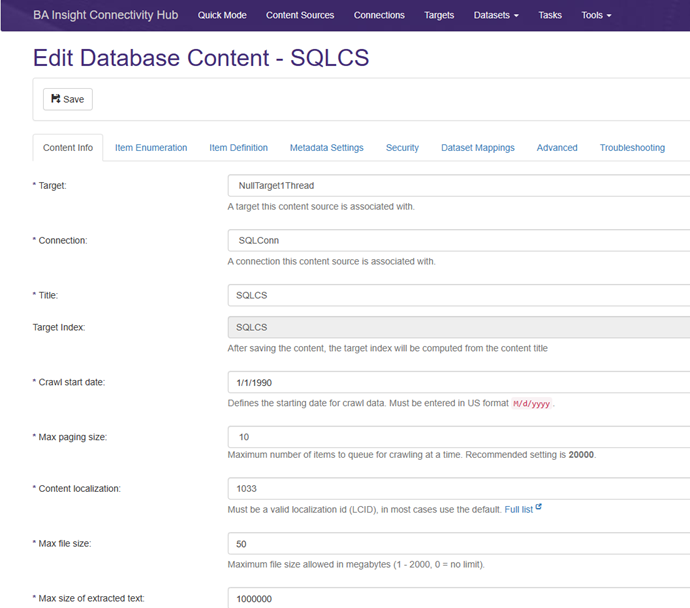
- Target:
- Required
- Select your desired target form the drop-down menu.
- Connection:
- Required
- Select an SQL Connection, such as SQL Server Connector.
- All configured SQL connections are available.
- Title:
- Required.
- Enter a title for this content source.
- Crawl Start Date:
- Required
- Leave the default entry 1/1/1990 or enter another date for the using the format MM/DD/YYYY
- This is the earliest date for items that are returned by the crawl operation.
-
Max Paging Size
-
Required
-
Select the page size to be used during item enumeration.
-
While indexing, SharePoint processes each page of items before requesting the next page.
Note: Max Paging Size and Crawl Start Point only function when the
SPW_LASTUPDATEorSPW_LASTUPDATEUTCcolumn is used in the item enumeration query.
For more information, see the topic "Specify the Item Enumeration." -
- Content Localization
- Required
- This value identifies the locale of the content for SharePoint.
- Leave the default setting 1033 (English) or see the link on the page for other options.
- Property Prefix:
- A prefix for the metadata property titles.
- Default is “ESC_”
- Click Save now or when you have made all of your changes to the information in all of the accessible tabs on this page.
Specify the Item Enumeration
Use the Item Enumeration page to specify all of the content to be indexed.
To specify the Item Enumerator settings, follow these steps:
- Click Item Enumeration on the SQL Content page and the Item Enumerator page appears.
- Item Enumerator SQL
- Required
- Specify a unique identifier for all of the items that are crawled in this content source.
- These items should be returned in ascending order based on the updated date of the item (when possible.)
- The expected columns to be returned are:
Table 1: Enumerator Return Columns
Identifier
Description
SPW_ID(Required) This is the unique identifier for the item.
SPW_SUBID(Optional) This is used if a two-part identifier is necessary.
Typically, this identifier is only used for versioning.
SPW_LASTUPDATEorSPW_LASTUPDATEUTC(Optional) This column provides the date and/or time that the item was last modified on.
Specify
SPW_LASTUPDATEif the date is in the local time to the SharePoint indexing server.Specify
SPW_LASTUPDATEUTCif the date is already in UTC time.
Table 2: The Unique Identifiers
Identifier
Description
File Extension
Optional
The file extension might be returned in the enumeration, although any name can be used for this column.
Connectivity Hub uses this extension when determining whether the item should be passed to the index (which is determined by the allowed extension rules in your target.)
To support incremental crawls and pagination during full crawls, include a
whereclause.This clause limits the results to the items that are modified after a passed-in date parameter.
This parameter is either
@SPW_ LASTUPDATEor@SPW_LASTUPDATEUTC.See the sample query that is provided below Item Enumerator SQL.
Note: Before you move to the next step, click Test and Load Metadata in order to populate the query columns in the Item Extension drop-down list.
- Item Extension:
- Optional, but helpful.
- This value identifies the item extension that is available to SharePoint during indexing.
- You can specify this extension by performing any of the following operations:
- Enter a static text value into the text box.
- Reference DS Columns with brackets:
- Select the column name from the drop-down list.
- This selection identifies the column from the item enumeration that specifies the extension for each record.
- When you perform this operation, you see the column name inside square brackets that appear in the text box.
- Click Advanced and use the text field to enter a VB Script that determines the extension for each item.
- Click Save now or when you have made all changes to the information in all of the accessible tabs on this page.
Specify the Item Definition
Click the Item Definition tab to specify the item information for the items that you choose to index.
This item information is the information to be included in the SharePoint index and available in the search results.
For more information on using VB script with your connection, use the Connectivity Hub Help on VB Scripts.
To specify the Item definition information, follow these steps:
- Click the Item Definition tab on the SQL content page.
- Item SQL:
- Enter the query that returns the data for each item.
- There are no required columns to return.
- However, the columns that are returned can be used in the remaining fields on this page to define the item, and in the metadata available to this content source.
- The following column names have special meaning; they are optional.
- The columns and their use are as follows:
Table 1: Optional Columns
Column
Description
SPW_DELFLAGThis column identifies whether the item should be removed from the index or not indexed.
A return value of
t: true,y: yes, or1marks the item as deleted.SPW_LASTUPDATEor
SPW_ LASTUPDATEUTCSets the modified date for the item in the SharePoint index.
You must also provide the item ID as a parameter. The following parameters are used:
Table 2: Item ID Parameters
Parameter
Description
@S_SPW_ID(string)
or@I_SPW_ID(integer)(Required)
The unique identifier for your record is passed to the query.
For this reason, only the data for the requested item is returned.
The value comes from the
SPW_IDcolumn in your item enumerator query.@S_SPW_SUBID(string)
or@I_SPW_SUBID(integer)(Optional)
In order to use this value, the item enumerator query must provide the
SPW_SUBID.Note: After you enter your statement, click Test and Load Metadata to validate your query and load the drop-down lists.
- Unstructured Data Options (required): Use the drop-down list to identify the data item for this record, such as a file or text data:
- Leave the default selection None and only metadata is used, or select:
Text: database columns are usedFile: network shares are usedFile: database columns are usedFile: zip files are created
- Use the text box to identify the network share location, or database column that contains your binary or text data.
Reference DS Columns with brackets:
Use the drop-down list to select a column.
The column selector is used to insert columns that are returned in the item definition query into the text box.
- Alternatively, click Advanced and enter a VB.NET script.
- Click Compile to validate and use the entered script.
- Using the Advanced script overrides any value set in the text box.
- Using the Advanced script overrides any value set in the text box.
- Leave the default selection None and only metadata is used, or select:
- Use the following steps for the following fields:
- Item URL (required)
- Item Title (required)
- Item Author
-
Use the text box to enter a string value for the property.
-
You can enter static strings and column values.
-
To reference columns values from the item definition SQL, enter the column name in square brackets ([]).
-
The drop-down list can also be used to select a column from the item definition SQL and to insert this column name into the text area.
-
Click Advanced and use the associated text area to write a VB script that assigns a value.
-
When you perform this operation, any string that you enter into the text box is ignored. See step 3.d: Note, above.
-
-
-
-
Click Save now or when you have made all of your changes to the information in all of the accessible tabs on this page.
Specify the Security Mappings
Use the Security page to determine what information is made available to the specified users and groups by the Connector.
To specify the Security Settings, follow these steps:
- Click Security on the SQL Content page.
-
If you leave Public Flag empty all information is made public to all of your users and groups.
-
You can also choose a column from the item definition query that will indicate whether the content is public.
-
The column should be a boolean value, true indicating public.
-
Use the following table to specify the parameters or return values identified in the following steps and use with grant and deny queries.
Identified
Description
@S_SPW_ID or @I_SPW_IDRequired. Input parameter that is used to identify the item.
@S_SPW_SUBID, @I_SpW_SUBIDOptional. Input Parameter (Optional), used as a secondary identifier for the item.
SPW_USERIDReturned Column, identifies users with access to the item.
SPW_GROUPIDReturned Column, identifies groups with access to the item.
-
- User Grant SQL:A SQL statement that returns the user IDs of users that have permission to access this item:
- Required Parameter: @S_SPW_ID (for string) or @I_SPW_ID (for integer)
- Optional Parameter: @S_SPW_SUBID (for string) or @I_SPW_SUBID (for integer)
- Required Columns: SPW_USERID
- User Deny SQL: A SQL statement that returns the user IDs of users that are specifically denied access to this item:
- Required Parameter: @S_SPW_ID (for string) or @I_SPW_ID (for integer)
- Optional Parameter: @S_SPW_SUBID (for string) or @I_SPW_SUBID (for integer)
- Required Columns: SPW_USERID
- Group Grant SQL: A SQL statement that returns the group IDs of groups or roles that have permission to access this item:
- Required Parameter: @S_SPW_ID (for string) or @I_SPW_ID (for integer)
- Optional Parameter: @S_SPW_SUBID (for string) or @I_SPW_SUBID (for integer)
- Required Columns: SPW_GROUPID
- Group Deny SQL. A SQL statement that returns the group IDs of groups or roles that are denied access to this item:
- Required Parameter: @S_SPW_ID (for string) or @I_SPW_ID (for integer)
- Optional Parameter: @S_SPW_SUBID (for string) or @I_SPW_SUBID (for integer)
- Required Columns: SPW_GROUPID
- Enter a VB.NET script into ACL Script to specify limitations on group and user access.
- To write VB.Net scripts, see the Connector Framework Help/Connectivity Hub help.
- To write VB.Net scripts, see the Connector Framework Help/Connectivity Hub help.
- Save now or when you have made all of your changes to the information in all of the accessible tabs on this page.
Specifying the Dataset Mappings
Dataset mappings map columns from this content source to dataset query parameters.
-
Details on how to create and use datasets can be found here.
-
You can find additional info in the Connectivity Hub Help.
-
To access the Dataset Mappings page, click Dataset Mappings on the SQL Content page and the Dataset Mappings page appears.
Configuring Advanced Settings
Advanced settings are optional.
For more information on how to use these settings, please contact BA Insight to work with a Solutions Consultant.
To specify advanced settings, use this information:
- Cache Database.
- If you have multiple connector cache databases configured, this drop-down determines which database is used for this content source.
- If you have multiple connector cache databases configured, this drop-down determines which database is used for this content source.
- Filter Script.
- VB script executed for each item while crawling.
- Return ‘
True’ to include the item in the index. - Return ‘
False’ to skip that item and not index it.
- Alternate Date Replace is used to specify the data type and format passed to the database for date parameters.
- Change Log Entry Format
- Specifies the format used for item identifiers when building the change during incremental crawls.
- The default value
‘[SPW_ID];#[SPW_SUBID]’treats each item as a unique, single item
- Additional Changes SQL
- Is a script that is similar to the enumeration query and will add items to the change log.
- Required to return the column
SPW_ID(andSPW_SUBIDwhen used) as the identifier for the items to be crawled. - Either
@SPW_ LASTUPDATEor@SPW_LASTUPDATEUTCis required for incremental updates.
- Metadata Generation SQL
- SQL statement used to override the default behavior when auto-generating metadata for this content source.
-
Required Columns:
SPW_PROPERTY,SPW_COLUMN,SPW_COLTYPE ('T' = text, 'N' = float, 'I' = integer, 'D' = date, 'B' = boolean) -
Optional Column:
SPW_DESC,SPW_SCRIPT,SPW_MULTIFLAG ('T','F'),SPW_MULTIINDEX
Access Existing Content
After you add new content, you can:
- Access information about this content
- Edit, add, and delete this information
To access existing content, follow these steps:
- In Connectivity Hub, click Content Sources.
- Click the following links under Actions:
- Clone: Create a clone of the selected Content Source.
- Test: For more information, see Running the Test Bench.
- Tasks: For more information, see Managing Tasks.
- Metadata: For more information, see Filter Your Metadata.